Showing posts with label home made. Show all posts

Sunday, 15 August 2021

Homemade wire string holder...

How to easily make a string holder from garden wire (other wire could be used) this has come in quite handy because you can hang it up in the shed or greenhouse, or on a fence or even from a tree branch which is what I did the other day when I was tying our tomato plants to their canes.

I'm pleased with it and it has become quite useful, and it's such an easy thing to make, hopefully the video is easy enough to follow, and you don't need any special tools, just a pair of pliers will do the job.

Have a look -


Thanks for visiting.

Monday, 1 March 2021

Homemade garden fork handle...

It's the time of year where my thoughts turn to all things gardening and so I start making plans and lists of jobs to be done.

Trouble is I broke the handle of the only fork I have for use at home, I have a couple down the allotment, probably should get another for home use (how many forks is too many?) I broke the handle whilst trying to dig up some very old rose bushes that someone in our local area had put on a freecycle type website, in the end I got eight very large (rooted) rose bushes, which are now in the garden in various places, which is good, but it did leave me with a broken garden fork.

So off to the workshop to make a new handle, below is the video.


Thanks for visiting.


Monday, 4 July 2011

Allotment update & a homemade hose reel ... ...

Since we had our allotment, and actually got it into a sort of usable state we haven't visited it quite so frequently, I went down today to have a look at things, and as usual I was presented with a sea of green, although this isn't a good thing, most of the green is weeds, but as I found out last time it doesn't actually take that long to weed it (about 3 hours)

Here it is - 

A lovely shade of green though it is, most of it is weeds.

I know 3 hours is a long time, but I've found that it's 3 hours every 2 weeks or so, which isn't that bad, although today's trip was just to give it a water and check to see what I'd need to do, as well as the weed issues I have to clear a space at the top for a poly-tunnel, but I could most likely get this done on a Saturday morning and still have most of the day left for other things.

Having an allotment is a lot of work, especially with a garden like ours as well, but the rewards are more than worth it, food you've grown yourself tastes so much better, I'm sure part of that is down to the fact you grew it.
We got the allotment a little later than we would have liked and as such we had already planted our main crop in the gardens (front & back) but even so we planted loads of stuff at the allotment, and today I was presented with what I can only describe as monster radishes, well perhaps not monsters, but a lot bigger than I've seen in supermarkets.

Here's a few of the largest ones, already topped and tailed -

As you can see the largest is 4 inches long !
These were grown from a cheap packet of seeds from B&Q I think they were a grand total of 49 pence for a hundred or so, not bad really and I didn't really expect that much from them, so I was pleasantly surprised, and I picked enough radishes today to make up about 2 - 3 quids worth, that's if you bought them from our local supermarket, not bad from a 49p packet of seeds, and there's still a load to come, I'm thinking I might leave some to go to seed.

Just in case you missed it, here's the beast again -

I love gardening :-)


There's loads of other stuff growing, I noticed the courgette plants had a few baby courgettes on, which is good as my wife makes a great relish from them, which if you want the recipe you can find here (opens in new window)

Well enough about that, onto the hose reel, which if I'm honest was down to me not measuring the distance between our plot and the nearest tap :-( as it turns out it's about 50 metres, which means a fair length of hose, oddly enough about 50 metres ;-) and a little extra.

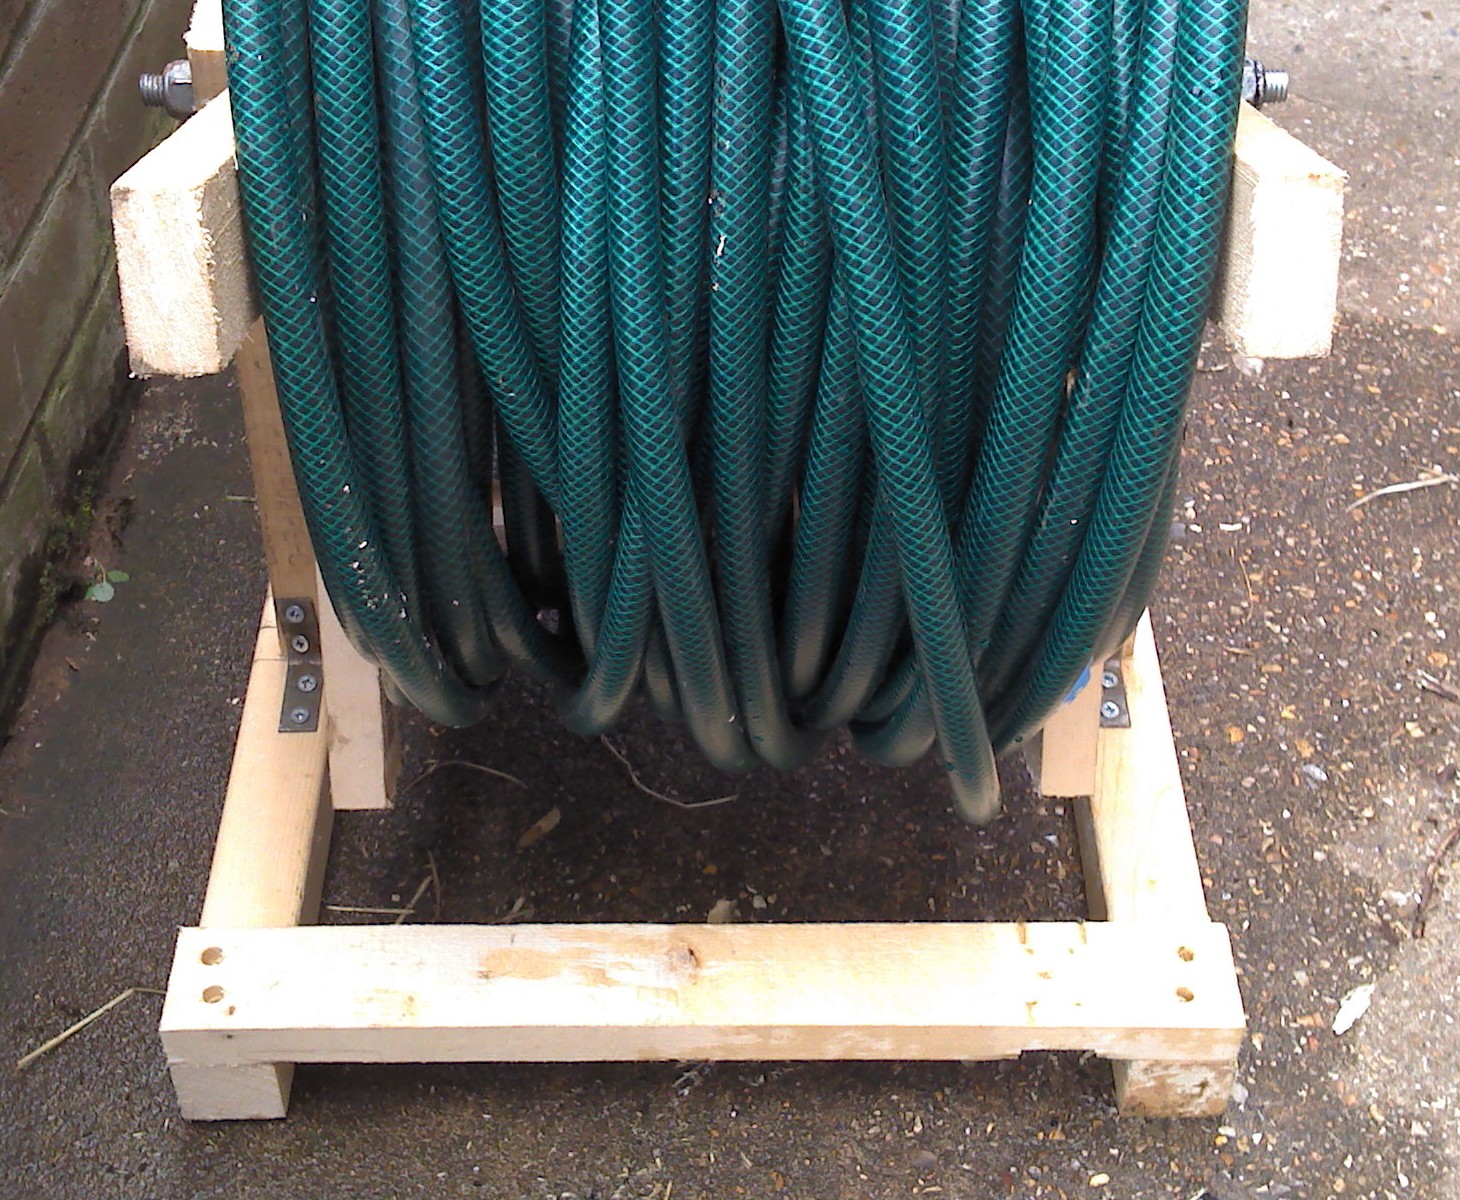
Keeping that much hose in some kind of order isn't easy without something to wrap it round, so I made a hose reel out of odd bits of wood and some other stuff I had lying about.

First I fixed some wood together in an x shape (I made 2 of them)

The wood was left over from another project.
To fix these together I found the centre of each piece and marked it, then I place the other bit of wood on and marked either side to get the right width.

Like this - 

Blurry picture, but you can see what I'm getting at.
Then what I did was chop out the wood between the 2 outer lines, I did this on all 4 bits of wood, this is so I could fit them together.

Chopped out section - 

This cut out needs to be half the thickness of the wood.
Side view so you can get an idea of the depth I chopped out - 

I wasn't trying to be accurate ;-) roughly halfway is okay.

You can then fit each piece of wood into each other and fix them together like this, you can use screws or nails.


Drilling pilot holes will stop the wood splitting.


Next I cut some lengths of wood to fix between each cross shaped piece, I made them long enough to allow for the amount of hose, then I fixed them with screws to make a rough reel that I could wrap the hose round.

Here it is - 
You can see where I fixed the parts to make the reel.
Now this was okay, but to be honest it was hard work wrapping the hose round this thing, and my lovely wife pointed out that it would be better if I could make it spin so that I could let the reel do the work, like the ones you can buy (I think they are about 20 quid or so) I sat and wondered how I might go about this.

After rooting about in the shed for bits and bobs I found some old steel tube and some threaded bar, this would do for the reel to turn on, I just needed to make a frame for it all.

And here it is -

It works very well, even if I do say so myself


Front view of the completed reel -

This piece stops each side from moving about on it's own
And there you have it, it cost next to nothing, and cleared a little space in my shed as well (extra space is always welcome) and solved the problem of how to keep the  massive length of hose in check, makes rolling it up a load easier as well.

Thanks for reading.


Thursday, 12 August 2010

Home made honeycomb... a blast from the past... ...

As a family we have been trying to save money in general and make use of things that you can find around and about. Like fruit that grows out in the wild, so to speak, this time it's blackberries, we managed to pick a kilo and a half the other day, and we saw a load of baby and adult common lizards, which was a bonus.

We have been looking at things you can make yourself, rather than buy, and as we are finding most of the time things you make yourself taste better and are better for you, and cheaper, which is always good.

My wife was looking for recipes that use blackberries and whilst she was looking she found a recipe for home made honeycomb, or cinder toffee as it's also known (in America ?) I remember eating loads of this stuff when I was a kid, it was one of my favourite sweets, still is if I'm honest.

I had to give it a go and make some myself, so I did, it was great fun :-) and easy to do.

What you will need -


  • 200grams of caster sugar.
  • golden syrup - you will need 4 tablespoons for this.
  • 3 teaspoons of bicarbonate of soda.
  • Some water in a tub,cup (all will be revealed)
  • A fairly deep sided baking tray.
  • Some grease proof paper, or you could just grease the baking tray really well.
  • A medium sized saucepan.
  • A wooden spoon, or similar stirring implement.
  • If you have one a sugar thermometer would be handy.
  • A tablespoon of water.
The method is pretty simple.

Put the 200grams of caster sugar,4 tablespoons of syrup and the 1 tablespoon of water into the saucepan.

Heat the saucepan until the contents start to melt, bring to the boil and make sure you keep stirring.
Then simmer on a low heat for about 10 - 15 minutes, now you need to keep an eye on the mixture to make sure it doesn't burn, this is where the sugar thermometer is handy, it should read about 138°C

Test the mixture by dropping a little into the tub of water, if it goes hard then it's ready for the next step.

Right this is where it gets fun, add the bicarbonate of soda, it helps if you weigh this out first and put it into a tub or something, the reaction is pretty quick and having to weigh stuff out while things are foaming all over the place isn't ideal.

The mixture will start to foam a lot, so the deeper the baking try the better really (or you could use less bicarbonate of soda) keep stirring and make sure it's all well mixed, you will need to be pretty quick as the mixture will be cooling, pour it into the baking try, don't worry if you get some on the work top, it comes off easily, but make sure you don't get any on yourself, hot sugar and skin don't mix, and it hurts.

Let it cool some where out of the way, it will take a while, which will give you time to tidy up. Once it's set hard just get it out of the try and break it into bits, you can store it in an air tight jar.

Here's a picture of how it looked - 

Blast from the past.

I'm pretty pleased with the way it turned out, seeing as it's the first time I've tried to make it, everyone seems to like it, and I tried some crushed on top of our home made blackberry ice cream, really nice.

Now here are some things I'm going to change when I make the next batch. Firstly the amount of bicarbonate of soda, I'm going to see if it still foams up enough with just two teaspoons, secondly I think I may have left it a little too long in the pan, so next time I'm going to check the mixture while it's cooking at regular intervals, and as soon as it goes hard when dropped into water I will mix the bicarb in, the other thing is that the tray I used wasn't quite deep enough, and a fair bit ended up on the work top, so a deeper tin is a good idea, and lastly, next time I make it I will do away with the grease proof paper and just grease the tray really well, the paper can be a bit of a pain to get off.

As for cleaning when you've finished, it's easy enough, just use some hot water and some washing up liquid, it's not hard to clean the saucepan or the work top, and it's worth it for a nice treat.

Thanks for reading.