Showing posts with label wood working. Show all posts

Tuesday, 10 December 2024

Simple wooden christmas tree decorations...

Simple to make wooden christmas tree decorations, these are made from scrap wood and don't require any special tools, they're easy for kids to make as well, and cats seem to approve as well.

These are a good use for some scrap bits of wood, and there are numerous ways you could make something similar to these, they can be painted or left plain and decorated with lights as we have, if you wanted something a bit more natural looking you could use sticks or small branches.

Here's the video - 


Thanks for visiting.

Sunday, 20 February 2022

Glass sphere / crystal ball stand...

My wife has a new glass sphere which she wanted for taking pictures through, it does come with a small glass holder, but she wanted something a little more sturdy so I made a stand for the sphere from a piece of oak.

The wood has some cracks in it, but I used CA glue to stabilise them and although a simple shape it works well, and looks good with the sphere sitting on it.


Here's the video -


Thanks for visiting.

Monday, 19 December 2016

Wooden star christmas decorations.

For a while my wife has wanted some wooden star Christmas decorations and to be honest I haven't managed to get around to making any until now, I always seem to be doing other things or time just seems to run out.

But I've finally managed it -

Very festive.

The lights on the right hand side one are brighter because I made that one last so the batteries are a bit fresher.

I did only mean to make one large star, but I ended up making two large stars, a small star and two small stars for the tree.

Rather than cut out a star shape from a sheet of wood I have made these stars in sections glued together, the three in the picture above also have lights in.

I spent a grand total of four pounds on lights for these, I bought the small sets of led lights you can get from pound shops rather than wire up a load of led's from scratch.

It would have only been three pounds but I forgot how to do maths and for some reason didn't realise that if you have five points and you want to put five lights in each point you're going to need twenty five lights, and not twenty, so I had to buy an extra set of lights.

First I made some templates of various sized star sections, and one complete star, which I didn't actually use, the idea being that I would draw round the templates onto some wood and then cut out the sections and stick them together.

Templates, just printed out and stuck onto card - 

You can find star templates online.

I decided to make a test star first, the main reason was because I wanted the grain of the wood to run in line with each point, rather than in the same direction over the entire star, this is why I made them in sections rather than cut them out of a sheet of ply or some other type of material.

Test star sections cut - 

They need to be sanded.

I cut each section out roughly using my bandsaw, but any type of saw will do and then I sanded each section to the pencil lines using my bench sander, you could just as easily use a block of wood and some sand paper to finish each section, it'll just take a bit longer.

Sanding each section to the pencil marks makes for a tighter fit with no gaps where the sections meet in the centre.

Once that was done I glued the sections together to see what the finished stars might look like.

Test star finished - 

Not bad.

Once I was happy with the test star and that I'd got the grain of the wood to run in the right directions it was time to make things a bit bigger, to make the larger stars I used some wood from an old pallet and in the end the large stars measure about 14 inches across, so they are quite big, I also used the off cuts to make the stars for the tree in the same way, just smaller.

Marking out the sections (using one of the templates I made) - 

Nice and easy.

Once you have five sections cut out and sanded all you need to do then is glue them together, I've used wood glue, but you could use epoxy or most other types of glue, the only difference really is the time you need to allow for the glue to set.

Test star, one large star and one tree star glued, ready for sanding - 

Nearly done.

To fit the lights all I've done is to mark out five points on each section of the star and drill a hole the same size as the led lights, in this case that was about 5mm and meant the led's were a snug fit in each hole.

Marking out where the lights will go - 

You can just make out the pencil marks.

A quick test - 

It works well I think.

As you can see I went for quite a uniform arrangement of lights, there's no reason you can't be more random, had I gone for a random arrangement I could have got away with just using twenty led's on each star.

Once I'd drilled all the holes I needed I sanded the pencil marks off each star and then gave each one a coat of clear wax to bring out the grain of the wood and then on was on to tidying the wires up a bit.


Now for some tidying up - 

Hot glue to the rescue.

Using a glue gun I stuck the wires to the wood to stop them moving about, I also stuck the battery packs to the wood as well, but in such a way that I can still get the covers off to change the batteries.

You can see in the picture above where I had to join the extra led lights, this was an easy job, all I did was cut of five lights and then join them to the other ones to make a string of twenty five.

Gluing done - 

Keeps the wires out of the way.

And that's about it really, there are numerous ways this could be done, I may end up making them into light boxes so that the wiring is hidden a little better, but as they are they look nice when lit up and we like them, and it goes with our tradition of making some kind of decoration for Christmas every year, I even used the test star and put some of the spare lights in that in a random pattern.

Waste not, want not - 

I'm actually quite pleased with them.

The small ones I made for the tree don't have lights, but there's no reason they couldn't have lights fitted, although you'd want to use smaller led's.

These I made in the same way as the light up stars, they're just smaller and I've used some natural fibre string to hang them on the tree with.

Tree star, I made two of these - 

These go well with our other homemade decorations.

And there you have it, a cheap and simple Christmas decoration, that could also be used in a kids room on a dressing table or chest of drawers as a year round decoration.

Merry Christmas - 


Merry Christmas and thanks for reading.


Friday, 3 June 2016

Bookmarks from a scrap bit of wood...

I have a lot of random bits of wood from various sources, left overs from jobs and projects, and also from keeping the garden in check, recently I cut a couple of fairly big branches off a Sycamore that over hangs our garden, most of which I used as poles for growing things up, I'm in the process of fan training some of our fruit trees, I had some left over and decided to make myself a book mark or two in much the same way as the one I made for my wife.

For a small Christmas present I made my wife this bookmark as she kept using random bits of paper, letters or anything thin enough to stick in a book so I figured she should have a proper one so I cut a slice of cherry root and made her one with an owl on the top.

This one -

Pretty simple, but it looks better than an old letter.

As it turns out I'm just as bad for using random things as bookmarks and I decided I should have a bookmark as well, so using a bit of the Sycamore branch I set about making some bookmarks, the first thing is slicing up the branch, this can be done with a hand saw as long as you're careful, a band saw would be better, but I don't have one so a hand saw it was.

I took the branch and clamped it in my vice and just cut down roughly in several places to create slices, the wood was still a bit wet and the centre piece started to split so I wrapped a load of tape round the end and left the wood to dry out (I left it about a week)

Branch sliced and wrapped - 

The cuts are straight (ish)

Split centre slice - 


Still got some usable bits.

After a week I cut the slices off the branch apart from the centre one they where okay and had no splits so it was on to making them a bit thinner.

Wood slices - 

Loads of bookmarks.

To thin out the slices I made a guide that I could clamp into my vice, it's basically a piece of wood with another piece attached to one end, but not flush so that it creates a crude height guide and stops the wood sliding off the wood, once I had my guide I started planing.

Planing (and some sanding) commences - 

Some nice green patterns in the wood.

Now I could have left it there, it would be fine as a bookmark, but i thought I'd add a bit extra to it like I did with the owl one, so I went with dragons.

To get the dragon design onto the wood I printed out something I liked and then on the other side of the paper I covered the design in pencil, once that was done I taped the piece of wood to the paper and using some embossing tools I went over the outline and transferred it to the wood.

Design printed out (this was one of two) - 

I liked it, but you can choose anything you like.

Back covered in pencil - 

Make sure it's all covered.

Wood taped on to stop it moving about - 

Taped down well.

Embossing tools at the ready -

Cheap to buy online, handy for all sorts of things.

To transfer the design is just a matter of going over the printed part, pencils will work fine for this, I use the embossing tools mainly for drawing on thin metal but with wood they tend to indent it which helps for the next step.

Transference complete - 

Time for burning.

Once I'd got the design transferred I got out my wood burning (pyrography) tool and set about going over the design, if you don't have a pyrography tool you could always try it the old fashioned way, ever heard of poker work ? 

It's what people used before pyrography tools were invented, basically as far back as the Egyptians (and probably further) people have heated up small tools and burnt designs into wood, a small nail would do, as long as you insulate the end you hold, you could try a soldering iron, or why not paint a design ?

Design burned in - 

I need a lot more practice.

And I could have left it there, but no I decided to partly cut out each design with my scroll saw, which could also be done by hand with a coping saw, you could probably carve them using a dremel type tool as well.

All cut out - 

Ready for bookmarking.

Better test one out to make sure it works - 

Road test results are in... it works.

And if you want something more simple you could cut out a basic shape and experiment with a bit of colour, but remember to seal the wood with wax or varnish otherwise the colour could leak onto the books pages.

An experiment in colour - 

Colourful.

Believe it or not I used printer ink from one of those refill kits you can buy cheaply, but wood dyes work just as well and felt tipped markers would probably give similar results once the ink has soaked into the wood.

I have used some tools that people may not have, but all you really need is a hand saw a wood plane and some sandpaper all of which can be bought for less than £10 and you can always prepare a load of wood slices and let the kids design their own bookmarks on a day when it's chucking it down with rain outside.

Thanks for reading.


Sunday, 14 December 2014

Wood threading kit...

For some time now I've looked at making threads in wood, and although I've found many solutions, I've not really been that sure I'd be able to replicate what I've seen, so to that end I decided to buy a ready made set, this one came from Axminster.co.uk it's a great kit...


Here it is -


Looks familiar ?

If you've ever done any type of metal work, specifically making threads and such like then this may look familiar, it is basically a tap and die set for wood, and works in pretty much the same way.

You make a hole in the wood, and using the tap you make the internal thread that the bolt part will bite into, it helps to oil the tap before hand, I used linseed oil.


Like so - 

Oiling the tap first makes a difference.

The cut internal thread (the nut if you will) - 


Not very clear, but you can make out the thread.
 

To make the bolt (external thread) you use the cutting box, using a bit of oil on the wood and leaving it for a few minutes makes a difference, you get a much cleaner thread.


The cutting box - 


You can just about see the cutting blade.

Wood ready for threading - 


I used some oil on it to make cutting smoother.

Thread cut - 

Nice and neat.


It's a good tool to have and I'm thinking of numerous things I can make with it, apart from the stuff I've already made that is, the parts I'm making in the pictures above are for something I've made for the kids Christmas stockings, but I can't tell you right now what they are as there are beady eyes everywhere.

One of the things I've made so far are nut crackers, I've made two so far, the first being a test using some scrap wood, but it turned out well, and it works, I had though the pine I used for the bowl part would crack under the pressure, but it's holding up well, the second one I made is a bit bigger, probably too big, but again it worked well.


The nutcrackers - 


Test piece made from scrap wood.

 And another, this is made in part from pallets - 


Despite it being a bit big I'm quite pleased with it.

After I made these I started to wonder what else I could make, and as it happens we were in need of a new tape dispenser (our old one broke) so I thought hey lets see if I can use the thread cutting kit and make a new tape dispenser, again it's made out of scrap bits of wood.


The tape dispenser - 


Slightly over engineered it has to be said.


I cut the basic shape out of some old shelves, the centre ring that holds the roll of tape is also made from old pine shelves, the nut that holds the ring is made from part of an old beech table leg (there's a reason it's not pine) I reused the tape cutter from the old dispenser, I was going to make a new one, but it was easier to use the old part.


The various parts of the tape dispenser - 


If you're going to do it, you might as well over do it.

As you can see the wooden ring goes inside the tape roll, and sits in the middle of the dispenser, and the bolt holds it in place, not to blow my own trumpet, but this works better than the old one, the old dispenser had a habit of spitting the roll of tape out, this doesn't plus it would probably withstand a small explosion, it's a bit heavy.

The reason I didn't make the bolt part out of pine as well is because it doesn't take a thread very well at all, even with oiling first the cutting box just chewed the wood to bits, which is why I used beech for the bolt part of the nut crackers as well.

As you can see here - 


Not great.

A wood with a tighter grain seems to work much better for making the external thread, although pine seems okay for the internal thread which I don't mind as I like to combine woods now and then, I'm looking forward to making loads of other things using wooden threads, and I'm probably going to get some more of these kits, but in a smaller size, I may even try my hand at making some of my own.

Thanks for reading.


Tuesday, 23 October 2012

Adding a twist to my turning ... ...

For some time now I've been getting, well I guess the word I'm looking for is bored, with the stuff I've been turning on my lathe, it's kind of become the norm, and I figured it was time I experimented a little more.

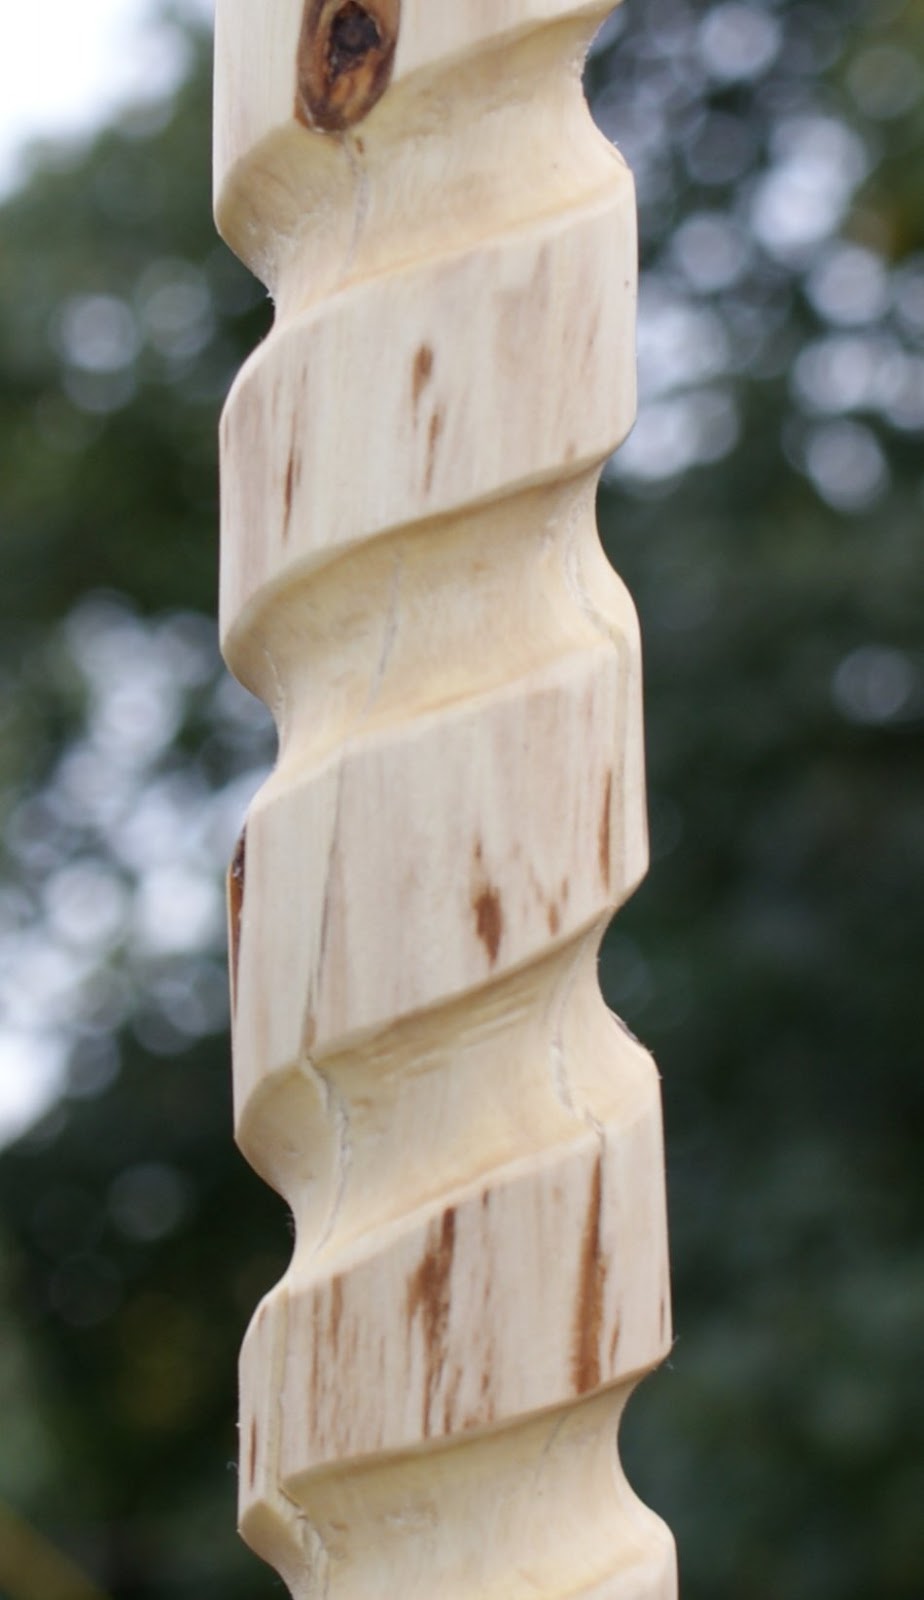
So I have been playing about with adding a slightly different type of design to my turned pieces, it's nothing special but it does seem to add an extra element of interest, well I think it does.


You may have seen the staff I've made for Halloween ? -


I did this quickly.

The twist design is easy to do, and although when it comes to turned wood you can buy special turning chisels, but they can be well over £150 in price, which to be honest is a little more than I want to spend, and besides doing that kind of design by hand adds a more personal touch to an item.

Here's a short video (not very clear) of me adding twist designs to a piece I made for the shop, it's a hardwood case, for storing large pins,needles or indeed things like hair pins.


Adding the twist with a small rasp file to start with (no sound) -


Adding the twist does take a bit of time, and you do have to be careful in order to get even spacing, but it does look good, I'm using a small rasp file to rough out the twist (spiral) and as you can see I've already done one spiral, which is basically a case of going over the roughed out lines with a larger rasp (if you want a wide twist that is) then use a normal file to smooth things out a bit, then it's good old sand paper in different grades to get a nice finish on it.


The rasp files I use -

Nothing special, bog standard rasp files.
 

The piece I'm working on in the video is mounted in a chuck on the lathe, which does make the whole process a lot easier to do, but you can do things by hand, it just takes a little more effort and time.


And if you're lucky it might turn out like this (or better, not that this is great) -


The finished article, which is for sale as it happens.

Another picture with a different view -


I've been experimenting with making it look more fluid.

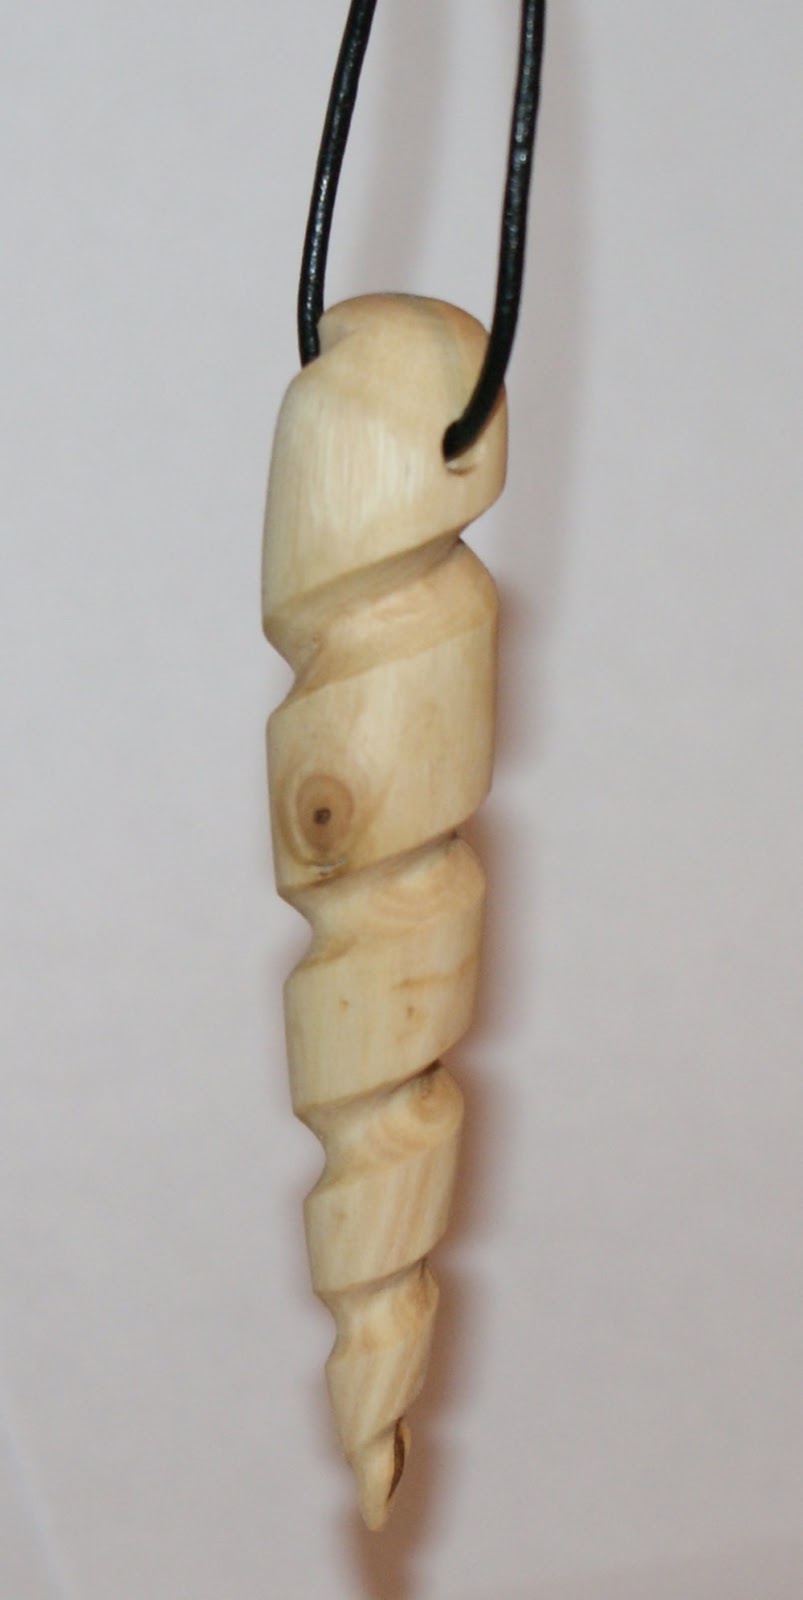
Since I made the case in the pictures above I've been experimenting a bit, I've made two more case like the one above, but with different spiral designs, over all I'm quite pleased with them, so much so I plan to play about with it more to see what I can come up with, I've also made some wooden pendants by hand and also added a spiral design to them, again using the rasp files, but completely by hand.


Here's a couple of pictures of some of the pendants -


Eucalyptus.

Pear with a copper twist.

Again I'm pleased with how they came out, it's perhaps not as uniform as the cases, but I think that adds to the over all look of them.

I'm glad I tried this out, and it's simple to do, and doesn't require any special tools, well apart from a lathe, I am now starting to rough out the design of a large single candle stick that incorporates a large twisted section.

Thanks for reading.

'I reverted easily to my wild state, that is experimentation.' - Jack Steinberger


Friday, 1 June 2012

Homemade lathe steady ... ...

From time to time when I'm turning wood I've found that I get too much movement in what ever I'm turning, especially long pieces (like candle sticks) this can cause all sorts of problems, for a start the piece won't stay round, it'll go a kind of oval shape, and the piece can even break where it's held in the chuck, and you don't really want large chunks of wood flying about at 2000 rpm.

So I decided I needed a steady for my lathe, the only problem is that I couldn't find one that would A - fit my lathe in a way I want and B - the ones I did find where a little costly for my tastes, so I built one.


 Here it is -

I'll explain why there's a bit missing.

It's not a particularly neat job, but it was cheap and it works, and despite how it might look it's very sturdy when in use, which is what I was aiming for.

After looking at a few sites online that have similar devices I figured a big circle shape was best, and to be honest the simplest way to make it.
I got a sheet of 12mm ply and had it cut at the diy store, mainly because I'm lazy and couldn't be bothered to do it, and because they'll cut it for free and it was easier to get home on my push bike.

Firstly I cut out 3 identical shapes, circles basically with an external measurement of 14 inches and an internal measurement of 12 inches, rather than cut out a complete circle shape I shaped the bottom so that I could fix the mounting bracket to it nice and securely.


3 parts ready for gluing together -


In the end I screwed and glued them together.

To make the circles I used a piece of wood that I marked with the right measurements, I don't have a compass that was big enough, hence using the bit of wood, this is a good way of getting large circles onto bits of wood.


The make shift compass -


Simples.

You can see how it works, once you have the centre of the wood you want to draw a circle on you can use a screw or a nail to locate your compass, and then all you need to do is drill holes at the right measurements for your circles, then just poke a pencil through the hole and there you have it, a simple, but accurate compass.

Once the 3 main parts had been fixed together I tidied them up with my homemade spindle sander, I'll put a link to that post at the end of this one.


Tidying up -

I've thought of loads of things I can do with a spindle sander.

Next I had to make 3 arms to hold the wheels I intended to use, the wheels came from an old set of roller blades that had been in the loft for years, the arms are also made from 12mm ply, I was going to make them out of a single thickness of ply, but they weren't as strong as I thought they should be, so I made them double the thickness.

The arms (which will support the wood in the lathe) - 


The groove is for the bolt that fixes the arm to the frame.


The wheels are held onto the wood with bolts and a small length of threaded bar, this was all I had lying about, otherwise I'd have used nuts and bolts of some sort, but this works just as well, the groove in the arm is was made by drilling out a series of holes and then using a rasp file I made the groove.


One of the wheels - 

Sports wheels no less.


Side view, with small washers added to make sure the bearings don't rub - 


I chose the smoothest wheels from the lot I have.
 
To fix the arms to the main frame I've used some long bolts with wing nuts, this means I can undo the arms quickly and make fine adjustments without having to undo things completely.

First I marked out on the frame where I wanted the arms, then I cut out the section of wood, I went down about 12mm, then I used a chisel to remove the scrap bit of wood.

The cuts already made - 


Just needs a chisel and then it's ready for the support arm.
I decided where I wanted all 3 arms, and about 5 minutes after I'd made all the cuts and chiseled out the wood I changed my mind, which is why there's a bit missing (now repaired) in the first picture.


The original placement - 

Not quite right.

As you can see the arms are more or less in the right place, I just wanted a little more support on the bottom of the steady, so I moved the arm on the right down a little, this way it will sit underneath what ever I'm turning slightly better than before.


Revised version - 

That's better.
Then all I needed to do was make a bracket so that I could fix it to the bed of my lathe, this was easy enough to do.
I cut 3 rectangles of ply, 1 to fix the frame to, and 2 others to make the bracket.


The bracket - 

Like a wood sandwich.

The smallest piece of wood sits snugly between the 2 parts of my lathe bed, the bolts then pull it altogether so that it's nice and secure and doesn't move when it's in use.
And that's about it really, it works quite well, all I need to do now is get into my shed and start turning a candle stick or 2 to see how it works on a long piece.


The steady on the lathe - 

You can see the bolts that hold each arm.


From the other side - 

You can see that 1 arm sits lower than the other.

And here's a short video (taken on my phone) of it working, it's noisy, but it does the job, this was with the lathe running at full speed, it holds the wood quite well I think.


Working (you might want to turn your speakers down a touch) ! - 


Here's the link to my homemade spindle sander -  Homemade spindle sander (opens in new window)


Thanks for reading.