Showing posts with label woodturning. Show all posts

Sunday, 20 February 2022

Glass sphere / crystal ball stand...

My wife has a new glass sphere which she wanted for taking pictures through, it does come with a small glass holder, but she wanted something a little more sturdy so I made a stand for the sphere from a piece of oak.

The wood has some cracks in it, but I used CA glue to stabilise them and although a simple shape it works well, and looks good with the sphere sitting on it.


Here's the video -


Thanks for visiting.

Sunday, 16 January 2022

Turning Picture Frames...

This is a project I started sometime ago, but only just got round to finishing.

It turns out that you can make pretty good picture frames using a lathe, although you will be restricted by the capabilities of your lathe, as in how big you can make them, but you could always go the other way and see how small you can make them. They are pretty easy to make and can be stained or painted to suit your needs, and you can make them from solid pieces of wood or by gluing wood together, it depends on what you can get hold of in terms of materials.

Have a look -


Thanks for visiting.


Monday, 27 December 2021

This is not one of my better ideas, but I have always (for some reason) wanted to turn chipboard (particle board) to see what would happen, well now I know.

It's not something I'll ever do again, chipboard or particle board as it's known is horrible stuff to turn for obvious reasons, the end result is oddly pleasing, but the actual turning was very messy, lots of dust so it goes without saying that you need a proper dust mask and eye protection (even when turning proper wood)

The end result is oddly pleasing though.

Here's the video -


Thanks for visiting.

Saturday, 11 September 2021

Turning a spinning top...

A short video of me turning a spinning top from oak, it's a simple turning project, but the end results are always pleasing, who doesn't love a spinning top, and it's a good use for those little odd bits of wood you end up with after a project (or is that just me?)

The oak is still a bit green, but it turns well, there's a small video at the end of some of the tops I've made recently.

Here's the video -


Thanks for visiting.

Monday, 30 August 2021

Homemade bobbins...

Here I use some buddleia (buddleja) that I cut down at the start of the year to make some bobbins (also known as spools or reels) on my lathe, this wood has a very soft pith to it which is handy if you want to make something with a hole through the middle, although I did do some tests and found that if you want a perfectly drilled hole an 11.5mm drill bit works best.

My wife and daughter use the bobbins to wind ribbon onto and other materials for crafting, it's a good use for a material that would probably end up as fire wood or mulch.

Here's the video -


Thanks for visiting

Tuesday, 27 April 2021

Making pincushions...

I've been trying to use up some of the scraps of wood I have, I tend to hoard small bits of wood as they might come in useful at some point, I've made pincushions before on my lathe and it is a quick and simple use of any small off cuts of wood and indeed material as well.

The one's I've made in the video are all from recycled materials, even the polyester padding, it's from an old cushion, I'm quite pleased with the way they turned out.

Here's a video on how to make them - 


And here's a picture of the ones I made recently - 


Thanks for visiting.

Sunday, 28 March 2021

Handmade wooden dibber...

A quick guide on how to make a dibber, perfect for planting bulbs of all variety's, cheap and quick to make, this one is made from an old pallet, or at least part of an old pallet.

Obviously you'd need a lathe to make this, it's what I used, but your could make one like this with hand tools easily enough, it'd just take a bit longer.


This one would be good for planting bulbs as it's quite thick and with the added lines down it, it will be easy to make sure things are planted at the right depth, the marks are made at 1cm intervals with a total of 12cm in all.


Here's the video of me making it -


Thanks for visiting.


Tuesday, 16 February 2021

Handmade valentines gift...

I've strung together some of the steps I used to make this gift for my wife, it's made in the same way as the hanging Christmas decorations, just slightly more elaborate.

I used Cherry, Pear and copper to make it and each material has a meaning or symbolism attached to it which varies from culture to culture, as an example Cherry trees in Japanese culture symbolise good fortune, new beginnings and revival and in old Buddhist stories the Cherry represents femininity, Pear wood has similar meanings as Cherry, and the shape of the fruit has long been associated with the female form and Pear trees usually live for a long time and Chinese culture associates this with immortality.

The Copper elements also have similar meanings, the metal represented Venus the goddess and the planet in Roman beliefs and copper has long been used by the Celts for making jewellery, it was in ancient times a highly regarded material, which is why it's often found in burials along with other metals such as Bronze, which is a Copper alloy.

Here's the video -


Thanks for visiting.

Monday, 7 September 2020

Homemade sanding stick...

Now that the garden and allotment are starting to wind down a bit I've had more time to get round to a few projects, one of which is making a tool to hold sheets of sand paper so I don't have to put my hand inside things I'm turning on the lathe.

I've made a couple of video's, one is of it being made and the other is of me using it, but basically it's a round handle that you can attach a sheet of sandpaper to, there's a coupe of pictures below and the video's as well, all I've really done is to turn a round piece of wood and then cut a slit into it, it's into this slit that the sandpaper slides, it's very simple, but saves catching your fingers on fast spinning bits of wood.

Pictures - 


Really should've made one sooner

Check out the video's, there's a couple of pictures of the brush pot I made for my daughter at the end of the shorter one, onto the next project.


Making the sanding stick - 


Using the sanding stick - 


Thanks for reading.


Sunday, 23 August 2020

Homemade bowl (friction) sander...

 Thought it was about time I made myself a bowl / friction sander for my wood turning adventures, don't know why I haven't made one before now (no excuse) but now I have, and to my surprise it works quite well, so here's a video of me going through the steps I used to make it, and at the end of this post is a very basic plan with some measurements on it, the measurements will change depending on what size bearings you use and what sort of size you want to make it.

Homemade bowl sander - 


The plan - 

Should give you a rough idea of how it's made.


As I said it's a basic plan to give you a rough idea of the dimensions of the one I made, hopefully you find it useful.


Thanks for reading.

Sunday, 28 January 2018

Better late than never, a project for Christmas...

Now I know that it's pretty much the end of January, but hang in there.

I did mean to write about last years Christmas decorations, but as you know time marches on and before you know it the moments passed.

So on that note this post is one to put on your list of stuff to make for this Christmas (and yes I know it's a way away, but time marches on remember)

For years we've been making our own decorations, and not just for Christmas but for various other times of year (like Halloween) and I decided I'd make something for the tree and it's something I've been meaning to make for a while.

Here they are -

Light bulbs.

Yes I made wooden light bulb style ornaments for the tree, which I'm pleased with, I think they worked well and they are a good addition to our decoration collection.

I did try to make them from a bit of scrap Pine at first, but I wasn't happy with the end results, so I recycled a bit of Beech from an old table leg, so not only do these look good on a tree, they were free, all it cost really was a bit of time.

First draft, looks bulb like - 

Not bad, but not quite right.

As I said the Pine didn't work well as I couldn't get a finish I was happy with, especially when I applied the wood dye, but the Beech worked a lot better.

Here's the Beech, I didn't use a hole leg, just a couple of sections off one end - 

Not much to say really, it's an old table leg.

First two turned and the dye applied - 

Not quite identical, but close enough.

The dye I mixed myself, I have a number of purpose bought wood dyes, but not in purple which is one of the colours we use on the tree every year, not loads of it, just little bits of purple here and there.

To make the purple I simply mixed a bit of blue and red wood dye together (blue and red make purple if you didn't know that already) I did have to tweak it slightly until I was happy with the colour, but I think it worked, and the grain still shows through the dye, which I wanted.

I have also in the passed experimented with printer inks for dying wood, these also work well, and you can sometimes pick up cheap refill kits from places like poundland.

For the part of the bulb that's meant to look like the screw in part I used some silver paint, we have various pots of paint about the house, the one I used is cheap to buy, about £1.99 from our local diy shop and it dries quickly and is water based.

I made some little eyes for each bulb so that we could thread some natural string through them and hang them on the tree, I just used some silver garden wire for this.

Making the eyes - 

Very easy to do.

The eyes are just a bit of wire twisted round to form a loop, it's easy to do, just twist a bit of garden wire around something round, in my case it was a wire staple, which was the first thing I grabbed and clamped into my vice, but a nail would do just as well.

To fix the eyes into the bulbs I drilled small hole and twisted them in, they are very secure, but you could always add a little glue to make sure they don't pull out.

And there you have it, I made six in all, unfortunately we couldn't hang two of the decorations on our tree because although they weren't huge they did weigh a fair bit (I made them from Laurel) and as we decided to get a real tree this year (one with roots, so we can use it again and again) it wasn't able to take the weight of them, maybe next year when it's a bit bigger.

Obviously this is a project for a lathe, but if you know someone who has a lathe or maybe you're a member of a club that does wood working then perhaps you could have a go, or maybe this year will be the year you decide to learn how to turn wood and you'll get your own lathe?

I have also made a light bulb shaped pull for the light cord in our bathroom, which I though was quite funny, because it turns on a light and it's light bulb shaped... ... but no one else thought so.

Pull cord bulb - 


Thanks for reading this very late or very early Christmas post.


Saturday, 21 January 2017

When is a stool not a stool?

When is a stool not a stool?.....when it's a picture frame.

For a while now I've had an old stool in my shed, it's in bits as I figured it would come in useful and recently I decided to see what I might make out of the seat part, which was the largest part, the rest being made up of various turned parts, which I'll find a use for eventually.

I give you exhibit 'A' -

But what to do with it?
Not much to look at really, it's in a sorry state, so what to make from it? well I decided on a picture frame, I had thought about making one but in the end I made eight small picture frames and not square ones either, I made round ones, well I have a lathe so might as well go round.

So the first thing to do is cut it up, I flipped it over and marked out the largest piece I could get out of it, it was then I realised that I could probably make more than one if I made them smaller.

Wood marked up - 

Worked out at around 6 and a half inches (17cm)
Next I cut out the square on my band saw - 

Plenty of wood left over.
Onto to turning, using a forstner bit I made a hole so that I could mount the square onto my lathe using an expanding chuck, then I gave it a quick turn to mark out a circle so that I could cut off the excess, it saves time basically.

Circle marked - 

Chop off the unwanted bits.
The fist thing I did was turn the back of the frame in order to make a rebate for the hardboard backing to sit in, then I realised I didn't have a chuck large enough to hold the frame so I could shape the front, to solve that small problem I made a chuck out of some old chipboard (parts of an old wardrobe) fixed to a face plate.

Chipboard chuck - 

Simple, but effective.

Frame mounted onto chuck, held in place by friction - 

It's a tight fit, so no danger of things flying off.
Once I got down to the smaller sized pictured frames it was easier and I didn't need to make chucks as I have various different sized jaws for my expanding chuck.

And when I'd finished making the frames I used a bit of dark oak wax (Liberon black bison, good stuff) it was on to figuring out how to make them hold a picture.

For the back of the picture frames I used some old hardboard that came as packing material in something we ordered, I cut circles out that fitted inside of the rebates on each frame, and fixed the hardboard into place with some small screws.

Backing cut out and small screws - 

Simple solution.
Backing fitted into one of the frames - 

One screw would do just as well.
And that's more or less it, apart from the glass for the front of the frame to protect the pictures.

Obviously you could make some of these and get small glass circles cut, not sure how much that would cost, some other options are thin perspex, one of our local diy type stores sells a large sheet of perspex for £16 and it would make a load of picture frame fronts.

For the time being however I've used a very basic solution, and that is a plastic laminator sheet, the sort of thing you would normally use to protect documents and such like, it turns out that if you run a sheet through a laminator a couple of times it makes a thin clear sheet of plastic, which is easy to cut into circles and works quite well in picture frames, you could also use the clear plastic that usually comes in the packaging for kids toys (I've used this to make stencils before - opens in new window)

Laminator sheet ready for cutting - 

Works surprisingly well.
I will probably, depending on how well this laminator sheet plastic lasts upgrade to clear perspex at some point, but for now my main problem is what to put in the picture frames, I'm thinking I might make some cyanotypes for them using the light reactive paper I have.

I ended up with eight in all, some are small enough that with a magnet glued onto the back they would stick well to metal notice boards, or even fridges, do people still have fridge magnets? and I need to come up with a way to hang the frames from walls and such like.

The finished frames - 

Not bad for an old stool.
So when is a stool not a stool? when it's eight turned picture frames, and making this has given me another idea, kind of a variation on this so look out for that at some point.

Thanks for reading.


Wednesday, 17 August 2016

Turning captive rings...

lately I've decided I should have a go at turning some pieces with captive rings, the only problem was I don't have a tool for turning captive rings, so I made a rough one from an old chisel, and one from an allen key.


Here's a goblet I made with a captive ring -

This was my third attempt at a captive ring.
Technically you don't need a special tool (which can be quite pricey) for turning captive rings, you can make one quite easily and if you look online you can find numerous different ways of making tools that will do the job.

I made mine from an old wood chisel which cost £1, all I've done is to sort of mimic the way a captive ring tool looks, which is kind of like a chisel with a hole drilled into it.

Here's my cheap chisel - 

Now for a bit of shaping.

To get the shape all I did was ground out a hole into the end of the chisel using a small grinding bit in my multi-tool and created a kind of hook shape.

One captive ring tool - 

Didn't take long to do.

And that's about it, now it's not perfect and needs some tweaking but I am able to turn things with captive rings quite easily all be it small pieces, for larger pieces it's just as easy to use a small gouge as you have more room to work.

Here's what I meant about it not being perfect, it's not sharp enough - 

The inside is very rough.

As you can see it leaves quite a ragged inside to the ring, and as I've discovered it's not that easy sanding the inside of the rings, at least not on small pieces.

The other thing I've tried is grinding the short end of an allen key to give is sharp edges and using that held in a chuck with a handle, this so far is much better as I can get right behind the ring, even on small pieces and I'm able to get much sharper edges on the allen key than I can with the modified chisel, probably due to the steel being better.

Here's one of my holders made from an old hand drill chuck - 

Quite versatile as it happens.

Here's a goblet I made using an allen key held in a chuck to make the rings - 

A vast improvement on others I've made.

So far I've made seven pieces with captive rings (and I need more practice) the latest being a fairly large goblet with two rings made from a piece of ash I chose for it's cracks and imperfections, you can watch the short video (about nine minutes, no sound) of me at various stages of turning, or if not just skip to the end of this post for the picture.

Video - 


Finished goblet - 

I'm pleased with it.

It's not the best way of doing things, but it works for me and it's something I intend to tweak and make better, it's always worth seeing if you can make your own tools, shop bought turning tools can be expensive and more often than not you can make something that works just as well for a lot less and I feel it gives you a better understanding of how things work.

Thanks for reading.


Sunday, 6 March 2016

Handmade row marker (with a lathe)

Whilst waiting for things to warm up weather wise (it's been quite cold here of late) I decided I'd have a go at making a row marker for the allotment, normally I use two sticks and a bit of string but thought I'd make an upgrade.

Not that there's anything wrong with two sticks and a bit of string.

So after a root around in my wood pile (which is quite large) I found an old pine bed leg and thought that will do nicely, basically my aim was to make a spike (kind of like a dibber) with a reel for the string on the end, easy enough if you have a lathe, but fear not if you don't have a lathe I have also made a row marker without a lathe, which I'll write another post about.

So here's the line marker -

Basic, but functional.
I cut the bed leg down into chunks, rather than put the whole thing on the lathe, using the first section which was already shaped as the spike for the reel.

Wood sorted -

I used this bit to save time.

I marked the centre of the wood -

As you can see it's actually two bits of wood glued together.

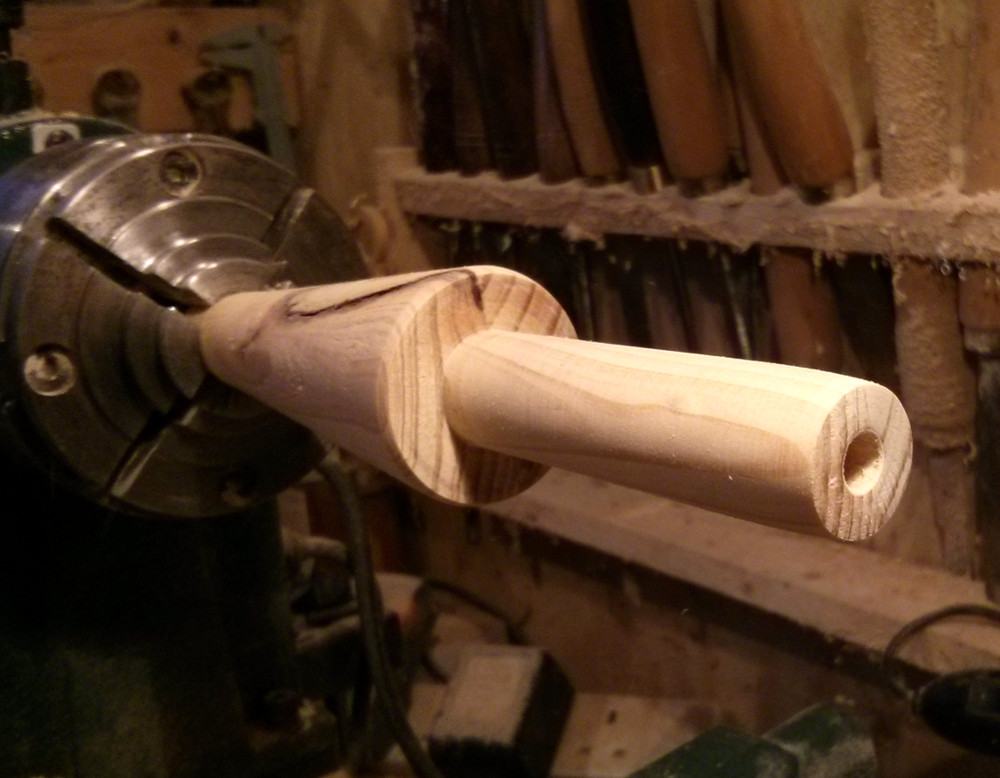
And after a short while on the lathe I had my spike, I turned a thin shaft for the reel to sit on, and also drilled out the end so that I could make a cap to hold the reel on with.

Basic shape done - 

Mini jousting anyone ?

Hole drilled for cap -

Probably not the best way to hold this in the lathe.

I used the waste wood from making the spike for the end cap, I made sure the fit was tight enough to hold the reel in place, but not too tight so that I could get it out if needed.

Wood for end cap -

Could have used a smaller bit.

End cap done and in place - 

The cap fits all the way into the spike.
And so onto the reel, using the other part of the bed leg I first cut it into two parts, one part for the reel and the other part to make the peg for the other end of the string.

Wood for reel and peg - 

Plenty big enough for what I need.
Reel almost done -

That knot will cause problems.
Reel spike done -

Not the prettiest thing ever made.
I figured the knot I found whilst making the reel would cause problems, and it did as I was left with a chunk missing from the bottom of it, but it still worked, so I cut a small groove into where the knot was for holding the string, rather than tying it on.

Knot problem sorted -

Similar to cotton reels that have the little slit in them for holding the cotton.

The other chunk of leg was turned into a peg, the idea being you stick the reel end in the ground and the other peg goes at the end of where ever your line finishes.

Wood for peg ready -

Soon to be peg like.
Peg done, I added an eye at the end for the string to attach to -

All done.

Ready for action -

I should have nice straight rows of veg this year.

And that's it, the reel is quite tight so that there's some tension in the line when marking out, this helps keep things straight, I didn't really work out what sizes things should, just worked from eye and made something I know I'll be able to use.

I have added an upholstery pin to the bottom of each peg / spike to protect the wood a little, but to be honest it probably doesn't need them, in my humble opinion it's a good use for and old bed leg, better than chucking it on the fire, I may at some point add a handle to make winding it up easier.

Thanks for reading.