Showing posts with label make your own. Show all posts

Tuesday, 31 January 2012

Handmade buttons ... ...

Buttons are great, and you'd be surprised how easy it is to make your own, I'm not talking about the plastic ones, I'm talking chunky wood buttons, great as a feature on a knitted hat or some other item.

It's easy to do, you need a saw (a hack saw is easy to use)


Bit battered, but works okay
 You'll also need a drill of some kind and a drill bit (I normally use a 3mm bit)

My post drill.
I use a post drill for making the holes in my buttons, but if you don't have one a cordless drill will work just as well, but be careful when drilling, and if you don't have an electric drill then a hand drill is just as good, but you will need a vice or some way to hold the button still whilst drilling.

Hand drill -

You can buy these quite cheaply.
And obviously you need some kind of wood, sticks are easiest to work with, but if they are freshly cut it's best to leave them in the house some where to dry out a bit first.

Then all you need to do is slice your stick up into sections as thick or thin as you want, although the thinner the sections the harder it is to grip them for sanding.

Ready for slicing -

Gripped tightly.
Now if you don't have a vice you could use a strong clamp to hold the wood, but I'd recommend a vice of some kind, it doesn't have to be expensive, I have a hobby vice I use in my work room at the back of the house, it was less than £10 and is great for small jobs like this.

Once you have some slices of wood it's on to the next step, and this is where things get personal, it's up to you how many holes you drill, where they are and such like, I tend to drill 2 holes in each button.

Ready for drilling -

They look a little rough, but they will turn out nice.
With holes drilled -

4 or 2 ? it's up to you.
You don't have to drill the holes first, I do things this way because if the holes are a little rough they'll get sorted out when I finish the buttons, saves time and extra sanding.
 
The next bit depends on what sort of equipment you have, if like me you have a variety of power tools then you may well have a belt sander or orbital sander, these will do for finishing the buttons as long as you use a fine grit (like 180) sanding sheet/belt if not then you can use a sheet of sand paper (again use a fine grit) and a wooden block, this will take longer, and probably make your arms ache a little, I use my lathe sander to finish the buttons, takes about 2 minutes (give or take) to finish a button.

I built a sanding wheel for my lathe, I made a short video of me using it, please remember to watch your fingers if your using a power sander of some kind, gloves might be an idea, and a mask as things will get dusty.

Sanding video -


Mind your fingers !

As you can see it doesn't take long, and apologies for the video quality, it wasn't as easy as I thought sanding and filming at the same time.

So once all the sanding is done you should have some nice smooth wooden buttons, they might be different sizes and thicknesses, but that just makes them more unique.

I tend to either give my buttons a coat of beeswax to protect them without affecting the colour, or I use linseed oil, which brings out the grain quite well, but you could wax them,varnish them, or paint them.

Finished buttons -

All done, 5 cypress & 2 pear wood.
Here's a picture of a cypress button and a pear wood button coated with linseed oil -

The pear wood is the darker one.
You can see from the picture above that you can make the buttons as round as you like, or leave them a little less finished for a slightly more rustic look, and if this all seems a little like hard work then I know a chap who sells them in his shop ;-) which you can find here (opens in new window) I'm also working on a lathe jig that will allow me to make sets of buttons the same size and decorate the buttons with simple designs.

Thanks for reading.

Inspire Me Beautiful

Tuesday, 31 May 2011

Making wine - A rough guide ... ...

I figured I'd write a post about making wine, seems a lot of people are thinking about having a go at it, I say why not :-)

It's not really that difficult to make a halfway drinkable wine, I've managed to do it twice so far, although I did follow a recipe the first time, well I more or less followed it ;-)

 Here's a picture of the plum wine we made last year (still in demijohns)

Not much of it left now ;-)
So on to making wine, you will need some equipment, a tub for starting things of,demijohns for fermenting and empty bottles to put it in once it's done, but you don't have to get everything in one go, you could get to the demijohn stage and then get the empty bottles as it'll take a few months for fermentation to slow down and stop.

Charity shops and free cycling are good places to find equipment, we got pretty much all our equipment from free cycle and charity shops, maybe you have a relative that used to make wine, they may have some spare or unused demijohns and other stuff, although you don't actually need them, you can used large plastic bottles, the 5 litre kind that you get water in, it's easy to fit an airlock to a bottle like this.
You will need airlocks, these help the gas escape during fermentation, they are cheap enough to buy, or you can find them in charity shops and such like, and it's also possible to make them using a piece of tube.

Here's a list of the basic stuff you'll need, it's what we use to make wine. 

Steriliser,this is very important, some people don't use it, but I wouldn't try it, it's best to have everything nice and clean to prevent build up of unwanted bacteria, a tub of steriliser is about £4 (you want vwp steriliser) this will last a while, we also use it to clean out our jars when we make jams.

Large plastic tub for starting things off, these can be bought for about £10 or you could use any large tub, even an old 10 litre paint tub will do, even more so as you can seal it, obviously it will need to be clean and paint free.

Demijohns, these can also be bought for about £10 each, which is a little expensive, so look in charity shops. Or you could use a large water bottle, but you'll need to make a hole to fit an airlock and rubber bung, this is easy enough to do.

Airlocks, these are cheap enough, you can usually get a pack of 2 complete with rubber bungs for as little as £2.50, but again you might find some in charity shops.

One of our airlocks -

This one is my favourite :-)

This airlock is an old one, it's made of glass, sounds great as the bubbles go through it, most are plastic these days, like the ones in the picture below.

Plastic airlocks -

I prefer the ones on the left, they sound better ;-)

Some other things you might want to get are a straining bag, or you can use muslin, a funnel makes bottling up loads easier and a long bottle brush, you can also buy these from good wine making shops, or you could buy a cheap pack of brushes from somewhere like poundland and attach one to a bit of garden cane, it's what I did to get the tough stuff from the bottom of the demijohns, you can also use a little dry rice in some warm water, just shake it about for a while, it works quite well.

Here's a picture of our blackberry wine, along with the brewing tub we use -

Oddly enough there isn't much blackberry wine left either ;-)


Here's a link to the local shop we use, the bloke that runs it is very helpful, you can also order online ---> Good life home brew (opens in new window) you should be able to find everything you need for making wine,beer and other stuff, they also sell some good wine making yeasts, it will also give you an idea of where to start with it all.

Okay I thought I'd leave you with a recipe for making plum or blackberry wine, although it's easy enough to adapt for them for making different wines, like elderberry for example.

Black berry & Plum wine (which are rather good, even if I do say so myself)

You will need about 2kg of blackberries or plums, which you can pick from your local hedgerows (it's what we did)

2kg of sugar (normal granulated is fine) Obviously the more sugar the sweeter the wine, but 2kg is a good starting point, you can always add more buy boiling some water and adding the extra sugar, but make sure it's cooled right down before adding it to the wine, or you'll kill the yeast.

Boiled water, about 4.5litres (roughly a gallon, enough for a demijohn)

And a good yeast, which you can get from shops like the one I mentioned, they do some good ones for about £1 a packet, enough for a batch of wine, or you can get larger packets of wine yeast.

I'm not going to go into working out the gravity and all the rest of it, but there are many guides online on how to work this out, but this will require a hydrometer, or you could buy a vinometer (about £3) which will give you a rough idea of alcohol content, once it's bottled up.

To start the wine of, make sure your tub is clean, use some steriliser and leave it for a few hours or over night (same for bottles and demijohns) when you want to use them make sure you rinse them well.

Fill your clean tub with the boiled water, then add the sugar and blackberries or plums, use a potato masher or big wooden spoon to mix it all up, try and break the fruit up as you go.

Leave the mixture to cool, make sure it's cooled down before adding the yeast or you'll kill it and it won't ferment.

Once you've added the yeast give it a stir, cover the tub and leave it some where warm for about 5 to 7 days, give  it a stir now and then, you should start to notice when it starts fermenting.

After 5 to 7 days you need to strain the wine through a bag of muslin and pour the liquid into your demijohn, then put an airlock on, you need to put a little water in the airlock, this stops anything getting into the wine, I normally use a little bit of the steriliser water in my airlocks.

The wine will be ready for bottling when no more bubbles go through the airlock, this can take a few months, once the bubbles stop this means fermentation has stopped, the sugar and yeast have turned into alcohol, and you can now bottle it up, you can use screw top bottles, we got a load of glass bottles and corks with our freecycled stuff, it's worth doing it this way.

To get the wine out of the demijohns use a length of plastic pipe (you can get this from wine making shops as well) and siphon the wine into your bottles, you can also buy filters that will help make the wine clearer.

Guess what ? we got a filter as well -

Even came with filter papers :-)

Leave your wine for a week or 2 before drinking, it will however get better the longer you leave it, we noticed a distinct difference between our wine from the bottles we drunk after a few weeks and the ones we drunk after a few months, so again it's worth leaving it that little extra.

The above recipe is how I made both wines, plum and blackberry (both made from foraged fruit) this method would work for elderberries and other fruits, we have a batch of elderflower wine on the go, but that requires a slightly different method.

You don't have to forage for fruits either, although buying a few kilos of blackberries will be quite expensive, but things like plums might be cheaper, we ended up with about 13 bottles (8 blackberry & 5 plum) of wine for Christmas last year, and each bottle cost about 50p not bad and we still have our eye sight ;-)

It's worth looking online for guides on making wine, there's a wealth of information and it's easy to do,saves money and the end results are pretty good, it's not just wine either, you can make your own cider and beers to.

Thanks for reading and happy brewing :-)


Saturday, 28 May 2011

Elder flower cordial ... ...

I've made some elder flower cordial, which I'm quite pleased about, mainly because it worked :-) we wanted to make some last year, but missed the best of the flowers, so we put it off until this year, and today I bottled the cordial up (all 2 litres of it) we also have some elder flower champagne on the go, although it'll most likely end up as wine, but I go into that another time.

Here's the cordial -

Nice and refreshing.


Looks good, and tastes great, now making this is pretty simple, although I was a little concerned about it as I've never used flowers in this way and wanted to get it right, and not kill anyone in process :-) we've made cordials before, we make rhubarb and blackberry cordials, and if we get enough black currants we'll be making black currant cordial as well, how ever using elder flowers requires a slightly different method. (you can read about the rhubarb cordial here on my wife's blog opens in new window)

Okay so how to make the cordial ?

Equipment :

  • Measuring jug.
  • Saucepan for boiling water, or you can use the kettle.
  • Large bowl,bucket to keep the mixture in while it infuses.
  • Straining bag or muslin.
  • Funnel (not essential, but makes bottling up easier)
  • Bottles.

Ingredients : (feel free to adjust to suit your needs)


  • Sugar (about 1kg, you can adjust to suit your tastes)
  • 2 lemons (un-waxed)
  • Water about 2 litres (we used 2 litres, but you could use less or more, again adjust to suit your needs)
  • Citric acid (helps it last longer, we used 2 teaspoons, but you can add more, or not use it at all)
  • About 20 good sized elderflower heads, make sure they are as fresh as possible.
The ingredients are easily adjustable, and with the citric acid you don't have to use it, it just helps it last longer, although from the way the kids have been drinking it we needn't have bothered :-) you can also freeze it in ice cubes, which we've done as well, this will help it last longer as well.

Method :

First boil your water, either in a saucepan or use the kettle (if you use the kettle make sure no lime scale gets into it) then put it into your bucket / tub, then add the sugar, and stir it until all the sugar has dissolved, you can use more or less sugar, we've found that 1kg is probably a little too much for us, but we'll just water it down more.

Add the zest of the lemons (again you can use more or less lemons, or add oranges and limes) then cut the lemons into quarters or slices and squeeze the juice into the mixture, then chuck the lemon pieces in the mixture, if your are using citric acid (which you can get from your local pharmacy) add it now.

Now for the elder flowers, before you put them in the mixture there's 2 things you need to do, make sure that the mixture has cooled and remove any bugs, and if your elder flowers are anything like ours there will be loads of them, give each flower head a shake, but not too hard as all the flowers will drop off, you can also rinse the flower heads in cold water.

Our mixture in the brewing tub we use for this type of thing -

The smell is fantastic.
Once your elder flowers have been de-bugged and the mixture has cooled you can put them in, then just give it a stir and cover it with a lid or a clean cloth, cling film will do as well, then leave it in a cool place for 24 / 48 hours to infuse, the amount of time you leave it is up to you, I looked on various web sites and found people left theirs for a day or two, some a week so it's up to you, obviously the longer you leave it the more flavour it'll have.

When it's ready for bottling all you need to do is strain it through a piece of muslin or a straining bag, then you can pour it into your bottles, make sure they are clean first, once bottled put it in the fridge to chill, or you can freeze it as ice cubes, or ice lollies, you could also make sorbet out of it, it's quite versatile :-)

Here's some in an ice cube tray - 

These go down well with the kids, as would ice lollies.

Just to point out that the flowers contain a natural yeast, if you leave the mixture in a warm spot long enough it will start to ferment and you'll end up with a slightly alcoholic mixture, this is how elderflower champagne is made, and whilst this may be nice for adults it's probably best the kids don't have any ;-) I have another post about our elderflower champagne, which I'll try and write soon.

And finally, you can also make lemon cordial in a similar way, just leave out the elderflowers and don't leave it so long, if you chuck everything in your tub of choice when the water is hot and leave it to cool, you should then end up with a lemon cordial, or you could use limes or oranges.

Thanks for reading.


Inspire Me Beautiful sunnydaytodaymama

Monday, 9 May 2011

Hmm bread ... ...

Since our journey into being more self sufficient we have been making our own bread (for over a year now) and whilst people making their own bread isn't revolutionary not enough people do it.

You simply can't beat home made bread, I used to travel past a bakery years ago on my way to work and the smell was intoxicating, there's just something about the way bread smells when it's cooking, it's great.

For a while we used our bread maker and we were perfectly happy with the bread that came out of it, and it is a very handy gadget, chuck your ingredients in push a button or two and bread comes out, what could be simpler ? and to be honest it's not difficult to make bread by hand using an oven.

So why aren't more people doing it ? when I do the weekly shop I'm amazed at the amount of people buying loaves of bread, of all different kinds, and some can be quite pricey considering, I get funny looks when I'm in the baking isle grabbing packets of yeast and bread flour, I find this odd.

Anyway of late we've been experimenting with flat breads, these are very nice and you can add loads of different stuff to them for more flavour, like cheese or herbs or both :-)

I started to wonder what else you could do with the recipe, and it seems that by sticking to a set of basic ingredients you can do a lot (this may not be news to some people) so here's the recipe we've been using for the last few months to make all our bread.

Firstly here's a loaf I made tonight -

Just a plain white loaf.
The ingredients consist of 3 things, at least for a loaf like the one above.

Ingredients :

500grams of bread flour (we've been using white, but brown should be okay)

1 packet (7grams) of fast acting yeast, you can get this in boxes of 8 sachets.

250ml - 300ml of warm water (I normally use 275ml)

And that's it for a plain loaf, obviously if you want something a little more interesting you'll need extra stuff, but I'll go into that later.

The method is easy, but might make your hands ache a little.

Method : 

First put your oven on at 200 degrees (gas mark 5 I think ?)

Weigh the flour into a mixing bowl, then add the yeast and give it a mix.

Next add the water (make sure it's warm, but not hot )

Now you should probably mix the water in a little at a time, but I just chuck it all in at once.

Mix until it all starts to come together, then get your hands in and make sure it's all mixed together. Please wash your hands :-)

Now all you have to do is the kneading part, turn the contents of the bowl out onto your work top and start kneading, if it gets a little sticky sprinkle a little more flour onto the dough.

You'll need to keep going with the kneading for about ten minutes, but rather than just push it about tear the dough, grab it with both hands and tear it, then stick it back together, do this a few times whilst your kneading the dough, it does make a difference to the bread (well I think it does)

Once you've finished kneading it form it into a shape, for a flat bread you can flatten it out with a rolling pin, or you can just make it into a ball shape and slice the top like I did for the loaf in the picture above.

Place the bread onto a floured baking tray and cover with cling film, it's best to either spray the cling film with a little oil, or brush some on, so that it doesn't stick to the bread (a damp tea towel should also be okay)

Proving the bread will take about an hour, depending in where you put it, you can place it somewhere warm for an hour, what we do is put it under the grill, we have an oven with a separate grill, so when we want bread we put the oven on at 200 degrees and it heats the grill up a little, which as it turns out is really good for proving bread :-)

You can also place the bread in front of your oven, the bread should double in size (perhaps a little more depending on how long you leave it and how warm it's been) we find we only need to prove ours for 30 - 40 minutes using our grill.

Once it's proved you can then cook it (make sure you remove any coverings) this should take between 15 - 25minutes, but this may vary depending on your oven, or if it looks ready you can take it out and give it a tap, if it sounds kind of hollow it's probably done.

And you should end up with something like this -  


Brushed with a little olive oil.
That's about as difficult as it gets, now if you want to mess about with the recipe you can, it seems pretty easy to add extras without having to alter the recipe, for example if you want a cheesy bread you can knead some grated cheese into the dough, then sprinkle some on top of the bread before baking, you could also add some herbs in the same way.

I have also found that by mixing in a little caster sugar (normal sugar would do just as well) and some raisins you can make a nice fruit type loaf, you can also split the dough and make two smaller loaves, we do this from time to time, making a small raisin loaf and a small cheesy loaf.

Tesco, the yeast about the same, you get 8 sachets of yeast in a box, so for less than £1.50 you can make about 3 or 4 loaves, which is less than 50p a loaf.

Here is the original recipe, as it was intended, I would recommend making this as well, it's great bread.

Chorizo and thyme fougasse ---> bread recipe 

Go forth and bake fellow human :-) 

Thanks for reading.


Tuesday, 16 November 2010

Make your own chunky knitting needles... ...

If you've read the last post I did you'll know I have been adventuring into the realm of knitting, with pretty good results (I'm happy at least) We now make our own floor and dish cloths, mainly because ours our better than bought ones, and last longer, and when finished with they can be composted, sounds like a winner to me.

Anyway I mentioned in the post about other applications for knitting, and I came up with the idea for knitting hanging baskets, admittedly this isn't a new idea, but I decided to ponder it a little, and after trying to knit with some fairly thick string I figured I'd need bigger needles to actually have a proper go, either that or some thinner string, I was feeling creative so I went for making the needles in the end, and here's how I did it.

Okay so I've kind of cheated a little, mainly because I bought two lengths of 12mm dowel for the needle shafts, at a cost of 68p each, so £1.36 for the pair, I could have turned the shafts on my lathe, but if I'm honest it was the last qualifying session of the 2010 formula 1 season and I didn't want to miss it, and in my defence I didn't actually have any wood as long as this, or that I wanted to turn down to 12mm, I have plenty of wood, it's just marked for other projects and such like.

So with my two lengths of dowel I trundled down to the mole cave and set about putting a point on the end of each needle.

Picture time -

Starting the point.
I started the point off by clamping the dowel in a vice and using a small block plane to shave the ends down, again this was done as it's less time consuming than sanding, again had I turned them I could have made the point at the same time.

Once I'd got a rough point I then sanded the ends using the sanding disc I made for my lathe, and with a fine grade sanding disc on it I was able to get a nice smooth point on each needle.

Finishing the points - 

I should have removed the bar code sticker first.
Both ends done - 

Pretty much equal, ish :-)
After I'd finished the ends it occurred to me that I would need some kind of stopper on the opposite ends, so that anything I was knitting wouldn't just slide of the end, I had some rough turned pieces of wood lying about so I measured a couple until I found a bit that I felt was big enough to fit on the end of each needle.

For the needle ends I got two sections of wood from the roughly turned piece I chose, and then marked the centres of each part, by drawing lines across each bit to find the centre, the same way you would find the centre of a circle on a bit of paper.

Then using a spade bit I made a hole in the centre of the needles end, and as it turned out the dowels were a little larger than 12mm, either that or the spade bit is wrong, a large drill bit would do just as well.

Needle end and spade bit - 

Spade bit and needle end.
The dowel turned out to be closer to 13mm according to my vernier which was okay as it meant I could get a nice tight fit on the needles ends, and with a spot of wood glue they wouldn't come off easily.

I did however have to sand the ends of the needles so they would actually go into the holes I'd made.

Sanded needle end and end - 

Needle and end.
Once that was done it was just a matter of finishing the ends, I did this using the sanding disc on the lathe, and then I gave each needle a good sanding with a finishing pad to make them nice and smooth, and below is what I ended up with, which is a set of knitting needles that are more or less 3feet long.

Knitting needles - 

Not the best picture, but you get the idea.
I think they turned out okay, and for about £2 and 45minutes work they are pretty good, and they work, they are a little strange at first because of the length of them, but after a while you get used to holding them, and just to prove they can be used I did a quick few rows of string.

String knitting - 

Much easier to use this type of string.
Of course you can use chunky wool as well, but I made these for the purpose of knitting hanging baskets, and yes you did read that right, I have already made a prototype which I will post about eventually, it actually looks quite good as it goes, but I'll let you be the judge of that when I get round to writing the post.

You can easily make something like this yourself even with out the lathe and such like, all you need is a drill a spade bit and some wood and sand paper, or you could just use a large drill bit, 10mm would be about right, of course with out the lathe sander it may take a little longer to make them, but there is a lot of satisfaction to be had in making your own tools.

I will get round to doing the hanging basket post as soon as possible, so stay tuned.

Thanks for reading.


Saturday, 13 November 2010

I can knit ! ... ...

Yes you heard it right, I'm a bloke and I can knit (sort of) so what you going to do about it grrrr ?

Seriously though there is a reason for me attempting to knit for the first time in about 20 years (I learned to knit in school) the reason is that I vaguely remember my nan I think making her own dish cloths and floor cloths, although I think she actually used to crochet them, I tried crochet and failed (I will have another go)

Why bother ? well it goes back to the same thing I've said in a lot of posts, no one makes anything any more, least that's how it seems to me, we tend to just buy it, and usually for as cheap as possible.
I think this attitude (and I'm just a guilty ) is actually harmful, our kids don't know what it's like to pick up a bit of wood and make a tool out of it, why should they ? when they can buy it ? and this mentality means our kids are loosing touch with certain skills, like wood working and such like, and not only that they aren't encouraged to think, to be creative and inventive, this I find is quite a sad situation, I'm not pointing any fingers as to who is to blame, I don't think any one person or group of people are to blame, perhaps it's society as a whole that needs to change ?

Anyway here's a picture of the first bit of knitting I've done in 20 odd years -

I think it turned out okay, after 3 attempts :-)
Okay so it's not perfect, but in all fairness it's a cloth and not a sunday best jumper, it's knitted from parcel string, I had loads of it lying around, I got it cheap from some place or other, and I think you can pick it up by the ball for under a pound most of the time, and for a pretty large ball.

It was easy enough material to knit with (even for me) and the end result is quite pleasing, and not as coarse as you might think, in fact I've seen fancy ex-foliating wash cloths made of rougher material.

As cloths go it works as expected, it's actually better at picking up dirt and grime than any of the bought cloths we have, and I'm not just saying that because I knitted the thing :-) and it can be washed and re-used, unlike some cloths which after a couple of days have to be thrown away, if it gets stained a little soak in bleach will sort it out (if you use it, other wise a very hot wash will do) and when you have finished with it, because of the nature of the string it will degrade, so chuck it into your compost bin and it'll break down pretty fast.

So what about time ? most people these days seem to not have time to do anything (even cook a real meal) well I managed to make the cloths (I ended up with 3 from one ball of string) while watching tv, and a more accomplished knitter would probably have managed this in a few minutes, so time isn't really an issue, even I managed to keep up with the program whilst knitting.

Once I'd finished the cloths I got to thinking about other applications for knitted stuff, apart from clothing, so I started messing around with other materials, here's a picture of some knitted garden string -

Natural garden string.
Now I have to say that this wasn't as easy as I thought it was going to be, I think the problem is that the string wasn't quite as flexible as I thought, and I was using small needles, but it was possible, and after a quick bit of research on line I found that some people have tried similar and knitted hanging baskets and such like, only they have used much bigger needles, so I made a set, which I will dedicate a post to, along with a post about my first knitted hanging basket ;-)

I don't think we have any excuses for allowing the loss of skills like this in our children, it's up to us as parents to teach them things like this where we can, and if not find some one who can, I'm lucky I have quite an array of tools which I will show both my kids (son and daughter) how to use, and I will show him and her how to go about making things, I feel I owe it to them as a parent, and lets face it in this day and age certain institutions don't put the effort in, this is probably the reason why skills are being lost.

All in all I enjoyed making the cloths, there's something very pleasing about linking a length of string / wool together in this way, but then I enjoy using my hands for making things, that's what they are designed for, not just picking something off a shelf and paying at a counter, we were given hands and brains for a reason, I think it's about time we started using both a lot more than we do.

Thanks for reading.

Tuesday, 3 August 2010

A bit of a rant ... ...

Are people who use bicycle trailers strange ? I don't think so, I use one.
But it seems to me that the majority of people must think it odd to have a trailer on a bike, I mean why not use a car ? at least that's must be what goes through the minds of some people.

As I said I have a trailer for my bike, it's a means to an end, I don't drive, in fact I have only taken my driving test once, that was when I was 17/18 I failed and haven't bothered since, I'm 34 now and whilst I admit a car would be handy, we seem to get by with out one.

I built my first bike trailer 2 years ago, as a why to move heavier stuff about on my bike, balancing shopping bags from each handle bar is a little precarious at times, so a cart/trailer was a plan (necessity is the mother of all invention after all) the mk1 :-) was built from the remains of my sons first buggy, it was one of those 3 wheeled things, the rear wheels made a great chassis, and I built the rest out of some steel tube and wood salvaged from an old bed (yes I did say bed) I used the buggy wheels at first, but soon found they couldn't cope with a lot of weight, so I adapted the trailer to use the wheels from a sack truck (and the mk1.1 was born)
The trailer was quite heavy and quite low as well, but it did the job, I carted cement bags and all sorts about in it, I also collected a 27inch tv in it, not a flat screen, but it eventually gave up, and so I set about constructing the mk 2.

Now the next trailer was built from scratch, I've used two 26inch mountain bike wheels, and steel tube for the frame, the sides and front and back are made from thin wood to keep the weight down, I used the same method to hitch the trailer to my bike, which is basically an eye bolt on the towing bar of the trailer and a d shaped bracket bolted to the bike, I join the two using a d shaped shackle for easy removal, I also incorporated a padlock and cable as well, just in case the main hitch fails, which to be honest is unlikely, unless I try transporting an elephant about.

Here's a picture of the basic frame, there's no towing bar etc because bikes vary and the hitch would depend on the bike and how the trailer was to be hitched.


The Mk 2 :-)
As you can see it's nothing elaborate, but it can hold a lot of weight, in fact when I'd finished building it (which was just after christmas 09) I weighed around 15 stone, so I used myself to weight test it, and it easily coped, of course after a few months of using it to get the weekly shop and other stuff I now weight a stone and a half less :-)


So why am I ranting ? well apart from the odd looks I seem to get when I use the thing, the nail in the coffin was when I was out doing the weekly shop, I had just stuffed the many bags of food and such like into the trailer and was just setting off for home, nothing odd you say ? well as I left the car park of the super market I rode past a chap with his daughter (she was about 6 or 7 maybe) she turned to her father and said look dad that man's got a trailer on his bike, nothing wrong with that, but it was what her father said in reply and more importantly the way he said it, almost with venom in his tone of voice " it's because he's an environmentalist " 

My first thought was wtf ! Did I just hear that right ? I'm all for being green, recycling and wind farms and the like, but this blokes comment made me feel like some kind of subversive.
I've wondered what kind of message this gave to his daughter ?

I'm not 100 % sure, but I'm willing to bet money that he got into a massive  4 wheel drive type vehicle (the fashion type 4x4's not the practical ones) and I live in Norfolk, no hills to speak off, and unless your a farmer who needs to drive out across wet muddy fields in the middle of the night for a sheep, why do you need what is basically a step down from a monster truck ? (that last comment is not meant to cause offence, just an observation)

I'm all for being green and such like, but the fact that this bloke didn't seem to consider any other reason for me using a trailer really wound me up if I'm honest, so bring on the bike trailers I say, the more the merrier, they are great things to have, cheap to run, good exercise and apparently annoy people who have 4 wheel drives :-)

I will be updating this post with some pictures and such like, to maybe give you some inspiration on how to build (or how not to build) your own trailer, and in the mean time have a look at this check out the " related " section on the right hand side, loads of different trailers :-)

Thanks for reading.


Saturday, 31 July 2010

A cheap mono pod for your camera...

Like a lot of people we like taking photo's of stuff, the kids,wildlife,odd insects we find in the garden (we do that a lot) photography can be expensive, depending on what sort of equipment you buy.

For christmas a year or two ago I got my wife a digital slr camera, it came with a lens, and since then we have added to it, new lenses etc. We have been lucky and managed to get some good deals on some of the kit we've bought, filters and such like, we even found a brand new tripod in a charity shop for the princely sum of £1:75p, which wasn't bad considering it would have cost £20 new, bargain.

As I said it can be expensive so finding tripods in a charity shop is handy, I made a bag for the macro lens we got, and what's more we got a free camera bag for all the stuff from our local free cycle group. While I was looking through some photography related articles I saw a monopod which is basically a one legged er.. tripod, handy for using with larger lenses, and for when a tripod would take too much time to set up, a nifty idea I thought, and since seeing that I have noticed that people photographing sports events use them a fair bit, so I decided I'd see if I could make one, I mean how hard could it be ? as it turns out, not that hard at all.

Basically it's an extendible pole that you can fix your camera to, by way of a thread that screws into the bottom of the camera, so with that in mind I started plotting as to how I might construct such a thing, as it happens I found the main components in a pound shop.

I bought a decorators pole, the sort of thing you attach a paint roller to, and a mini tripod, then all I needed was a longer screw to attach one section of the mini tripod to the end of the decorators pole.

Kind of like this -
Extendible decorators pole.

Top section of a mini tripod -

Mini tripod head.

I've seen two types of mini tripos, one has a section like the picture above, and the other doesn't (for want of a better way to put it) one that has and end like the one above is best for this, it is held onto the legs by way of a small screw, undo it and keep the legs, you never know what they might be useful for, the screw that holds the two parts together is too short for attaching it to the pole, so save that as well.

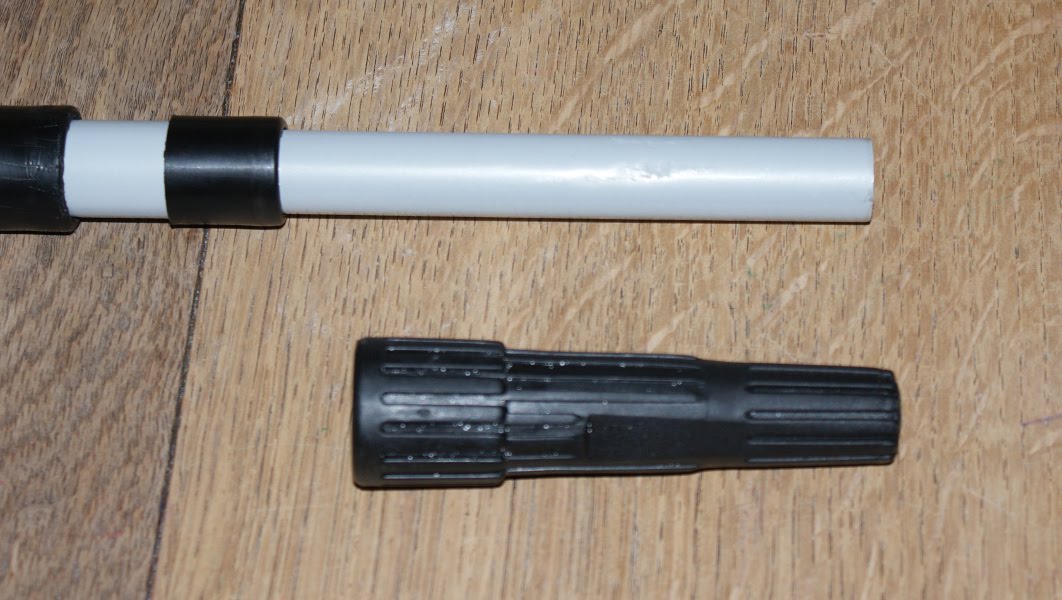
Next you need to remove the end from the pole, this might require a couple of taps with something, but should come off quite easily.

The end of the pole - 

Pole with end removed.

Attaching the camera mount to the pole is easy really, it's just a case of finding a screw that will go through the end of the pole and into the end of the mini tripod.
I found that I had to add a small nut and washer to attach the end to the pole, just to act as a couple of spacers, I also used a spring washer to make sure it kept nice and secure.

The parts -
The bits n bobs.

As it turns out the end of the pole fitted into the section of the mini tripod, but you might have to cut some plastic to get yours to fit.
Here's a picture of the end of the decorators pole, it had a hole in the end, so I had to use a slightly larger washer, otherwise it wouldn't have worked.

The end of the pole - 

Why the parts were needed.
Here's the tripod end attached - 

Nearly done.
Finished article -

All done.

The good thing about this mono pod is that it's light,cheap and using the type of mini tripod I used I can change the orientation of the camera for portrait type shots.

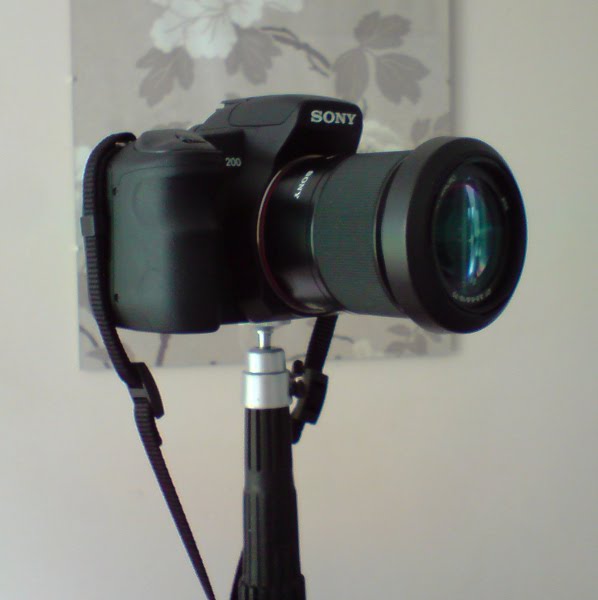
Here's a picture with the camera we use attached, I didn't take a picture of it in portrait mode, but you get the idea, and you can always use a bit of spray paint to change the colour.

With camera -
Ta da !
Thanks for reading.