Showing posts with label wood turning. Show all posts

Saturday, 11 October 2025

Barometer renovation...

There was a time when households would have had a barometer hanging on the wall as a way to tell what the weather might do on any given day, they were also used to forecast the weather as well, in reality a lot of the barometers that were available to buy were I guess treated like a gimmick, perhaps as something one might buy if you had the money, not particularly accurate compared to the instruments used by weather forecasters, but never the less they were interesting things to own.

Most of the barometers I have renovated and repaired have been aneroid barometers, these types of barometers were invented around 1844 by a French scientist called Lucien Vidi, and whilst the movements are largely the same the cases were very varied, often wooden, but sometimes in stone, such as slate, serpentine and marble, some had wrought iron cases (which is what I call them) below is an image taken from a catalogue that dates to around 1950(ish) and although the images are black and white you can get an idea of the variety that were available.

A small selection of what was available - 


Below is a video in which I make a new case for a barometer I purchased, I think it's a better fit for the style of barometer, and I'm pleased with the overall result, including reusing wood from an old pub table and stool set that was destined for the bin, part way through the video is an image of another barometer I renovated, although all that one needed was a refresh to the teak case.


Video -


They are interesting things to own and as the variety of styles is... varied there is something to suit most tastes, and in the case of the one in the video if you have the tools you can make your own case.

Thanks for visiting.

Saturday, 10 December 2016

Hanging bowls for plants...

It is safe to say that we like plants, in fact of the nine windowsills we have in the house only one of them doesn't haven't any type of plant on it, and that's because it's full of books instead.

My wife has been collecting cacti and succulents for a year or two, and we've always had house plants of various sorts, but the cacti have kind of taken over, so much so that I've been making hanging bowls for them to live in.

Like this -

This was the first one I made.
This one was kind of an experiment mainly to see how I might go about constructing such a thing, it works well and can hold about three small pots (three 7cm pots) it also has a plastic drip tray in it to catch any extra water and protect the wood.

I have since been making smaller ones for single plants, the big one was made using small lengths of cls timber glued together and turned into a bowl, the cost of the wood was about £3.90, the smaller ones are made from Leylandi logs.

This is how the large one started out - 

Lots of glue needed.

Basically once the glue had set I roughly turned the larger and small blocks and then stuck those together, and then turned the final shape.

During turning - 

I applied some stain while it was still on the lathe.

As I've used a similar method to make the large bowl and the smaller ones from here on the pictures are of the smaller ones (because I forgot to take pictures of the larger one being made) the smaller ones were easier to make as I didn't have to glue blocks of wood together.

So once I'd hollowed the log I tested to make sure a small drip tray would fit into it, you could use a polyurethane type varnish or water proofer on the inside to protect the wood, but I just went with a drip tray, it's simple and it works

Checking the drip tray fits - 

It fits.

Next thing is to make the holes for the string (you could use chain of some kind) so you can hang the bowl, to do this I used three small clamps placed around the bowl roughly the same distance apart, I placed the clamps on a pencil line I'd made that was about half an inch down from the edge of the bowl.

Like so - 

Roughly the same space between each clamp.

Drilling points marked - 

Next up some drilling.

I've used small eyelets in each hole for decoration, and to make sure I drilled the right sized hole to make the eyelets fit tightly into the wood I used a small forstner bit.

Eyelets and forstner bit - 

It's just about the right size for the eyelets.

Holes drilled - 

Now to finish the bowl.

Once I'd drilled the holes I gave the bowl a sand to get rid of the pencil marks and then flipped it round so that I could shape the bottom, I fitted the eyelets once I've sanded and waxed the bowl.

Bowl done - 

I'm calling it 'Rustic finishing'

I haven't finished the bowl as finely as I would normally as I wanted a slightly rougher look, I used a clear wax on the smaller bowls, but there's no reason you couldn't stain them, use a wood dye, or even if you're feeling adventurous add a different type of wood for the shaped part for a two tone effect.

To get the bowl to hang I've used braided jute string, again keeping with the slightly rustic look, but you can get some nice decorative chain from a lot of diy shops and I'm thinking that I may use chain of some kind on the next one I make.

Once I'd braided the string I tied each piece to a small brass curtain ring - 

Perfect for a hook or a nail.

I tied small knots in the other ends of the string and then threaded each one through the eyelets I'd fitted to the bowl, and used a small piece of garden wire to make sure the string doesn't pull out.

Like this - 

A simple solution.

And there you have it, one hanging bowl ready for a plant - 

The first of many I feel.

Plants that have a tendency to hang are better suited to these types of bowl, but there's no reason why you can't put any other type of plant in one, I have made three of the smaller bowls so far and my wife really likes them so much so that I plan to make a few more, and maybe a couple of the larger ones.

They do look good with plants in - 

I'll have to make one for the monkey tail in the plastic pot.

If you don't have access to a lathe why not convert a wooden bowl of some kind, whilst I was researching hanging bowls I found a few tutorials where people had converted wooden bowls into hanging bowls for plants, all you need is a drill and some string.

Thanks for reading.


Thursday, 22 September 2016

I've been making tealight holders again...

It's well known that I will attempt to turn any old bit of wood I can mount on my lathe, recently I turned a couple of bits of pallet (there's a surprise) into tealight holders.

Here they are (all fourteen of them) -

Rustic.
As you can see they have cracks and nail holes and various other faults, some people like this kind of 'character' others don't but each to there own and I guess that's my point when it comes to turning.

I've been turning for a while and I've come across a certain shall we say snobbery when it comes to wood and turning, there are a lot of people who'll only turn stuff bought in as blanks, and then only certain types of wood, usually the more decorative stuff, like Zebra wood or Bubinga.

But I say all wood (no matter how depressed) deserves a chance, and I think that even the roughest piece of wood can look great if treated with a bit of care.

So here is what the tealights looked like before I started - 

Not the best pieces of wood in the world.

This a good starter project if you've just started turning, all I did was measure the width of the wood, and then measure out lengths the same size as the width, which gave me cubes of wood to work with, and I then marked the centre of each cube.

Wood marked, ready for cutting - 

You can just about make out the marks.

Once I'd cut all my blocks (I had fourteen to play with in the end) it was on to drilling out a hole so I could mount them onto my chuck.

Blocks cut and marked - 

More of the faults are visible after cutting.
Now on to mounting the blocks for turning, if you have an expanding chuck this is easy, using a 35mm forstner bit I cut out a small hole in each block, and then it's just a matter of sticking the block onto the jaws and tightening the chuck, you could also use a small screw chuck.

Mounting hole - 

Time to turn.

Block on the lathe ready for turning - 

Nice large crack bit of character in this one.

Now before I start turning I should point out that I've left the hole in the bottom of each tealight and turned out another hole for the actual candle, you could however just use a forstner bit or a spade bit and make a hole large enough for a tealight (around 40mm) and use that to mount the block, but sometimes I like to leave the mounting holes and such like on a piece, again this is something some people frown upon. 

And rather than leave just a hole in the bottom of each tealight holder I've turned a small three ringed detail into each one, I started adding three concentric rings to things I'd turned years ago for no other reason than it seemed like a good idea and now it's kind of stuck, and so I try to incorporate three concentric rings into every thing I turn where possible.

Here's a before and after type picture of a block and a finished tealight holder - 

I think they look good.

And here's another picture of the finished tealights again, the reason (in case you are wondering) why two are different from the rest is because one piece of wood split and a chunk came out and there wasn't enough wood left to turn a ball shape, so I made two straight ones, the perils of using gnarly bits of wood.

All done - 

Shiny.
And before I go here's a picture of a pen pot I made for my wife, from the top part of an old newel post, all I need to do now is figure out what to do with the rest of it.

Pen pot - 

It works well as a pen pot.

Any ideas ? - 

I have a few ideas.
Lastly here a short video of me making a tealight holder, some parts are sped up - 


Thanks for reading.

Sunday, 25 October 2015

Smelly wooden pumpkins...

It's that time of year when I'm left with less to do gardening wise at least, the allotment has wound down, the garden as well, I do have a load of jobs to do over the winter in the garden in the shape of some trellis for training fruit trees and other plants, I also plan to build a seated arbour for the bottom of the garden, but as for growing things, not much is going on so I'm now working through some of the other things I've been wanting to do, one of which is make some wooden pumpkins for Halloween.

To be honest I'm not sure they are very pumpkin like, but they look okay and they have the added bonus of being smelly, I shall explain.

The pumpkins -

Pumpkin ish ?

I made them from an old fence post, I haven't finished them as well as I usually do, as I was trying to retain a kind of rough / rustic sort of look, they were easy enough to make.

I took an old fence post and cut some blocks from it - 


Blocks cut and centres marked.

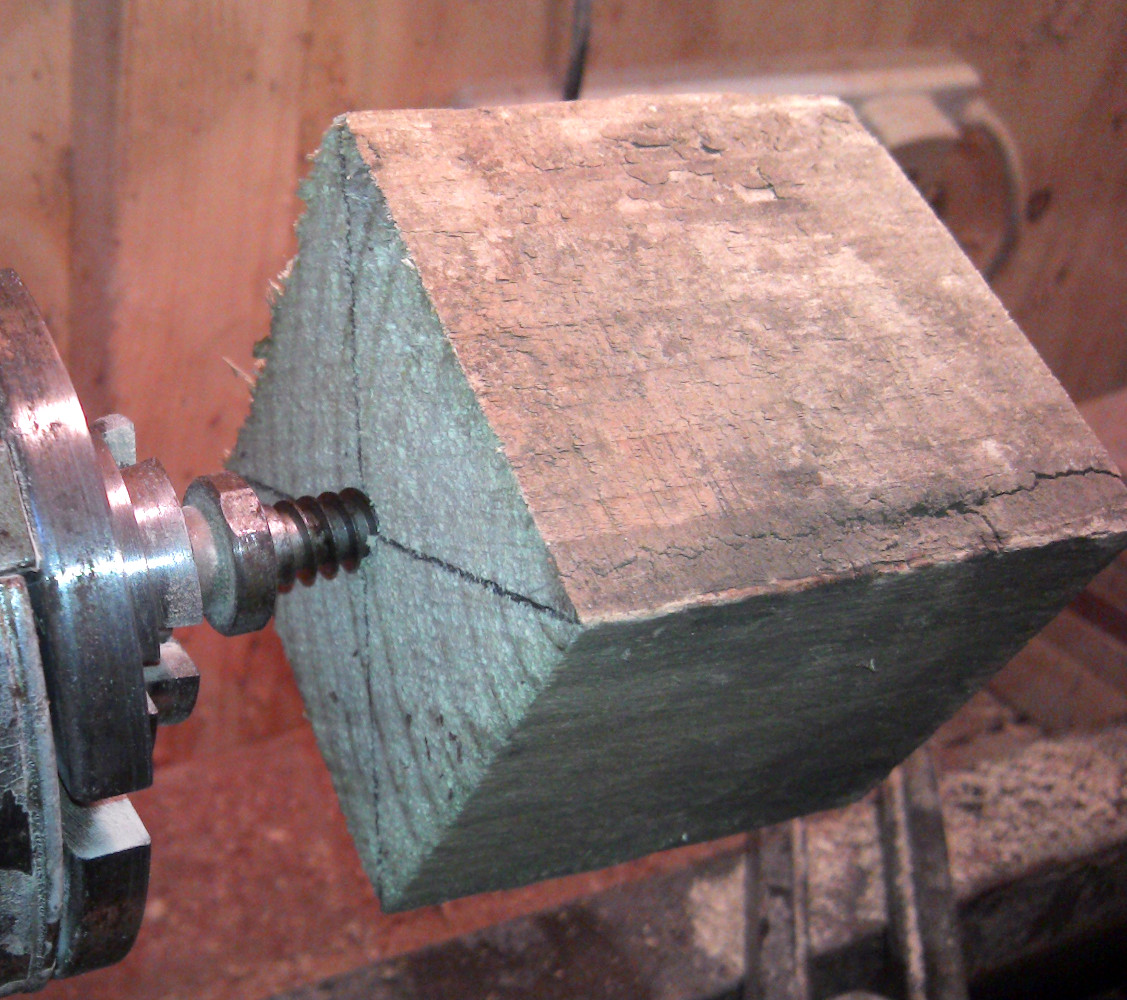
I drilled a hole in the centre for mounting onto my lathe using a woodworm screw - 


Ready for the lathe.

Block mounted and ready for turning - 


These are rough and ready pumpkins.

As you can see I haven't taken too much care, and to be honest the wood wasn't great but didn't cause any major problems.

After a minute or two of turning - 


Sort of pumpkin shaped ?

After a bit more turning and a bit of a sand - 


Ready for a bit of detail.

At this point it kind of looks like an onion, to make the lines that pumpkins have I used a couple of needle files to make some grooves into the wood, I did try using my multi-tool with a small sanding drum on it, but I thought the grooves where too wide, you can tell which one it is in the picture at the top of this post, after I'd made the grooves I used a bit of sand paper to smooth things out a bit.

Needle files - 

Easy to use and cheap to buy.

Grooves started - 

Slightly less like an onion ?

Grooves done - 

Almost done.

Once I'd done the main part of the pumpkin I gave it a quick coat of Teak oil and then it was onto the stalk, to make this I raided my supply of random sticks and twigs, I chose some twisted willow as this looked more stalk like.

Stick chosen - 

Just needs a bit of trimming.

I cut the stick where it branched off into two parts, then trimmed it a bit, the next thing to do was sand one end of the stick so that it made a kind of stopper shape, this I figured was an easy way to hide the hole that was left from mounting the wood on the lathe.

Trimmed - 

One stalk.

Sanded and now ready to be a stopper - 


Just needs stuffing into the pumpkin.

Pumpkin done - 

One pumpkin ish pumpkin.

The reason I chose to make a stopper is because this wood is quite soft (it's Pine) it soaks things up quite well, especially oil, so I figured that they'd make interesting air fresheners, the idea is that the hole that I used to mount the wood on the lathe becomes a reservoir for the oil and it slowly soaks into the wood and the stopper stops it spilling, it also soaks some of the oil up, kind of like a wick and there you have it, smelly pumpkins, I used Lavender oil, but any essential oil would work, and after a while you can change the oil for  a different flavour.

In the end I made three pumpkins and filled them all with way too much oil and stunk the living room out, but everyone in the house likes Lavender so all was good and it was a better use for an old bit of fence post than the fire.


Smelly wooden pumpkins, what more could you want ?

Thanks for reading.


Wednesday, 21 October 2015

Bowls from pallets (and a bit of scrap wood)

Now that the weather has turned a bit colder (and wetter) I've been experimenting with various wood turning projects I have wanted to try for a while.

Having seen similar things online I decided I'd have a go at making some bowls from some scrap bits of wood, in this case the scrap wood is bits of pallet, and some old lengths of pine (the sort of thing used for stud work) I mainly used the pine as a filler for the pallet wood (which is a type of gum) because I didn't have that much of it.

Here are the bowls I've made so far -

They turned out good.
These are quite large bowls (about 30cm across) and about as big as I can turn with my current lathe, they take a bit of prep work to make in the form of gluing the wood together, but they do have a nice look to them once turned and given a good coat of oil (Danish oil in this case)

To make them all I've done is take a load of wooden planks and glue them together, by arranging the wood in different ways you can create some interesting patterns in the finished piece, although these bowls are pretty simple compared to other segmented items I've seen.

Cut your planks to roughly the same size, and try to get an equal sized square, so if your planks are 20cm long then arrange enough planks to give you a finished block of 20cm by 20cm, it's best if you can use the same width of plank, but if some are a bit bigger than others its not a problem.

My planks arranged in a way I was happy with - 

I marked each bit so I could remember which way up they needed to be.

You can see the wood isn't all the same thickness, but by lying them all on a flat surface I was able to create a nice flat face, which helped when it can to mounting the face plate for turning, I've also tried to get the grain of each bit of wood arranged in a more or less symmetrical way, it's easier to see in the turned bowl.

Now onto gluing, I glued each piece together and made sure that each bit of wood was nicely coated with glue, I used a paint brush to apply the glue, I'm using a good quality wood glue for this to make sure it's all stuck together, really don't want it falling apart when I turn it, big chunks of wood at high speed, not great.

Once I'd glued all the pieces and stacked them it was time to add some clamps, the more the merrier to be honest, I clamped the wood together as tightly as possible, I put a clamp on each corner and used a ratchet strap for the middle as I only have four of these clamps.

Wood clamped - 

Just go to wait for the glue to go off.

Although this glue takes about 24 / 48 hours to set fully I waited a week before removing the clamps to make sure that all the glue had set.


Once the glue was set taking the now solid block of wood I marked it out to find the centre and using a make shift compass I marked a circle onto the block making it as large as possible, this way I figured I'd have guide so I could see how much wood to take off before it was round, the idea being that I could take off the bare minimum and keep the bowl quite large.

Centre marked out - 

Quick and easy compass, just a flat bit of wood with a few holes.

Face plate mounted, one more thing to do before turning - 

More or less centred.

To save a bit of time I cut some corners - 

Not the best picture, but you get the idea.

On to turning, didn't take long to get it to this state - 

Bit of a sand and this side is done.

Slight oversight on my part, bit of wood missing, but left it as it is, we'll go for the rustic look -

It adds to the character.

Now for the inside, I'd turned a recess so that I could mount the bowl on my expanding chuck -

Looks like a bowl, so that's good.

And here's the bowl after some sanding and a bit of an oiling - 

Bit more oil and it's done.

Hopefully you can see what I mean about arranging the wood so that the different grains make different patterns, the other thing I like about these bowls is that I can make them using one tool, I've made three so far and for each bowl I've only used one of my Oland tools to make them all.

Okay so they aren't fancy bowls, but they are very sturdy and not bad to look at, they make great fruit bowls and I'm quite happy with them, considering it was a bit of an experiment I think it worked out okay, which is not always the case for some of the ideas I have.


The three bowls - 
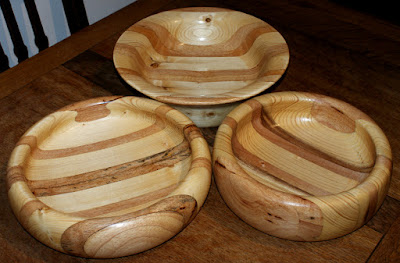
Better than chucking the wood on the bonfire.


Thanks for reading.

Thursday, 13 November 2014

Treen,well sort of...

Although it's been a bit colder of late I've been messing about in my shed again,there's not much going on at the allotment,I do have a few jobs to get done before spring so this time of year I normally focus on making stuff for the shop,or just general experimenting.

We watch a load of antiques related tv in this house,we have a load of antiques related books and a fair few antique/vintage items (our front room looks like something from the 1950's) if you've ever watched any antiques related tv you may well have come across stuff known as Treen.

I quite like Treen,it basically means things made from trees (wood) and usually they have a purpose,which is probably what I like about it,so to that end I thought I'd have a go at making something similar to an item I saw on tv,it's a sewing case,and although it's not antique I guess it could be classed as Treen (it's made from wood after all)


Sewing case -

Doesn't look like much.

It's pretty normal from the outside,the main part is made from Walnut,but here's where the function comes in,it's the bit on the inside that's interesting.

As with most pieces of Treen this has a function,on the inside is a second smaller case,one that holds needles and pins and also cotton,you need cotton or some kind of thread if you want to sew stuff.


The inside case -


Makes more sense now?
Basically the inside part is a small case with what look sort of like a load of bobbins stuck together,this is where the thread goes,the needles and pins go inside it,and it has a little stopper in the top to stop things falling out,the inner case is made from Beech.


Like so -


Have thread will sew.

Like I said it is pretty simple,it's useful although not as refined as a bit of antique Treen,but I think it's quite good and it's useful,not very big,about 15cm long and about 4cm wide so would easily fit in a bag,perfect for any on the spot repairs.

Another thing I've been working on is small bowls made from Silver Birch,these are quite troublesome due to the state of the wood,but so far they seem to be turning out okay,I've recently sold one that was given as a birthday present,despite the work it came out quite nice,I've got some more in various stages of completion,which will go in the shop eventually.


Here's the bowl -


It came out well.

Thanks for reading.


Homemade Thursday