Wednesday, 26 March 2014

Headband holder ... ...

My daughter is always losing her things,specifically her headbands,she has quite a few of them,and she often gets annoyed that she can't find the right one for that particular day.

I always say to her that she should put them some where in her room,where she'll be able to find them again,but she doesn't always remember,so I made her a place for her headbands to live when they aren't on her head.


Here it is -


Not much to it really.

I did look online at various headband holder type things,they mostly seemed to be made from round things,like cardboard tubes,and I didn't have anything that would do,so I made this,it's basically a bit of wood with a rail on it that she can hook the headbands onto.

I also put a peg on so that she can hang her necklaces and bracelets on,as she often loses those as well (despite having numerous jewellery boxes) It's all made from a piece of match board (thin tongue and groove) apart from the peg,that's just a bit of 9mm dowel.

The flower was cut from a scrap bit of wood,and then I painted it to make it look a little nicer,and it adds a bit of colour to the whole thing,once the paint was dry I stuck it to the holder with a bit of glue.


Flower - 

Vaguely flower like.

The peg was also glued into place,I drilled a hole into the wood at and angle so the peg will point upwards,this helps stop things from sliding off.


Peg - 


Just enough room for a few trinkets.

The part that holds the headbands is made by sticking a couple of small squares of wood to a thin strip,which creates a kind of 'c' shape this is then fixed with of a few small nails and a bit of glue to the holder.

Here's a picture that shows how the rail sits away from the back board to create a gap that the ends of the headbands can fit into.


The rail - 


Simple really.
 

To hang the holder on the door I used four small hooks,two I fixed into the holder at each end,the other two I fixed into the door where the holder now hangs,it's light and doesn't need strong fixings.


And here it is hanging in it's new home - 


It works,and it's out of the way,so it shouldn't get knocked.

The whole thing cost no more than about £2, and now my daughter knows where her headbands are when she needs them.


Thanks for reading.


Thursday, 20 March 2014

Hoover cannon ...

For some time I've wanted to make a hoover cannon, and show the kids on some level at least a little bit about air pressure, a hoover cannon is great for this because they're fun and easy to make.

We actually made three different cannons, from stuff we had lying about the house, two are made from various bits of plastic pipe, and the third we made out of cardboard, which I have to be honest I didn't think was going to work.


Here they are -


Easy enough to make, especially the large white one.

They are all built the same way, a large tube for the projectile and a smaller tube to connect the hoover to, the bit on the end is basically a valve (it needs some tweaking as you'll see from the video) you don't need to make a valve, a bit of paper on the end is enough to achieve the same result.

As you can see the largest cannon is made from plastic pipe, with a fitting, it's all push together, so there's no gluing needed, I had the pipe already, and the fitting cost me about £2.00, the other two cannons are held together with black insulation tape, all I did was to cut a hole in the main tube to allow the air to flow, and that's about it.


Plenty of tape is best - 


The tape helps stop leaks as well as hold it all together.

The valve (burst disc) is a piece of thin plastic taped to a bit of thin plywood, which I cut a hole in and then glued to the end of each cannon, obviously there are three different sized ones, but they all work the same way, that being to seal the hole and then move when the projectile hits them.


The valve (burst disc) - 


The clear plastic is from the front of a box a toy came in.

We made a few different projectiles to fit the various cannons we also tried making them heavier to see if that affected how far they went, you can use various different things, tin foil screwed into a ball, old film cases, the plastic things from kinder eggs, wood, basically anything that will fit down the tube without getting stuck.


Some of our projectiles - 


I wrote on them so we could remember what weights we had.

Here's a simple diagram of how it all works, but there are numerous articles online on how to make these, and how they work, and there is a supersonic version of this that fires a ping pong ball at mach 1.2 (about 912 mph)


Diagram - 


A simple diagram.

Plastic tube is best, but you can use cardboard tubes as long as they are very strong ones, the sort that tin foil or cling film comes on, or the tubes you can get to post posters and the like, toilet rolls probably won't work. 


Here's a video of ours in action, you can see I need to work on the valve / burst disc set up, they weren't meant to fly off the ends of the cannons, and we should have really added some kind of trigger set up to make it easier to load and fire the cannons, we may make  changes to them at a later date.


Cannons in action - 


Thanks for watching.


Tuesday, 4 March 2014

Swing out tool holders ...

Spring is almost here, and in a bid to get more organised, and while I'm decorating and waiting for the weather to warm up a little so I can get some gardening done I decided to try and sort some of my tools into a more orderly fashion.

For some time I've had my small files amongst other things in old cups, which to be honest isn't the best way to keep them, especially when it comes to finding a specific thing, but I found a better solution on Pinterest of all places.


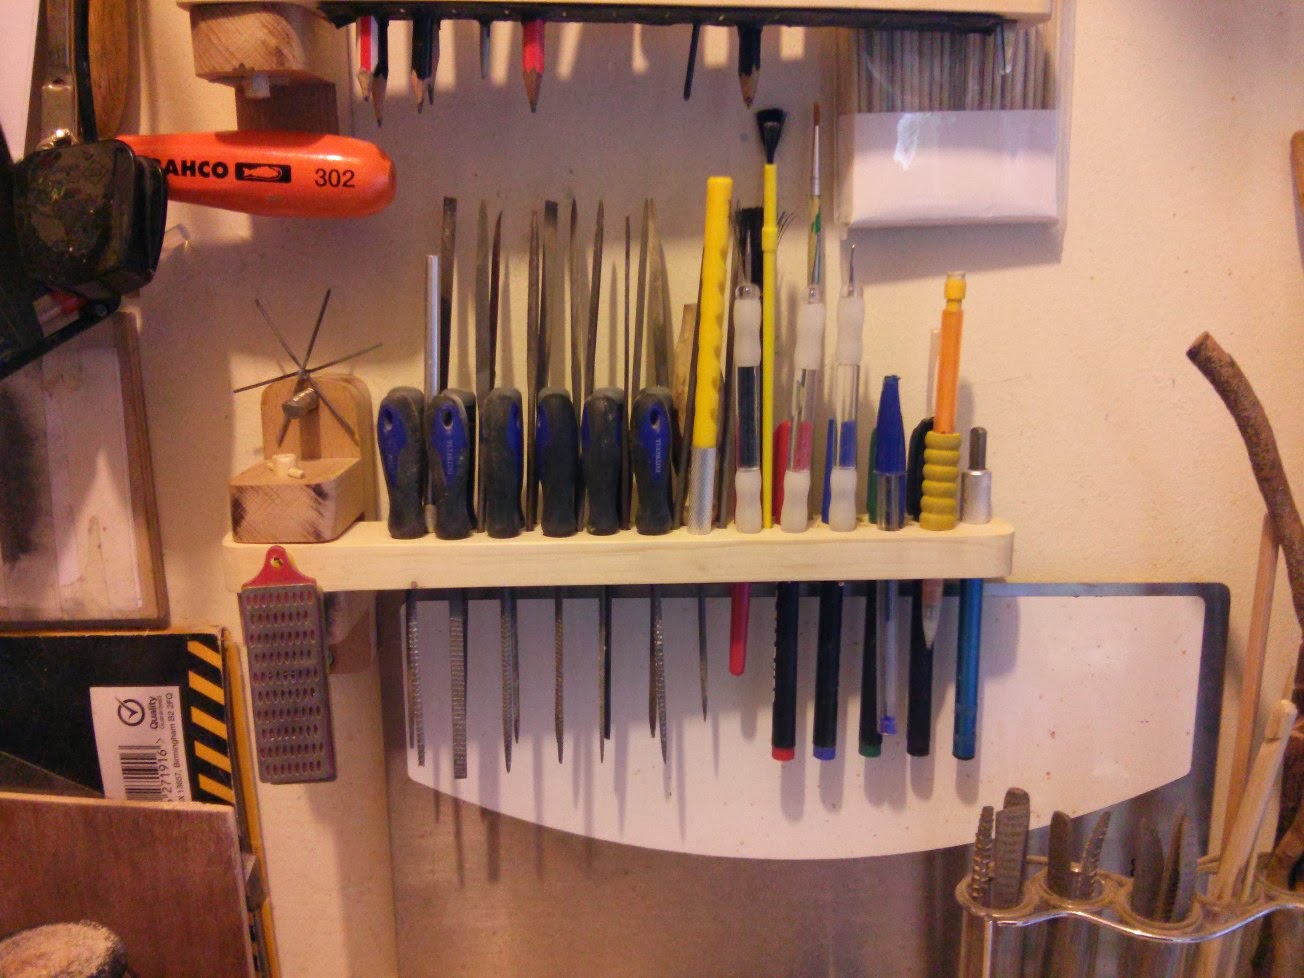
And here is the better solution -


Made from scrap bits of wood.


These are slightly different from the ones I saw on Pinterest, firstly the hinge is all wood, even the pivot, the others used a bolt, after having a quick look I couldn't find any that would do, so I just used a bit of 9mm dowel and put a couple of pegs in either end to stop it all falling apart, it's handy because I've been experimenting with wooden hinges of different designs, and these are kind of a prototype for another project I'm working on.


A close up of the hinge section - 


Pictures a bit fuzzy, but you get the idea.


And another picture - 


A simple hinge, using dowel and a peg.


The other change I made is the holes for my various tools, as an example some of the small files I use from time to time don't have handles, and as such they would fall through some of the larger holes, and the same can be said for pencils and pens and other things, so I came up with a way to hold items of different sizes, using a piece of old inner tube.


All I did was to drill a series of holes all the same size in one of the holders, and on the under side of it I stapled a bit of inner tube, then I just made a series of small holes in the inner tube that correspond to the holes in the wood.


Like so - 


I could have made a neater job of it to be honest.


The idea is that when I stick a pencil or pen (or other item) into the holder the inner tube grips it and stops it from falling through the holder, and because the inner tube is rubber it will stretch to different sizes meaning I can put different sized things into the holder with out having to worry about it falling out.


Kind of like this - 


You can see where the inner tube has stretched around the pencil.

And that's about it, I now have more organised tools, and because the holders are hinged I can just move them around to get at the tools at the back, I'm also thinking of adding a small lamp to one of them so I can get better lighting when I'm doing small jobs, fixing them to the wall is easy enough, a couple of screws does the job.


Here they are all ready in use -


Makes for a more productive work space.


Here's a quick look at a small wooden box I made that has wooden hinges on the lid, making the hinges out of wood allows for some creativity because lets face it sometimes hinges can be a bit boring, not that these are exciting, but as I said I'm still experimenting.


Wooden box with wooden hinges - 


Not much to say really, it's a box.

Thanks for reading.


Wednesday, 5 February 2014

Recovering office chair arms ...

I've recently acquired a new office chair, not that I needed one, basically my daughter was after an office chair for her new place, so she'd been looking on freecycle, and she found one that would do, only they had two on offer, so she had to take both of them.

They were both a bit damaged, she has since recovered hers in a fabric she liked, which she got for £8, and she's got some fabric left over for other things, the only thing wrong with the chair I now have is the arm pads were a bit worn, which as it turns out was an easy fix.

The thing that struck me was how easy people throw things away these days, it seems that no one stops to consider if a thing can be fixed before they throw it out, maybe it's just a difference in thinking, but if something in our house breaks the first thing we do is work out if it can be fixed, and then if it can't we try to recycle it in some way, maybe that's part of it, perhaps people lack the confidence or the practical skills to try and fix things ? but you would think with everyone having to tighten their belts that more people would be trying to fix things and save a few pounds.

As an example a few months ago my sons nintendo 3ds started playing up, the left and right buttons wouldn't work properly, the cost of a new console is about £100, which was more than we had at the time, but as it turns out it's easy to replace those buttons, and it cost about £8.50 for new ones, I wonder how many people would have written it off before they thought about fixing it.

It cost nothing for me to fix the chairs arm pads, I found out that they un-screwed from the chair and it was easy to recover them, here's how.


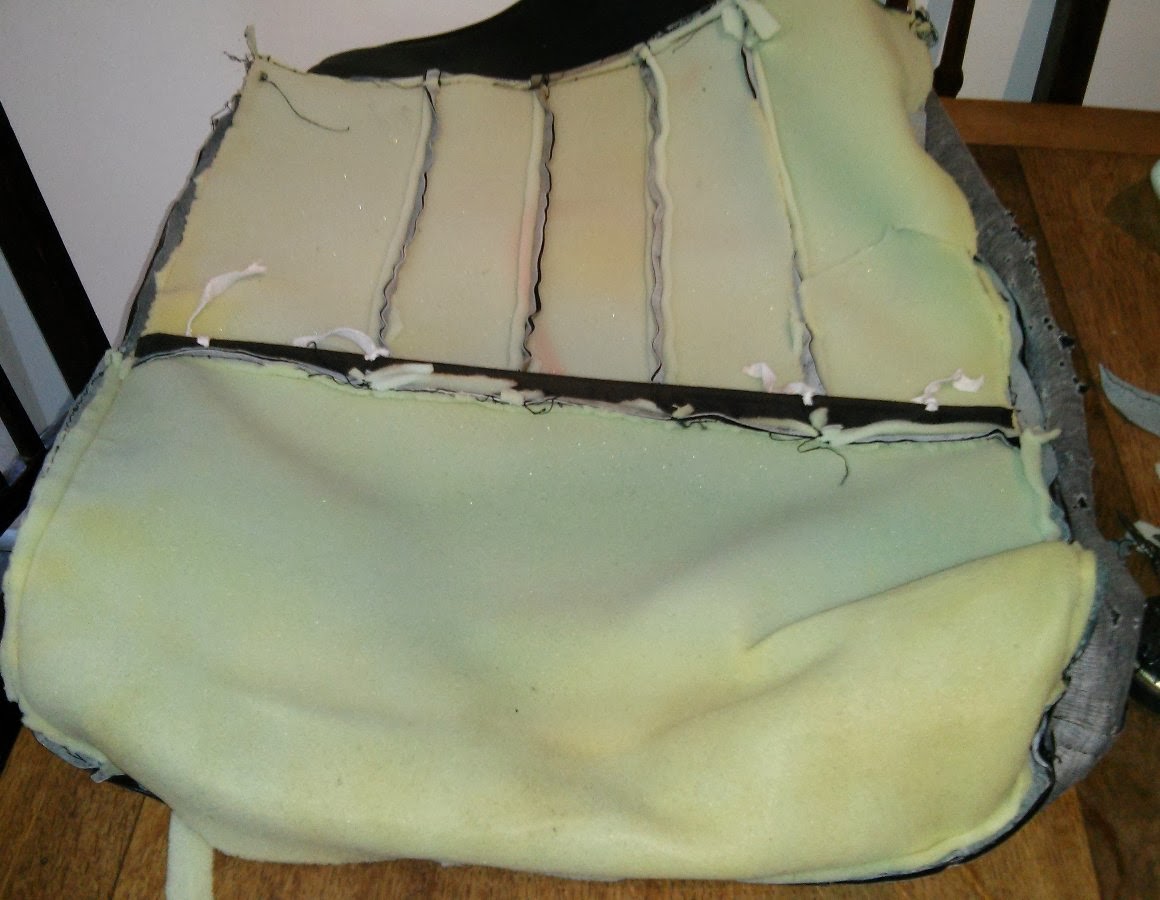
One of the arm pads before covering -


Quite worn.

I found that the material was stapled onto the plastic arm, with a bit of foam padding, so I removed the staples and then took off the old material.


The staples - 


Easily removed.

Using a pair of snips I pulled out all the staples and then got rid of the worn material, but I kept the foam padding.

I used a magnet from a an old speaker to keep the old staples in one place, I do this when I'm taking things apart as well, saves trying to find dropped screws.


Staples all in one place -


Better here than stuck in some ones foot.


The arm with foam padding -


Not too bad.

On to the covering, the old covering was some kind of mock leather type stuff, I could have used just about anything to re-cover the arm pads, but as I had some old covers from a previous office chair I went with leather.


The old cover (complete with foam) - 


Some might call me a hoarder of objects that might come in handy.

After finding a bit of the old cover that was big enough to cover the arm pads I unpicked the stitches to remove it from the cover, mainly to make it easier to deal with, and because I wanted to save as much of it as possible.


Enough material to cover both arm pads - 


I kept the foam for extra padding.

Once I'd cut the material in half so that I had two bits, one for each arm pad I set about fixing it down, to do this I used a staple gun and basically just stapled it back down, I could have glued the material down, but stapling was quicker.


Fixing started - 


Few more staples and it's done.


I had to cut some bits of material to make way for the bolt holes that hold the arm pad to the arm, and just to make sure the staples were well into the plastic I gave them a tap with a pin hammer. I wasn't too careful with folding the corners in as the arm pad fits into the chair arm and the ends are covered.


Cut outs for the bolt holes - 


The bolts also help to hold the material down.


One arm pad done, just need to fix it back onto the chair - 


Simple really.

All done - 


Looks almost new.

And that's it really, it took me about 45 minutes to do both arm pads, and I'm really not that good with upholstering things, so If I can do it so can you, and if your office chair is starting to little worn, why not try to spruce it up a bit before you chuck it, this isn't the first time I've fixed an office chair, the arms on my last one broke, so I made some new ones from wood - Wooden office chair arms (opens in a new window)

Thanks for reading.


Saturday, 28 December 2013

Stocking filler toys part 2 - Tower of Hanoi puzzle ...

'I meant to get this post out before Christmas, but I ran out of time, where does it all go ?'

This is another of the stocking fillers I've made for the kids, they both seem to like puzzles, they found a version of this puzzle on a maths website they use, so I thought I'd make them a physical version of it.

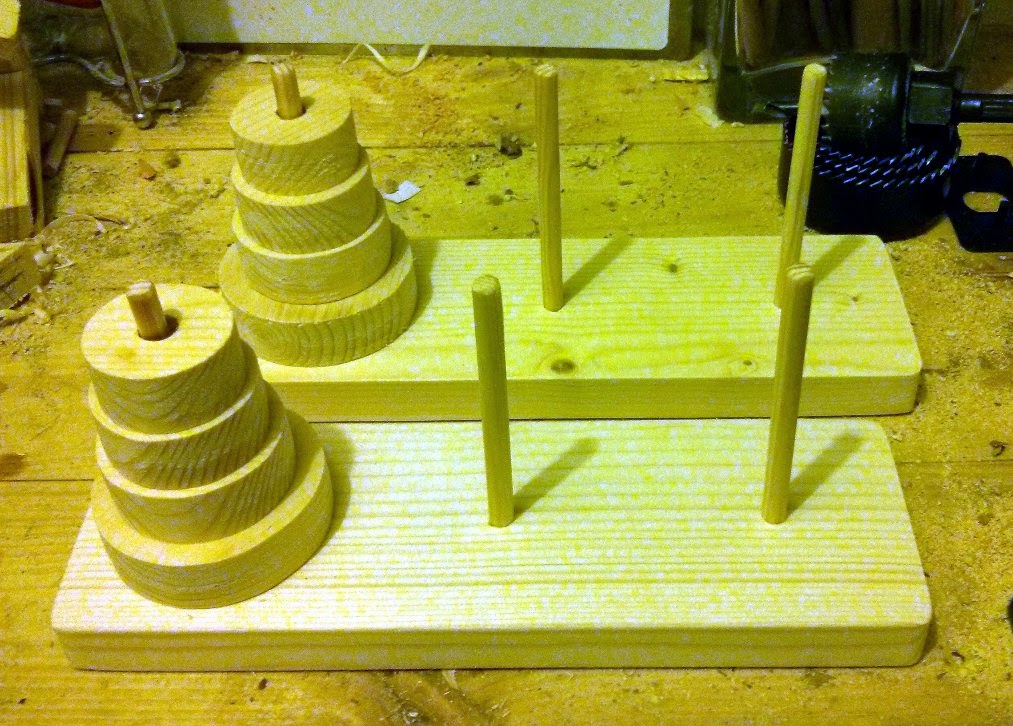
The Tower of Hanoi is a mathematical puzzle, the idea is you move a series of different sized discs from one side of the board to another, you can only move one disc at a time and you can't place a larger disc on a smaller disc, they vary in complexity, basically the more discs there are the harder it is to solve.


Here are the finished games -


I stuck to four discs.

These are very easy to make, especially if you have a set of hole saws, but basically you'll need a piece of wood, mine is 7cm wide by 22cm long, some dowel, I've used 9mm dowel, and for the discs I just used offcuts I had lying about.

Divide the base into three parts, as mine was 22cm long this worked out at 7.3cm, and mark the wood at each point, you should now have three squares marked out.


Squares marked out - 


Next we need to find the centre of each square.

Next we need to mark where the three pegs will go, these will be in the centre of each square, now remember to leave enough room between the pegs for your largest disc, as mine was 6.4cm (64mm) and I'd divided the wood into three 7.3cm wide squares I had enough room.

To find the centre of each square is just a matter of drawing lines from corner to corner, this should give you the centre.


Centres marked - 


Needs drilling next.


For the pegs I cut 6 lengths of 9mm dowel to 10cm and then I drilled out the base to about half way through, the pegs are long enough to allow for the thickness of the discs and for about 5mm to be glued into the base.


The discs themselves I just cut out with my hole saws, hole saws are handy for this because most sets will have a variety of sizes, so it's easy to make a set of discs that start large and then get smaller.


Discs cut out - 


They need sanding.

All sanded up, just need a bit of colour - 


Apologies for the terrible picture.

And that's about it, not much else to this really, I painted the discs in different colours, again using the water based enamel paint I've used on various other projects, the total cost for both of these is no more than £4, although I made these from scrap bits of wood, so technically they cost nothing.


Finished Tower of Hanoi games - 


Puzzling.

I've also made them both a large wooden dice, this was just a bit of fence post I cut into a cube shape, sanded and then marked with the numbers a dice has on it, the bit of fence post I made them from cost 50 pence, they are always looking for dice to use in the games they make up, and these aren't so easy to lose as normal sized dice.


The dice - 


Not as hard to lose as normal dice.


I have also made the kids their own flat pack bird box kits, for them to assemble themselves, but that's for another post.


Thanks for reading.


Sunday, 22 December 2013

Stocking filler toys part 1 - Mini ring toss game ...

For a few years now my wife and I have tried to make a few things as stocking fillers for the kids, last year I made them three toys each on my lathe, I made two spinning tops that work differently and a cup and ball toy, part of making them was that we as home educators try to show the kids how things used to be, and to that end we watch a lot of history based programs.

Last year the kids had seen the sort of toys that Victorian children might have played with, and in making them some of their own they'd get a more hands on feel for what the toys of olden days would have been like, and besides some nice sturdy wooden toys have to better than some of the plastic stuff you can get these days.


Here are the things I made the kids last year -


All easy to make, and fun to play with.


This year I decided that it would be better to make something different, rather than just turn a load of spinning tops or something, so I took inspiration from the kids themselves for this particular toy, which is a mini ring toss game.

It came about as the kids were watching a program about Tudor farming, and in one of the episodes there was a celebration and amongst the various things going on there were some people playing a ring toss game, the next day the kids made their own ring toss game using some of my daughters bangles, and I though I'd make them a more permanent set.


Here they are (I made one each) - 


Really easy to make.

These are very easy to make, and in this case all I bought was some natural rope at a cost of £3 for three metres, you can use plastic tubing, or any other type of cord or rope, the wood I had lying about.

Basically what you need to do is make a cross from two bits of wood, then add some pegs (I used some dowel) for the rings to catch onto, the rings are made from rope and held together with a bit of plastic tube, which I then painted with quick drying enamel paint (great stuff)

To make the cross take two bits of wood (mine are about 8 inches long / 22cm or there about) and mark the centre on one, then measure the thickness of the second piece and then mark that measurement out on either side of the first piece of wood.


You should have something like this - 


Now to transfer the marks.

To transfer the marks onto the other piece of wood use a square - 


Both pieces marked out.


Next you need to mark the depth to which you need to cut out so that the two bits of wood will fit into each other, this is about half the thickness of each bit of wood.


Depth marked out - 


Depth marked out, just needs cutting.

Once you've marked out and cut the wood to the right depth both pieces should fit into each other, I made mine so they fix together using the centre peg, this means they can be packed away easily.


Cut outs, and pegs added - 


Almost done.

The pegs are just stuck into the holes I drilled into the wood, I was using 9mm dowel, and the holes I drilled are about 8.5mm so the dowels are nice and tight, no glue needed, the centre peg fixes the two halves together, I made each peg about 3 inches long (about 7cm) I measured in about 1 inch (2cm) from each end for the outside pegs, the middle peg is an equal distance between the other pegs.


Two halves with pegs added - 


Basic wood working really.


Assembly is just a case of slotting the two halves together -


Just needs some numbers for scoring.

The rings are made from lengths of rope joined with a bit of plastic tubing, now because I used natural rope I had some trouble with the ends fraying, so to get round this I used super glue on the rope before I cut it into lengths.

By adding some glue to the rope it kind of plasticises it, which makes it a little harder to cut, but a junior hacksaw makes short work of it.


End without glue - 


Makes things harder to control.

End with glue - 


Much neater end.


It's much easier to get the tubing onto the ends of the rope when it's not fraying and coming apart. I made four rings for each set, and the rings are about 9 inches (23cm) round, to join them I used some plastic tubing I had left over from another project, the tubing is a good way to hide where the two ends meet.

To join the rings it's just a case of stretching the tube enough to get it onto the ends of the rope, this is easy to do with some long nosed pliers and a bit of heat.

After I'd cut some bits of tube I used some pliers to stretch the tube, all you need to do is push the tube onto the pliers and open them, using a lighter (a candle would do) just apply a bit of heat to the tube, not too much or it'll burn, as the tube heats up you can feel it get easier to stretch.


Tube on pliers - 


Take your time with this.

A bit more and it'll go over the rope - 


Nearly there.

Once it's stretched just about enough put it onto one end of the rope, when the tube cools down it'll shrink a bit and hold the rope tightly.


Rope with tube on - 


Now to join them up.


To join the ends up and make a ring just repeat the steps again, gently heat the tube and stretch with the pliers and once it's just about big enough to get the rope in, push the end of the rope into the tube and you should have a nice rope ring.


Like this - 


Quite simple to do.


I decided to paint the bits of tube holding the rope together, one because I thought it looked better and two because then the kids will know which rings belong to who (not that it really matters) I used quick drying enamel paint, I really like this stuff, it gives a nice finish and dries in about 15 minutes, it's water based as well, which makes cleaning brushes easy.

You can use a bit of sand paper to rough up the tube a bit, this will help the paint stick.


Enamel paint (pink for my daughter) - 


She really loves pink.


One ring painted - 


A bit of colour is good.

The last thing to do was to add some numbers to the game for scoring, to do that I used a stencil to mark the wood with a pencil, then using my pyrography tool I burned the number in where the pencil marks where, and that's about it, they are easy to make, and even if you had to buy the wood and the dowel as well as the rope and tubing you should be able to make them for no more than about £5 for two, which isn't bad really for a handmade wooden toy, and this is another easy to do project for kids to have a go at themselves.


Mini ring toss games - 


Easy to make stocking filler.


Thanks for reading.