Sunday, 6 October 2013

Allotments, how much do they cost ?

This year we decided to try and work out how much having an allotment costs us and to see if having one saves any money. I have read stories of people being charged as much as £108 per year for a full plot, which works out at around £2 per week, I suspect most people spend much more than that on veg a week.

Okay firstly this isn't by any stretch a comprehensive study, it's based on this years costs for us personally and it's off set against how much buying the veg we've grown would have cost had we got it from our local supermarket, this is also based on the veg we've grown at the allotment, and does not include the stuff we've grown at home in the garden.


Our first harvest -


Carrots,spuds,peas,broad beans,onions,rhubarb


I have also based the pricing on what we would have bought, and even though you could argue that as we don't use any chemicals of any kind on our plot it's all totally organic veg, I haven't priced it as organic, as I said it's all based on what we would have bought from the supermarket.

The costs, this is what we've spent on seeds and the rental of the plot this year.

  • Rent = £36 (ours is a half plot, a full plot would be £72 for the year)
  • Seeds = £10 (most of our seed is saved from previous years) this also includes the seeds we bought to grow in the garden, like tomatoes,cucumbers,chillies and peppers.
  • Onion sets = £2 for reds and whites.
  • I also spent £4 on some reduced price seed spuds.
  • And I got some reduced price onions and shallots for £2
  • Total cost = £54 (which works out at about £1 a week over the year)
Not bad really, however I should point out that we now save a lot of seeds, so although it's cost much less this year our first year was more expensive as we had to buy a load of seeds, so I guess you could say the savings increase with time, if you save seeds and look out for bargains, and it's worth checking freecycle and other similar sites, we got all our strawberry plants for free.

Onto what we've grown and harvested so far, this doesn't include stuff that's still growing (there's a few squashes and some other stuff) and it also doesn't include things that will be over wintering, like the swedes (I planted quite a few)

  • Strawberries - 1.5kg
  • Rhubarb - 1.5kg
  • Peas - 2kg (un-shelled) which worked out at 821g once shelled.
  • Onions - 2.2kg
  • New potatoes - 9kg (whites)
  • Red potatoes - 15.5kg
  • Runner beans - 4.8kg
  • Carrots - 1.7kg
  • Broad beans (un-shelled) which worked out at 2.3kg once shelled.
  • Patty Pans - 5 combined weight = 2.6kg (so far)
  • Courgettes - 5kg (so far)
  • Parsnips - 1.4kg
  • Corn - 5kg (40 usable cobs) smaller cobs saved for next years seeds.
  • Pumpkins - 10 (various sizes) combined weight = 8.2kg (so far)
  • Beetroot - 780g (so far)
  • Winter squashes - 3 combined weight = 1.75kg (so far)
  • Turnips - 2 combined weight 200g (so far)

All that looks like this -


I much prefer gardening to shopping.


Right, so how much would all that have cost had we bought it? I've priced things up at the prices and weights for when they were in season, so for example the strawberries are currently (as of October 2013) £2 for 227g (not a lot of berries per punnet) in the summer they were again £2 but for 400g and working on that basis then 1.5kg of strawberries works out at about £7.50

  • Strawberries - £7.50 for 1.5kg (based on £4 for 400g)
  • Rhubarb - £5.55 for 1.5kg (based on £1.50 for 400g)
  • Peas - £1.31 for 821g of shelled peas (based on peas at £1.60 per kg) our local supermarket did not have fresh peas in the pod this year, so this price is based on a bag of frozen peas.
  • Onions (reds) - £1.20 for 1.2kg (based on £1 per kg)
  • Onions (whites) - £1.20 for 1.2kg (based on £1 per kg)
  • New potatoes - £9 for 9kg (based on £1 per kg)
  • Red potatoes - £15.50 for 15.5kg (based on £1 per kg)
  • Runner beans - £20 for 4kg (based on £5 per kg) we saved 800g for seeds.
  • Carrots - £1.70 for 1.7kg (based on £1 per kg)
  • Broad beans - £16 for 4kg (based on £4 per 500g) this is for beans still in the pods.
  • Patty Pans (culinary squash) - £10 for 5 (based on £2 per squash)
  • Courgettes - £7 for 5kg (based on £1.40 per kg)
  • Parsnips - £2.23 for 1.4kg (based on £1.49 per kg)
  • Corn - £20 for 20 packs with 2 cobs in each pack (current price £1 per pack)
  • Pumpkins (culinary pumpkin) - £11.50 for 10 (based on £1.50 per pumpkin)
  • Beetroot - £2 for 780g (based on 80p per 300g)
  • Winter squash - £6 for 3 (based on £2 per squash)
  • Turnips - £1.50 for 2 (based on 75p per turnip)
Total price of veg grown if we'd bought it =£139.19

So £139.19 minus the costs = £85.16 which is pretty good if you ask me.

And this doesn't count the stuff that still needs to be harvested, it also doesn't count the stuff that will be over wintering.

Had I priced this all up for organic veg prices it would have been quite a lot more, obviously this is based on our personal shopping preferences and there's a fair bit of variation between supermarkets, so this figure is not exact, but it does show that having an allotment is worth it, and even though it's taken us 3 years to get to this stage we should in theory save money from now on, which makes up for the first couple of years where we probably didn't save that much.

And you can make savings by keeping seeds from the things you grow, you can even grow things from supermarket bought veg, just save the seeds, and not only is it good exercise you know where the veg comes from, and you know exactly what’s been done to it and you get to grow and eat great looking veg.


Like these squashes -


Winter is looking tasty.


Thanks for reading.


Saturday, 5 October 2013

Allotment update (another year on the plot over) ...

Well it's October (where does the time go?) and I have to say it's been a good year for us, least we think it has, our little plot has been quite productive, so I guess ' you only get out what you're willing to put in' holds true.


Here's what the plot looked like at the end of the last update -


This was at the end of May.

As you can see not much is going on, things we planted had started to grow, but things were quite quiet.


This was taken a month later (the end of June) - 


Some growing appears to have taken place.

I sometimes wish veg plants would grow as fast as some of the weeds we get, but I guess it means the soil is good.

Some weeding needed doing, but a lot of the green stuff is actually veg of one kind or another, so after a few hours weeding we had everything ship shape again, and the next day I went back to plant some more stuff in the space we'd cleared.


More plants in - 


Looking a little more respectable now.


I planted corn and a variety of squash plants, pumpkins,winter squash and butternut squash which we'd started off in the greenhouse at home, and I did a bit more tidying, and that was it for June, although it's taken 3 years to get things to this state the work has been worth it as it only takes a short time now to weed the entire plot with a hoe.

On to July, which was quite busy, I would say I visited the plot more times over the course of the month than any other month this year, but most of that was watering and the odd bit of weeding, just to keep on top of things.


Plants are coming along nicely now, beans - 


The frame works well, and it's easy to move.

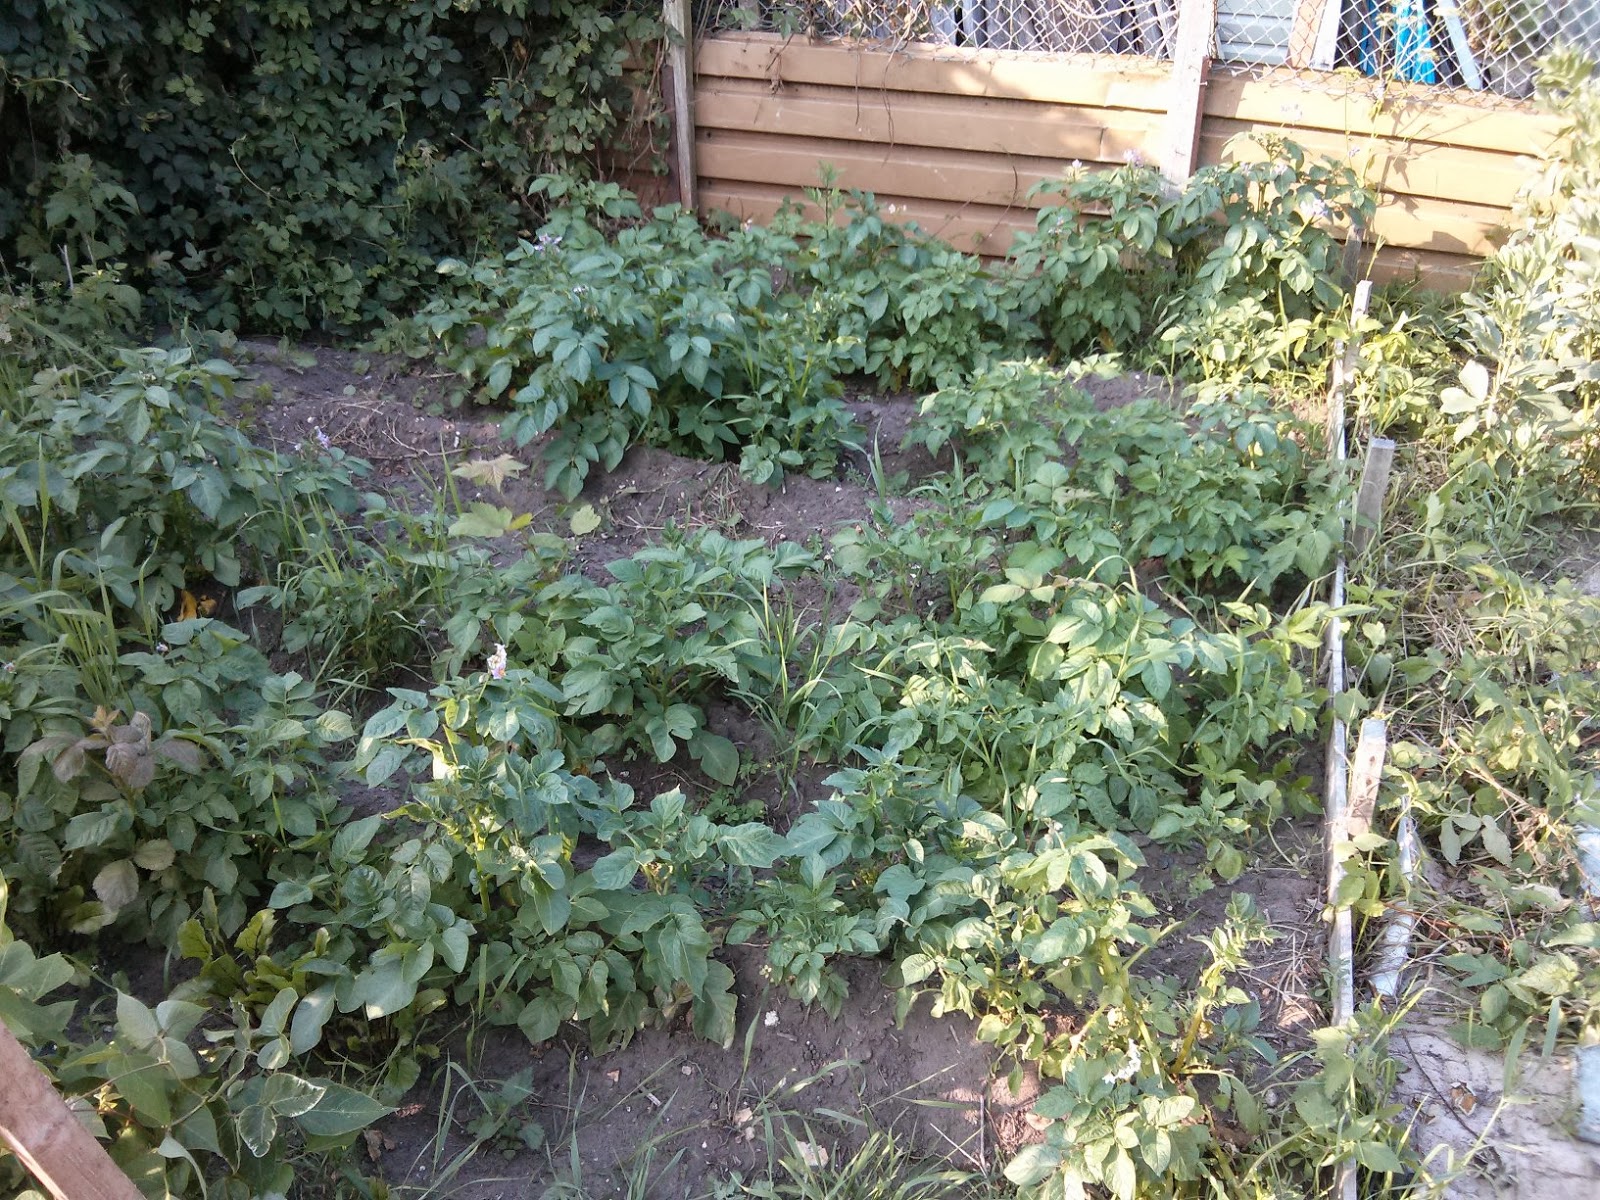
Spuds perhaps not doing as well as I'd hoped - 


The first spuds we planted.


More spuds - 


The second lot of spuds we planted.

Some of the rows of spuds did fail to grow, but we still got a good amount of spuds, mostly reds, which is odd as we planted mostly whites.


Carrots,parsnips and onions doing well - 


We'll be planting a lot more carrots next year.

Peas, again we'll be planting a lot more next year - 


The bird scarer did work well in the end.


The plot was looking good by the middle of July - 


Lots of lovely veg.


By the end of July things were doing really well, I had to make regular visits with the hose because of the weather being so warm, I always tend to do the watering in the evening in the summer, once the sun is off the plot, although some people say it's better to water in the morning.


 We have signs of squash - 


Patty Pans be growing here.

The corn was doing well, some even starting to show signs of cobs growing, the spuds despite the failures were also doing nicely, we had picked most of the peas and broad beans by the end of July, and very nice they were too, there are some beans left in the freezer for stews and such like in the winter, we'd also dug up the carrots and onions, again we've frozen the surplus for use later on in the year, freezing is a great way to make the veg you grow last, my wife makes purée from the pumpkin for use in soups and pumpkin pies during the winter, and pumpkins and squashes will keep for quite while in a cool dry place.

You can also leave squashes on a window sill to harden the skins up, this is what our kitchen window currently looks like, these are the ones we haven't eaten yet, I fear they are not long for this world.


Squash squad - 


I do like a nice squash.

And apart from watering and weeding that was about all for July, that and watching stuff grow and feeling very satisfied with all the hard work we'd put in, and if I'm honest this is the first year I've looked at the plot and thought you know what? the hard work, blisters, back aches, being bitten by bugs and stung by nettles was all worth it

The next time I visited the plot was in September so that I could do yet more weeding, and start to tidy things up a bit, I had to dig over the beds that had the spuds in and remove the dead pea and bean plants, I left the runner bean plants in because they were still producing beans, the squash patch was looking okay, the pumpkins aren't huge but they taste good.


This is how the plot looked at the end of September -


Bit messy but easy enough to fix.


Top half of the plot all tidy - 


Some stuff will stay in over winter, like the swedes.


Pumpkins and corn looking good - 


Perhaps a bit crowded to be honest.

And after a bit of work this is what I left behind - 


Note the flask, very important is tea (or coffee) when gardening.


And that brings me neatly to the last trip I made to the plot, which was today (October the 5th) not much had changed, few weeds growing, and there are still some squashes growing so I've left them in for now and I'll check on them next week, things like the swedes and turnips will stay in over winter and I also decided to experiment with planting some onions and shallots, all of which I got cheap from a diy shop, and I also had a few spinach and cabbage seedlings in the greenhouse so I figured I'd chuck them in as well, they might not do anything, but they wouldn't have in the greenhouse, least this way I might get a few spinach leaves and the odd cabbage.


This is what the plot looked like when I got there - 


Not much has changed.

The usual odd bit of weeding and then some planting and I was done - 


All done.

And that's that, apart from picking the last few squashes there's nothing else to do but wait for spring, next year almost all of the stuff we grow will be grown from our own saved seeds, things like beans, corn, squashes and peas amongst other things, this reduces the cost quite considerably.

Some might say that buying seeds will yield better results but that's not always been the case, for example this year we grew corn, half of which from a packet of shop bought seed and the other half from seed I saved from our last batch of corn, and they all grew, they all had good usable cobs, so we've noticed no difference at all, the same with our squashes.

And to that end I am currently working on a post about this years allotment escapades, I'm hoping to show that the cost of renting the plot and the cost of seeds is not that much compared to how much you can grow and ultimately how much money you can save if you think a little differently and put in that little bit of extra work.

I'll leave you with a collage of pictures, these were all taken this year, they are all of things we've grown entirely on the allotment and this only covers what we've harvested to date, there are still things to harvest, in the next post I'll include weights and prices, it might not be that much, but it's the most we've had in three years.


Our harvested veg so far this year - 


Loadsa veg !

 Thanks for reading.


Monday, 9 September 2013

Box project ... ...

When ever I do anything wood work related our kids are always quite eager to lend a hand, doesn't matter what it is they like to help, as was the case with our recent foray into siege engine building.

So I decided to get the kids to make a box, and instead of them helping me I helped them, although I did kind of set the size of the box and methods used to build it, but this was mainly down to what wood I had available at the time, and because I wanted to show them a variety of techniques.


Here are the finished boxes -


Simply made, and functional.

Both boxes are made in the same way, but the kids decided they wanted slightly different colours, they are both made from lengths of tile batten fixed together with screws and wooden dowels, with a plywood base.

Admittedly I did make the grooves for the base myself with a router, but apart from that they did everything else, with a bit of help from dad, they even got to use my post drill and the sanding attachment for my lathe, which seemed to please them no end.

On to how we made the boxes, the first thing was to cut out two rectangle bits of plywood to make the bases (I used 5mm ply) if you decide to have a go at this then the sizes are up to you, but the kids boxes are roughly 6 inches (15 cm) by 7 inches (18 cm) to make the sides and the lid of the boxes I used tile batten.

To make the grooves that the base slides into I used a router with a bit the same size as the plywood (so 5mm in this case) this gives the base a nice tight fit, and with a bit of glue it makes it quit sturdy.


Making the grooves - 


Four grooves for the ends of each box (two each)

Close up - 


Groovy.

You can see that I haven't gone all the way to the lines I've marked, if I had you would be able to see the grooves on the outside of the box, and we don't want that.


Now onto the sides of the box - 


Straight (ish)

Because these parts make up the sides of each box you don't have to worry about them being seen as the end parts will cover the grooves when it's put together.


Here's how it fits together - 


The ends cover the grooves in each side.

Not a bad fit - 


Just needs screwing and gluing.

Onto the fixing, we used screws and glue on the first section of the box, and using the post drill the kids drilled the holes and counter sinks so that we could cover them with wooden pegs.


Fixing the sides together - 


Clamps would have made things easier.

Once all the screws were in we then filled the holes with wooden pegs to hide where the screws are, as the next picture shows we just glued a bit of dowel in each hole, we weren't to careful when we cut the dowel because the whole thing was going to be sanded anyway, and any bits that weren't flush are easily sanded to smooth them off.


Yep, clamps are definitely better.

Once that was done we had something that looked like a box, all be it a very shallow one, so to increase the depth we used dowel joints to add more lengths of wood to each side, we could have just glued the wood together, but adding a few dowels adds strength, and it teaches the kids how to join two bits of wood together, or at least one of a few ways in which you can join wood, I actually used this method to make our fire surround, which I made from floor boards and a couple of bits of 3x2 timber.


Making dowel joints is easy, it's just a case of making matching holes in the bits of wood you want to join, then using pegs to hold it together.
You can buy kits in most diy type shops that help with this, they come in various sizes, and they cost around £5, I have several in different sizes, and I've used them to make fire surrounds, gates and to join wood together to make sheets for various building projects.


Here's one of my dowel jointing kits - 


Simple to use and works.

The kits consists of a drill bit, a drill stop (the bit on the drill) and collars, these help to get the holes in the right place, the drill stop allows you set the depth you drill to, if you have a post drill you can set the depth on the drill itself, a post drill also comes in handy for keeping everything level and straight, but you can do it by hand, there are numerous systems that are easy to use as well, a quick search for dowel jointing will yield lots of possibilities, but to be honest I prefer doing things this way, sometimes the simplest way is the best.

Okay so next we set about joining bits of wood together with dowels, this is just a case of drilling two holes in each piece of wood (for longer lengths use more holes) I used an 8mm drill bit, and 8mm dowel for the pegs.


First lot of holes drilled - 


A few bits of dowel already prepared.

Next we use the collars, these go in each hole you drill - 


The points mark where you need to drill in the other bit of wood.

Once the collars are in the holes you just need to line up the other piece of wood and push down on it, so that the collar points mark the wood, then you can go ahead and drill the next lot of holes.


And as long as you're careful everything should line up - 


Looks about right to me.

To fix it together spread some glue along the wood and in the holes the dowels go into and tap it together with a mallet, you can then add some clamps to make sure it stays together until the glue dries.

It's best to use a wooden mallet, if you don't have one then use a scrap bit of wood, place the scrap piece on the wood and then tap it with a hammer, this way you won't damage the wood, just the scrap bit.


Fixing the sides together, couple of good taps with a mallet should do it - 


I know the shed is a mess.

After we'd added the sides we then fixed them at each end with screws like we did with the first section of the box, and again we used dowels to fill the screw holes.

To make the lid we measured and cut enough lengths of wood to cover the box, as it turns out this meant each lid needed four lengths of wood, we fixed these together by cutting another two bits of wood and laying them over the four strips and again we fixed them all down with screws and glue, the cross pieces also serves as a way of keeping the lid on the box.


The lid - 


Can't get much easier.

Box and lid done, just needs sanding and painting - 


Bit rough round the edges, sanding will take care of that though.

All sanded, ready for staining or painting - 


One rustic looking box.

After much deliberation the kids decided to use the vinegar and steel wool wood stain we made for staining the bathroom furniture I made recently, it's easy and safe for kids to use, best do the staining away from any other wood as it will stain that as well.


 Just apply the stain with a brush - 


A spot of staining on a sunny day.

You can also paint the boxes, or just leave them plain, although a coat of wax might be an idea to protect the wood.


Here's what the boxes looked like with one stained and one plain - 


They look good either way.

My daughter decided to stain hers and then use a clear wax on it, so hers is a little lighter than my sons, he decided to use some of my restoration wax on his box, the wax has given it an old look, and because we didn't go too mad with sanding both boxes actually look old, like they've been around a bit.


Applying some wax, again best to cover any surfaces - 


Don't worry the wax is safe for kids to use, gloves might be an idea though.


And there you have it, two hand made wooden storage boxes, the kids are very pleased with them, all in all I think they enjoyed making something for themselves, they are eager to make other things, which is good I was hoping they would enjoy the whole experience, and if nothing else it's a good way to build practical skills, which I still think are important, even in today's technology driven world.


The boxes again - 


Antiques of the future ? well maybe not.


Thanks for reading.

Monday, 5 August 2013

Handmade bathroom set (part 3 - Toilet roll holder) ...

Last but by no means least, a toilet roll holder, which is the easiest of the three things to make, you should be able to make this in about 20 minutes (no more than half an hour) at least the actual wood working part, it'll take longer because you'll need to let the stain dry.


Here's the very simple toilet roll holder -


Not much to say, it holds a toilet roll.

Again this (like the towel ring) is made entirely from scrap bits of wood, and cost nothing apart from the time to make it, I also used the same homemade stain, even the piece of dowel that holds the toilet roll was a small scrap piece left over from siege engine building.


Here's a picture without the toilet roll - 


You can see how it fits together.

Size wise, well it should be more or less a standard thing really, having not carried out much research into the size of toilet rolls, but I guess as long as it's big enough for a toilet roll, obviously you don't want a massive one, although this could be adapted to hold rolls of kitchen towel, for reference the toilet roll I used measured about 4 inches / 10.5 cm long and about the same in diameter.

The whole roll holder is about 6inches / 15cm in length, that's 5 inches (12.5 cm) for the back plate that holds it onto the wall and about half an inch (1 cm or so) either side for the arms that hold the toilet roll, the piece of dowel is 5 and a half inches long (14cm)


Here's diagram with the sizes on it - 


Does the job.

To get the dowel to sit in each arm I used a small Forstner bit (hinge cutter) to make a hole, and to get it so that each arm had half the hole I clamped the two arms together and then once I'd measured where I wanted the hole to go I drilled the hole, so that the point of the Forstner bit (hinge cutter) was lined up in between the two arms, as the next few pictures show.


Marked the line and clamped into a vice - 


Ready to drill.

Drilling commences - 


Making holes is boring.

Obviously you'll need to make the hole deep enough to fit the dowel into it, other wise every time you use the toilet roll it'll fly out of the holder.


Hole done - 


When separated each piece should have a semi circular hole in it.


A quick check to see if it's deep enough and will hold the dowel - 


Now that's done it just needs assembling.

To fix it all together I drilled into each side, and again I've used plugs to cover the screw holes, I only used one screw on each of the arms, normally I'd use two, but as this doesn't need to be super secure I used the one screw and some wood glue.


Here's a picture showing where the side fixes to the back plate - 


Two fixings would have been too much.


And that about it really, a very simply made toilet roll holder.


Thanks for reading.