Wednesday, 9 March 2011

Jigsaw puzzles ... ...

Some time ago I bought a scroll saw, I've always wanted one so I could make jigsaw puzzles and other things, you can make some amazing bits of artwork using a scroll saw.

Here's a picture of the one I went for (it's very good)

It takes both pin less & pined blades, and it has variable speed, both handy features.
I have used it a few times, but not for making jigsaws, the first thing I made with it was actually a cat flap (long story) 

So the other day I decided it was time to have a practice with it, and luckily I have a good book to help me with ideas and techniques (which my lovely wife got me) with book in hand I set about making a couple of test puzzles, they are both stand up puzzles, not very complex but enough to be going on with, I used an old piece of 18mm plywood I had left over from making new arms for my office chair.

Here's the book, it's old, but that's a good thing, shows how things should be done.

It's a vintage book, and very good.
It covers the basics and goes into such things as making your own scroll saw, and it also includes loads of templates which you can use as is, or customize, which it also shows and encourages.

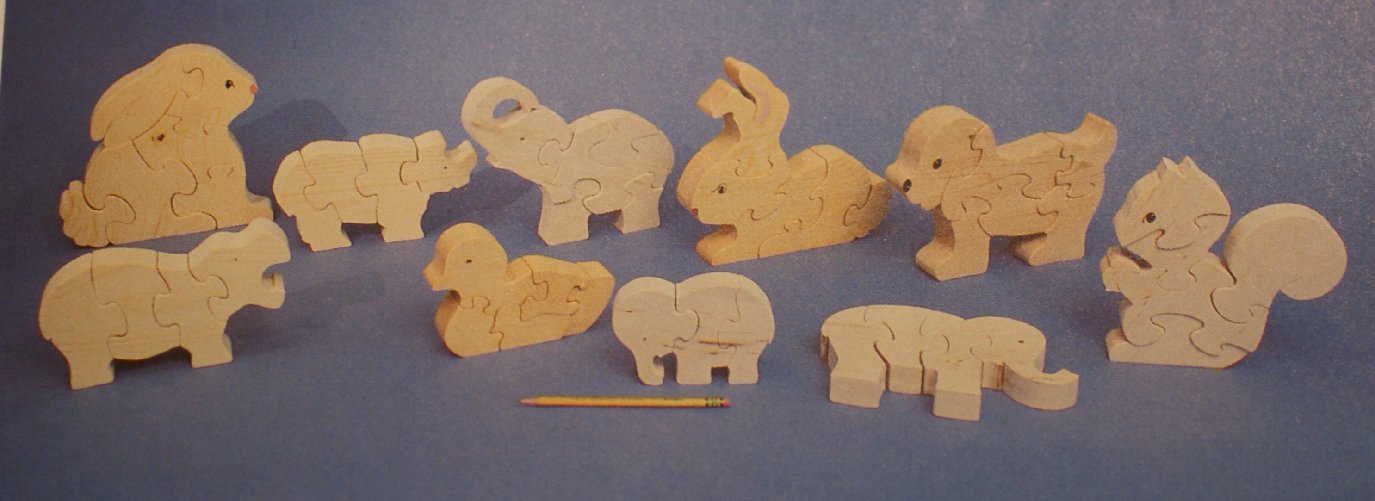
A few pictures of some of the things you can make using the book as a guide.

Nice and colourful.
These pictures are a small sample of what can be done.
How cool are these ? :-)
Like I said this is just a small section of things, and it also shows more advanced pauzzles, like maps of America with the various states as pieces, and some mind bending type puzzles as well, so there's a wide range of things that would appeal to adults and kids a like.

You don't actually need a scroll saw to make a jigsaw puzzle, you could use a coping saw, but as it's hand powered your going to get sore arms, so a powered saw is better ;-)

A coping saw.

You can do a lot with one of these.
Okay so on to what I made, which were a couple of simple puzzles, learning to walk before I break out into a run ;-)
Using a sheet of printer paper I was able to use the templates in the book to make a transfer, which I then cut out and stuck to the wood I was going to use.

A picture of a template and a transfer.

I haven't made the elephant yet, next on the list :-)
In the end I went for a simple dinosaur and a pig for my test subjects, mainly because my son loves dinosaurs and my daughter loves pigs :-) I left them bare, just plain wood because I don't actually have any paint that would be okay on a kids toy, I will invest in some nice colourful paints for the next ones though (kid friendly of course)

Here's the pig, complete with template. 

Already cut out, but you can see the paper.
Cutting them out is pretty easy, you soon get into the swing of things, I wasn't actually expecting to get smooth cuts on either puzzle as I'm not that good with the saw yet, but I was pleased with how they came out, obviously they have both been sanded all over, even in the joints, splinters aren't good, I've round off the edges as well.

Here are the finished puzzles.

Just simple, but the kids like them.
And some more pictures.

The piggy, would look better painted pink.
The dinosaur, again would look better painted.
Although I've used templates the idea is to get used to how the saw behaves, then attempt some free hand puzzles, using just an out line of the basic shape, I'm a little way off that at present, but practice makes perfect, so I've heard :-)
One nice thing about the wood is that because it's plywood the puzles have a nice stripey edge to them, which has come out quite nicely with a little oil.

The edges.

Stripey :-)
Overall I'm happy with the results, and there is a certain satisfaction to be had when you see your kids eyes light up when they get a new toy, even simple ones like these, even more so when you've made it yourself.
I have plans to make all sorts of things for the kids and such like, and not just puzzles I'd like to try my hand at a piece of my own artwork, but I need a lot more practice first, either way it's good fun :-)

Another picture.

Pleasing puzzles :-)

Thanks for reading.


Inspire Me Beautiful

Thursday, 3 March 2011

A new use for our dehydrator ... ...

This is just a quick post about yogurt of all things.

We had been thinking about making our own yogurt and had been thinking about getting a yogurt maker of some sort, and as is the case more often than not some one on our local free-cycle group offered one, which we were lucky enough to get.

Here it is -

Nothing special, just a standard yogurt maker.
 As you can see it's an old one, the date on the back is 1990, but it works, which is the main thing and of course being free-cycled it didn't cost anything, it came with everything needed, and although the person who gave it to us couldn't find the booklet that was originally with, she took the time to write down the basic yogurt recipe, bonus.

We tested it out the day after we got it, and sure enough we made some yogurt, which got eaten pretty quickly, the kids loved it, although we did add some stuff to it, like a little vanilla, it's quite nice plain as well.

Then I got to thinking about the device itself, which is basically an incubator, that's what it does, it allows you to incubate the cultures that make yogurt, so despite the fancy " yogurt maker " label it's basically a regulated heat source, which we already had, only we didn't think about it until we got the yogurt maker.

So the other day I decided to experiment with our regulated heat source, or if your prefer the dehydrator I modified from an old glass drying cabinet (which you can read about here - opens in new window ) and using the little glass pots that came with the yogurt maker I set about making some yogurt in the dehydrator, which may sound odd, but on it's lowest setting it's just about the right temperature (around 45°C)  to make yogurt, I'll admit I did have to leave one of the doors open a fraction just to stop too much heat building up.

The little glass pots that came with the yogurt maker -

Just about the right size for one person.
 It took a little less time to make the yogurt in the dehydrator than it did the yogurt maker, so in theory cost a little less in electricity, and as the dehydrator is a lot bigger than the yogurt maker we can make loads more at a time, providing we have the containers to make it in. So that's the plan for making yogurt, we will still use the yogurt maker, until it stops working, but either way we have learned how to make yogurt.

I would post pictures of the yogurt we've made so far, but er we kind of ate it :-) we mixed various things into it, blackberries,strawberries and vanilla, we have plans to make frozen yogurt type things as well, and on top of all that it's an interesting lesson for our kids, this is how you make yogurt and this is how it works type of thing, we've also tried making cheese this week as well, which has been interesting, I'm planning on making more, so I'll post the results no doubt.

And if you've wanted to make yogurt, but didn't want to buy a yogurt maker you may already have the means to make it, if you have a dehydrator and you can also make it in a flask, why not have a go ? if you do a search for making yogurt in your search engine of choice you'll get loads of results.

Thanks for reading.

Saturday, 26 February 2011

Another handmade crochet hook ... ...


If you have read this blog you'll know I spend a lot of time playing about with bits of wood, I can't help it, it's almost a compulsion, and if I could spend ten hours (or more) a day just making stuff out of wood, whether it be on my lathe or by hand I would.

It's very rewarding, and oddly therapeutic,  maybe it's something to do with the repetition  I don't really know, and hand carving wood doesn't involve buying lathes and such like, all you need is a sharp knife,sand paper and a small saw, and not much else.

Recently I've been trying to perfect the method I use for making crochet hooks by hand, trying to get the dimensions as exact as is possible without machining them, although I do use my calipers to get things more or less the same.

Here's the latest crochet hook -

It's made from a small pear branch.

 I wasn't sure when I made this one whether it was going to crack of not, the branch was very green, in fact it had only been cut a few days earlier, but it hasn't, which is a bonus although I'm not going to attempt to carve or turn a larger piece until the wood has a chance to season a little, the temptation to cut a section of the tree trunk I have in my shed is almost too much.

As you can see this hook has a curve to it, I haven't tried to straighten it out as it doesn't seem to affect it's use, it actually fits nicely in the hand. I've tried to keep the design simple and also allow a couple of inches of plain wood for the shaft, which makes the hook usable.

Some more pictures - 

The twist.


The hook.
The twist is hand carved, I'm more or less happy with it, it's not as even as it could be, but compared to the metal hooks my wife has it's more pleasing on the eye, not sure whether this matters in a tool though ? I would say that it's not as decorative as some I've seen. As for the hook I have tried to get it the same width as the shaft, using fine sand paper I have managed to get the shaft and hook to within in 0.5mm of each other using my vernier, which I think is pretty good, not sure if half a millimeter will make any difference to the item being crocheted ? the width of the shaft and hook is 7.5mm (give or take the 0.5mm) if any one has any thoughts about this I'd be interested in hearing them, also if you have an thoughts, opinions on the hook as a whole I'd be interested in hearing them :-)

Here's a picture to give you an idea of scale - 

It's a little longer than a ball point pen.

Here's a picture of it the other way round - 

The other way round.

 I spent some time finishing it with a very fine sanding pad, then I gave it a few coats of linseed oil, this helps to keep it from cracking.

Last picture to hopefully show the amount of curve it has -

I used the pen to hold it up :-)
 If anyone has an thoughts on it, for example whether it's going to be a usable design and such like, my wife has tried it out and she can crochet with it, I can't get my head round crochet at all (it's a dark art ;-) so I'm not really best placed to say whether it'll be any good for the purpose I made it.

Thanks for reading.


Friday, 25 February 2011

Hand turned candle stick (feeling smug) ...

Today was a good day, mainly because we managed to get out into the garden for a few hours, the kids love being out in the garden, and as we were out in the back garden they got to run around a lot more, much more room than the front garden.
The kids now have their own planting bed, which they can use for what ever they decide to plant, I'm sure it'll be interesting if nothing else, and we got some tidying done, so the garden is looking a little neater than it did.

It's not that I'm feeling a little smug about however, not that being in the garden with the kids isn't good fun, if not a little hectic :-) no the reason is I managed to finish off a piece of wood turning I started yesterday. I had picked out a nice chunk of silver birch and already fixed it to one of my chucks, with the intention of making a small bowl of some sort, however on closer inspection I found that the end of the wood was split quite badly, so I decided to make something else, and seeing as my wife had made some nature candles with the kids for Imbolc, and was in need of candle sticks to put them on. I went for candle sticks, although I still have one to make, I'm quite pleased with the over all look of the piece, the grain is really nice, even if I do say so myself ;-)

Here it is -
This side is nice, the grain is interesting.
And another -

This is my favourite side.
I did most of the turning yesterday, and today it had it's final finishing, which consisted of using finer grades of sand paper to get it as smooth as possible, then I sealed it with our home made wax, and gave it a polish while it was still on the lathe, mainly because it's easier.

It may not be every ones cup of tea design wise, but it has meaning to me for various reasons, not least because I'm making them for my wife to display the candles our kids made. Just got one more to make which will be different, I had no intention of making a matching pair, although if I was I'd make a jig from the design of the first one so I could get them both exactly the same, or as near as possible.

More pictures - 

I like the way the shadows fall on this one.

This one was taken in natural light.


I'm really pleased with the grain, it has a great look to it, even more pleased seeing as it's the first piece of birch I've turned, I've had a six foot length of tree in my shed for a while (I didn't use the whole six feet to make this) I'm glad I waited until I had plenty of time to give it some proper attention, though it didn't actually take that long to turn.

Some close up pictures of the grain - 

This section reminds me of a map.

This part almost looks like two different types of wood.
All in all I'm feeling a little smug about it, I'm not an expert by any stretch of the imagination but I think I did good, can't wait to make the other one and have a go at turning a piece of the pear I have in the shed.
It also feels good because for parts of it I used one of the Oland tools I made myself, as you can see it worked :-) 

If you have pondered having a go at turning wood I would recommend it, it's very satisfying. You could probably find places that run wood turning courses near to where you are by searching online, it's a great thing for kids as well, I first turned a piece of wood when I was in school, but now in my opinion overly cautious health and safety laws and other factors are putting paid to kids being allowed to put their hands and their imagination to good use in schools to create pieces of art, or functional items, it's a shame, we were given hands for a reason, and even though I'm pushing buttons to write this, it's not what hands are for.

If you want to read about the candles my wife and our kids made you can on my wife's blog ---> Decorating candles, (opens in new window) and just for the hell of it I'll leave you with another picture - 

Smiling smugly ;-)
Thanks for reading.


Tuesday, 22 February 2011

Handmade row markers ... ...

To go with our new veg beds, we decided to make some bespoke ;-) wooden row markers, after all you need to know what you planted and where, with a memory like mine I need all the help I can get :-)

Here they are (the ones we've done so far, there will be more)

Ta da ! 
Okay they are simple enough to make, these are made from scraps of wood, the one in the background was made from a scrap of wood left over from the pallets we used to make the raised beds.
Nothing special, built more for function than form I guess. The lettering was done using a pyrography tool which if I'm honest has been sitting around for more than a year, this is the first time I've used it (pyrography is basically burning designs into wood) as you can see it's not perfect, probably requires a steadier hand than mine, I used a letter stamp set as a template, stamping the letters on in ink first, then burning them into the wood.

The other three markers were made out of a couple of bits of tongue and groove, I marked a basic stake sort of shape out on the wood and then cut them out on my scroll saw, you could use a coping saw or a hack saw, then I gave them a quick sand, I haven't coated them in anything yet, I'm still wondering about what to coat them in, I'll probably use a varnish of some sort.

Some more pictures -

I should have drawn a line on them to get the letters level :-)
And another - 

Handy if vampires invade the garden ;-)
I got to thinking that this would make a nice project for older kids to do, I say older kids because of the tools involved, but there's no reason younger kids can't do it, you could do the cutting out and such like for them, then they can decorate them, they don't even have to be wood, you could make them out of clay, although it would need a varnish or some other coating, it might make a nice project for kids to do as well, why not set them the task of designing their own row markers ? they could research designs,materials and it doesn't matter if you don't grow veg or have a garden they could be presents for relatives who do.

This is the one I made from a piece of scrap left over from the veg beds - 

A slightly more decorative one.
They don't have to be plain stake like markers, which is why I thought about making it into a project, or why not just for fun ? you can find scrap bits of wood in the off cuts bin in most diy type shops, you could make them from branches that have fallen off trees, or as I mentioned clay, or some other material.

The stake like ones in the veg beds - 

Beans.

Peas.
And there you have it, it didn't take long to make them, I've since made a few more for the various other things we've planted, and I'll make more as we go along. Okay so we didn't need to bother, but why not add a little bit of a personal touch to the garden ? no harm in it, and as I've said it might keep the kids busy for a little while.

Thanks for reading.


Inspire Me Beautiful

Friday, 18 February 2011

Re-cycling pallets to make planters ... ...

This week we have decided to extend the growing space we have, for the last couple of years we've grown a pretty good amount of stuff, but this year we are going all out.

I have already made extra space by moving various things about, and stealing little bits of lawn here and there ;-) we did grow some extra things in the front garden last year, which worked quite well, so with that in mind we decided that because we don't use the front lawn for anything in particular we would turn it into a new veg bed, well not all of it, so we made three raised beds that measure 3 feet by 4 feet, and to keep the cost down we got some pallets for free.

Here's one of the finished articles -

One of the new veg beds.

It's nothing special, this type of thing isn't hard to build, and if you use pallets you will only have to do a little wood cutting to get things to the size you want, as it turned out the wood I got was the right size for the job.

I can't really say enough about using pallets for this kind of thing, firstly there's the price, which is nothing, most places will let you have one or two pallets for free, and if they have broken ones they may let you take more, after all it saves them the job of getting rid of them.
The wood that pallets are made from isn't the best in terms of finish, but it's good sturdy stuff, I've used pallets before to build a storage cupboard for the garden tools and such like, and I have plans to make small pieces of furniture out of them, book shelves and some other things, I will have slightly more work to do in terms of finishing, but a quick buzz over with a belt sander will sort most of it out.

To make a planter / raised bed is pretty simple really, all you need is a hammer and some nails, a saw (and a tape measure) and a pencil, or if you have some screws and a cordless drill you can use that.
Basically you want to make a rectangle / square shape, with a thin piece of wood in each corner that you can use to peg it down with (a one inch square peg will do)

Here's a picture of the wood work - 

You can see the pegs in each corner, these also help hold it together.
You don't have to add the pegs, but I find it helps keep it in place and to hold it together, they don't have to be very long, just a few inches.
If your putting yours on a piece of lawn keep the turf, it might come in handy, some of our lawns in the back garden are a little patchy, so I kept the turf to fill them in.

It's easy to mark out the turf, just lay the frame on the ground and cut round it with a half moon cutter (edging iron) or you can use a spade.

Using the frame as a template - 


That's me, cutting out the section of lawn to be removed.
Once you've cut round the frame you can move it out of the way and then using the cutter cut the turf into more manageable sections, then use your spade to lift it up, you might want to have a place ready to store the turf, or if you plan to use it have that area ready, then you can get both jobs done quickly.
After that all you need to do is place the frame on the new patch of earth and bang each corner in using a hammer, it won't take much and that's about it.

You should end up with something like this - 

Ready for production.


I had two little helpers when I made our new beds, they seemed to enjoy it, although I suspect it was the chance to investigate under the grass rather than helping me, it's worth getting the kids involved they can learn a lot, for example we found loads of little centipede and beetle larvae under the turf, I guess they were hibernating there over winter there were loads of worms as well so the kids get a chance to learn about nature and bugs (kids love bugs, if you have bugs you're onto a winner) and you may find other things as well, we found a ten pence piece under the grass, which prompted a mass excavation for treasure :-)

Digging for gold - 

We didn't find any more money.
They seemed to love digging in the mud so much, they carried on - 

There must be more in here some where :-)
And there you have it, we now have three beds at about twelve square feet each, and all it took is a little wood work and some digging, and it cost nothing and on top of that we spent an hour or two having fun as a family in the garden, can't be bad.
So get out into the garden, if it's a little chilly put an extra jumper on, the fresh air will do you good, and it won't hurt the kids if they get a little muddy, you and the kids can learn so much, and in an age where it seems adults and children especially are loosing touch with nature it has to be a good thing ?

Thanks for reading, and happy growing :-)


Monday, 14 February 2011

Electronics kit fun ... ...

It's been a while since I posted, and seeing as I haven't as yet finished some of the projects I have on the go I thought I'd post about the electronics kit we got for our son to mess around with (and hopefully learn from)

I can remember playing with these types of kit when I went to school, but they have come along way since then, much more interactive and fun, which I guess is the main thing, if it's fun kids generally get into it more.

Here is the kit we got -

Hours of fun & learning.
So I guess this is kind of a review for the kit, which comes from Maplins ---> Amazing all in 1 connect & learn. it costs £16.99 (it was on offer when we bought it)

All in all for the price I think it's a great introduction into how electricity works, it has various things to do, from simple circuits, like making an led light with a battery, including a switch to control the light and some more advanced stuff like a motorised basket ball game, and there are options for making the basic experiments more interesting, one of which we tried when we got the kit out the other day.

Although it says 8+ on the box my six year old son soon got to grips with it, and don't worry if you aren't the most technical person around, it's easy for adults too ;-)

Here is a picture of my son and daughter playing with one of the experiments -


We added a bell to this one.
Another picture of the experiment -

Some of the wiring looks a little messy, I kind of rushed it :-)
This was an extension of the basket ball game, the hoop is connected to a motor which makes it move from side to side, to make it more difficult, there is also a little ball and a small plastic launcher for it, the circuit for this experiment is pretty simple to put together, and as an after thought I added the bell, and thanks to the little micro switch that's in the red tray that catches the ball we were able to make the bell sound every a basket was scored, there are other things you can add to it as well.

The basket ball game - 

With ball launcher.


The instructions are easy to follow, with step by step how to's, and they cover pretty much all of the things this kit can do. One of the other experiments we tried was the bubble blower, this actually does three different things by way of various attachments, it has two nozzles that you can either use to blow bubbles with or make a small polystyrene ball hover (this one got a good reaction) it also acts like a hoover, and the third attachment is a little hose and filter, so you can teach them about circuits and also how a hoover works.

The instructions - 

Parts list, and step by step instructions.
You can see that each experiment has a parts list, and if there are any things that need putting together it will also show you how to do that, it gives easy to follow instructions on how it should be wired up, and things you can try after it's working.

Things to try with the bubble blower - 

Further experiments.
Here are some pictures of some more wiring diagrams, ranging from the easiest to more complex ones.

They are easy to follow.

These diagrams show how you can expand the basic experiments.
You can't really go wrong with this kit, as long as you follow the diagrams you should be fine, most of the parts are encased in clear plastic, like the battery boxes,switches and led's.

Pictures of some of the parts - 

Switch.

Each experiment uses 1 or 2 batteries.
All the components connect to white / light grey plastic boards by way of pegs on the undersides, this means it's easy to get everything lined up, and it's secure so that things don't rattle apart, all electrical connections are made using springs, which also fit securely into the boards, the springs are quite small so not ideal for really small children.

The spring connectors - 

You can see how they fit into the board.

Making connections easy.
If you want to have some fun with electronics this is a good starting place, it has plenty to do, and you can expand on some of the experiments to add extra interest, for example there is a flapping duck experiment, you could connect this to the maze challenge, so that if you touch the wire the duck flaps, or you could use a bell instead, or you could us both, and like we did with the basket ball game you can add what you want, why not connect the duck and every time some one scores a basket it will flap like mad, it is also possible to connect everything up at once, although this may get a little hectic.

It's a great kit for mum or dad to teach the small ones a little bit about electricity and most of all it's fun as well as informative.

Thanks for reading.