Things have been quite busy around here of late, what with building a new shed, trying to sort the garden out, and all the plants we've been propagating and of course the allotment (amongst other things) time has been a bit thin on the ground.
I finished the shed/workshop a few weeks ago, and I've already put it to use, and I've a post or two lined up about some of the things I've done.
Here's the shed before I started -
I finished the shed/workshop a few weeks ago, and I've already put it to use, and I've a post or two lined up about some of the things I've done.
Here's the shed before I started -
 |
| Few screws and a bit of paint and it'll be great. |
As sheds go it's pretty basic, a simple wooden frame skinned in plywood with a pent roof, it was the cheapest way to do it, and even though I bought the wood it still worked out cheaper than buying a similar sized flat pack shed, I used cls stud work timber for the frame and roof beams, 12mm shuttering plywood for the skin and 3 sheets of 11mm osb for the roof, and a good quality roofing felt for the roof.
Here's a set of basic drawings which show the frame work for the shed -
 |
| Click for a bigger picture. |
It's basically a 7 and a half foot by 10 foot box, with a sloped roof, which is roughly twice the size of the previous shed I had (part of which now resides on our allotment plot) it is quite a bit taller than the last shed as well to allow for storage in the roof space, it's about 7 feet 8 inches at it's highest point sloping down to about 7 feet at it's lowest.
The extra space has allowed me to have half of the shed for storage of crap essential equipment and the other half serves as a work space for my lathe and other tools whilst allowing me room to move, which is something the last shed was lacking, it also means that all the wood I had stacked in the garden under tarpaulins is now out of sight in the shed, so the garden looks much neater.
Here's the shed almost done, it rained just after I'd got the roofing felt on -
 |
| Could do with a door. |
And here's the finished shed -
 |
| Function over form. |
All the wood, has been given two coats of wood preserver, and none of the wood is actually touching the slabs it sits on, I used some of the off cuts of roof felt as a sort of damp proof membrane, the lighter coloured battens were used to cover where the plywood joins.
I also converted an old hard wood French door into a window, it's nice having a window in the shed, the last one only had electric light, which was a bit depressing to be honest, it's nice when the sun shines through it, the intention is to clad the entire thing at a later date (when I have the wood) to make it more appealing to the eye, but for now it's water proof and usable.
Since the picture above was taken I've added a shelf to the front of the shed and I may also add extra shelving down one side of it for the storage of plants, we have loads of things in various states of growth all in pots dotted around the garden.
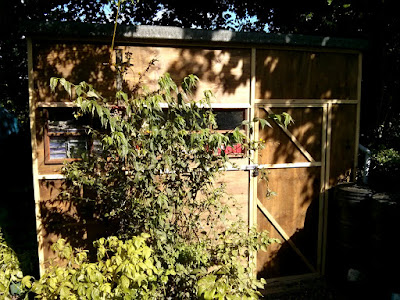
Shelf fitted -
 |
| You can just make out the shelf behind the bush. |
I also recycled some of the old sheds guttering for water collection, despite being under a large Sycamore tree the roof collects plenty of water (it'll collect more in winter) which should fill the two water butts easily, and with the water butt on the greenhouse we should be able to use that water rather than tap water for watering all the plants in pots, and the stuff in the greenhouse, helps to keep the water bill down.
Here's the work space section of the shed, more or less organised -
 |
| I seem to have a lot of tools. |
As you can see I have much more room now, although I'm sure I'll soon fill the extra space with crap essential equipment and supplies.
I've already used my lathe since I fitted it to it's new work bench, well I had to test it out, good thing really as it needs new bearings which I've yet to fit.
I made a few pendants, two of which you can open to put small things inside, these are just testers, I'm still fine tuning them, so with any luck I should be posting a bit more often than of late now I have a shed again and I can do a bit of wood work.
The pendants -
 |
| It's the end two (on the right) that open. |
Thanks for reading.


No comments:
Post a Comment