Sunday, 17 December 2017

We've been making stars again...

Last year we made some wooden stars with led lights in them, and as we try to make some kind of decoration for Christmas we decided to make some more stars using the same method.

Here are the ones we made last year -

They survived the loft I'm pleased to report.

Here's a link to the blog post I wrote about those - Wooden star decorations. (opens in new window)

We used the same method to make this years star decorations, only this time we've made a load of smaller stars so that we could make some garland type decorations, and my daughter also wanted to make a star to hang in her room, so a lot of the pictures in this post are of my daughter making her star, she made a few to decorate in different ways.

This really is a simple make, and even with out power tools it's really easy to do, my daughter is quite young and apart from me cutting the parts out with my bandsaw all of the other work was done by her, at least on the larger stars anyway, I made the fourteen smaller stars for the garlands.

So using a template we made last year she marked out the five parts of the star - 

Templates make life easier.

All the stars we made are made from pallet wood, so basically these were free to make.

I cut out the segments roughly with my bandsaw, and my daughter then sanded each segment to the lines she'd made.

Sanding using a bench sander - 

Handy things to have.

I made sure she wore a dust mask whilst sanding the stars, I also wore one and she also wore a set of goggles to stop dust going in her eyes.

Almost done, nearly ready to glue it all together - 

Good fit on each segment.

Sanding off the feathering - 

Nearly ready for some glue.

Time to glue it all together - 

I highly recommend gorilla wood glue.

Left alone for the glue to dry - 

Looks good.

Once the glue was dry it was on to sanding the stars off so they could be decorated.

She used the smallest sander I have, the larger ones are bit heavy she said, and quite noisy, but this little one works well.

Sanding - 

Ready for some decoration.

She decided that she'd stain one of the stars with a purple wood stain, this one now hangs above her bed, and the other ones will be decorated in something festive (probably involving glitter....shudders) the wood stain is water based and was mixed especially for the star and for another Christmas decoration project.

Applying the stain - 

It looks black, but it really is purple honest.

Stain drying, it did dry a lot lighter than in the picture - 

Phone camera didn't really do the colour justice.

And here are the other three large stars we made, ready for something glittery (shudders) -

Nice wood considering it used to be a pallet.

We (mainly me for this one) made a load of smaller stars to hang from the ceiling, they were made in the same way, just on a smaller scale and to hang them we drilled a small hole through one of the points and then threaded a bit of natural string through, this allows the stars to hang from another long length of string which we pinned to the ceiling.

Like so - 

Easy peasy.

We made two garlands, each with seven stars, and in total each garland is about nine feet long, that allows for a gap of about a foot between each star with about a foot extra each end.

Here's one hanging from the ceiling - 

It was difficult to get a good angle, but you get the idea.

And that was it, not much too it, yes it was a little repetitive cutting out each star segment and then sanding and gluing, but it's worth it in the end as they look good, well we like them, and like the larger stars these were also made from pallet wood so cheap as chips.

My wife has also made garlands before and this year she's put a simple how to on her blog on how to make some excellent pine cone garlands, you can read her how to here - Pine cone garland. (opens in new window)

Thanks for reading.

Monday, 20 November 2017

Wooden money clip... (and a quick metal one)

If you live in the UK you'll know that we've started changing our notes (money, 5's and 10's so far) to the plastic ones, like a few countries already have, personally I think it's a good idea, but I've discovered a problem with the new notes, that being they're quite springy, unless you crease them, but they don't fold well and if you do crease them the crease doesn't come out easily.

I'm aware that just using a contactless payment card makes this post irrelevant, but for those of us who still like to have cash in our pockets so we know what we've spent and how much we've got left read on.

As I said the new notes are springy, on a couple of occasions I have dropped notes (and picked up very quickly) because they seem to spring out of my bag, I've also noticed that if they get a little damp they tend to stick together, that's something I've yet to solve, although keeping them dry helps.

So to combat this I made a wooden money clip so I can keep the new notes (and old ones) in better order, I tend not to keep money in my wallet, I know this defeats the object of actually having a wallet, but hey ho.

The finished money clips (I'll get to the metal one in a bit) -

All in good order.

This is a simple make, you can easily do it with hand tools if you don't have a bandsaw and bench sander.

I made mine from an offcut of walnut, but most any wood will do and who doesn't have scrap bits of wood in their shed/workshop ?

The walnut - 

Not much to say, it's a block of wood.

First I marked out the centre and where to drill a 7mm hole, make sure you go with the grain of the wood and not against it, otherwise it'll break very easily.

Wood marked out - 

Marked and ready for drilling and sawing.

I used my bandsaw to cut down the centre line and then my post drill to drill out a hole, this just makes things a bit quicker, you could easily do this with a hand saw and a drill.

Drilled and cut - 

On to sanding and shaping.

I clamped the block into my vice and using a broken sanding belt I started to sand where I'd cut and drilled, this is where the notes will slide into, It's best to go easy here, if you take too much out you'll have to carry a load of notes around with you, so I did several tests for fit as I went a long.

Clamped for sanding - 

This step took hardly any time.

Sanding done - 

All done, now to shape it a bit.

Once I was happy with the fit (it doesn't hold a load of notes, but enough for what I need) it was on to shaping it, this I did on my bench sander, but again an electric sander would do, just mind your fingers.

Shaping commences - 

Back end done.

Shaping continues - 

Bit less bulky now.

I decided to add a groove to the clip, this makes it easier to hold, I did this with a drum sander attached to my post drill but you can use drum sanders in a normal drill, you could even use a dremel type multitool as well.

Into the groove - 

Grooved for added grip.

And after a little more shaping with my bench sander the only other thing I did was to give it a wax and that was it.

All done, it works not sure Jane approves though - 

Simple solution to a problem.

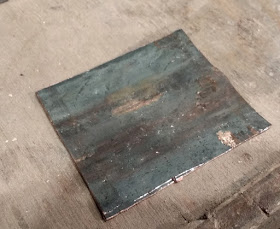
Don't like wood ? what about copper ? this is by no means a refined make, I did it very quickly and had I spent more time on preparing the metal it would look a lot more, well polished but I made it to mainly prove that anyone can make something like this easily, with just a few tools.

Take one length of copper pipe (or you could use a strip of aluminium or steel) if you use pipe you'll need to cut it length ways.

Pipe in my vice and cut - 

I used a hacksaw to cut it.

You can use a hacksaw to cut the pipe, or maybe a dremel type multitool with a cutting disc, once cut I bent the pipe outwards to make it flatter and then using a hammer I beat the metal until it was flat (ish)

You now have a flat piece of metal to work with - 

Time to cut a strip off.

Using some tin snips (metal cutters) I cut the copper into two strips and then it was on to bending into a clip shape, or something near enough.

And then there were two - 

Two for one, can't be bad.

To bend the metal I made a very basic jig from a scrap bit of pine and a couple of dowels, I bent one end of the copper in my vice and then used the jig to do the rest.

Bending begins - 

You get the idea right?

Once I was happy with the shape and the way it was bent I set about cleaning the metal, I sanded the inside of the clip so it didn't tear the notes and then polished the outside of the clip and shaped the ends a little, considering it took all of 20 minutes to make from start to finish it's not bad, and it works well.

All done  - 

Shiny copper clip.

The finished money clips - 

All done, basic but they work so I'm happy.

And that's it really, the copper one would look a little less erm... rustic shall we say had I spent more time on it, but I quite like the way it turned out, I might make another and spend more time refining it just to see how it comes out, there's no reason you couldn't decorate the finished money clips, if you have some metal stamps you could personalise a metal one, if you're into pyrography you could burn a design onto a wooden one, so many possibilities and all from a scrap bit of wood and an old bit of copper tube.

Thanks for reading.


Sunday, 15 October 2017

Allotment update (all be it belated) part 2...

Welcome back, so if you remember I left off at the end of July, this post is from August up to now.

Not much to say about August, we harvested a good crop of onions (best I've ever grown) and other things were starting ripen up ready for picking.

Pumpkin starting to go orange -

Looks like a good one.

Started getting the plot ready for next year, this section has green manure sown into it, this will be where the squashes go next year, we also sowed some swedes, turnips, carrots, raddish and lettuce for a late crop, and we'd been letting some things go to seed, like the lettuce plants so we can collect the seed for next year.

Preparing for next year - 

Still plenty going on.

We found some Russian kale plants reduced at our local garden centre, so we put those in, they'll over winter, along with other things we'll be putting in before December, like onions and garlic.

Russian kale - 

Looks tasty.

Borlotti beans, we'd already harvested one lot, this was the second flourish - 

Looking forward to eating some on stews over winter.

Borlotti beans ready for drying - 

They look great.

The apples on our inherited trees were doing well, we're not sure of the varieties yet -


Apple 'A' - 

Apple 'A'

Apple 'B' - 

Some kind of russet maybe ?

If you read part one you'll know we put various things in our polytunnel, and I obviously under estimated how much room things would need, jungle like is a good description.

No room here - 

There's veg in there, I can feel it.

And onto September which was basically frequent visits for harvesting purposes and a lot of time spent making stuff out of the things we took home, here are a few examples - 

Apples from both trees (about 40kg in all) - 

This wasn't all of them.

Which we (mostly my wife) turned into dried apple rings, apple dumplings and wine, the rest were blanched and frozen for pie fillings and obviously we've kept a load of the best ones for eating.

Apple rings - 


the kids loved them.

Apple dumplings, a family favourite - 


Awesome.

Home grown rhubarb and custard ice cream - 

It was awesome.

Pickled lemon cucumbers (grown in the polytunnel) and pickled onion slices -


Very tasty in sandwiches.

Courgette relish in the pan - 

We make it with pumpkin as well as courgettes.

Grape cordial we froze a load for Christmas as well, just add some sparkling water for a homemade sparkling grape drink 


The kids love it, it's good with vodka as well.

The grapes that didn't get turned into cordial and jelly (yes we made grape jelly as well) have ended up as wine, quite a bit of it in fact, I don't know what variety of grapes these are, but they are the same as the grape vine we have in the back garden, they don't make good dessert grapes but they do make excellent wine.


Wine, it'll be ready next year - 


I need more demijohns.

This is just a small amount of what we've grown and turned into various things, every year that goes by we get better at preserving and growing, and now with the larger plot we intend to grow and make as much of our own stuff as possible, it saves money, it's better for you, it's a no brainer.

And so with that in mind onto October, we've been clearing up and sorting things out, there are plants that will over winter that we can eat, and we've started preparing for next year, we'll be putting in onions, garlic, shallots and broad beans soon, and we've started planning where things will go next year.

Our latest harvest - 

Bit of everything there.

We cleared out the polytunnel and are making use of it over winter, we left the chilli plants in as there's a chance they'll survive the winter in there, it is possible to over winter chilli plants and the ones we have at home will be bought in to see if we can do it, we have also put in some grape vine cuttings, and when I've pruned the currant bushes at home we'll be putting a load of currant cuttings in as well, and probably some other assorted cuttings.

Polytunnel cleared - 

I'll plan the planting better next year, but for now it'll act as a nursery.

grape vine cuttings - 

It's as simple as sticking a stick in the ground (apparently)

By the end of this month we should have the plot cleared and all the beds prepared for next year, yes there'll be some weeding to do in spring but hopefully not too much and we'll also have a head start with the onions and such like, I will put another crop of onions and broad beans in, in the spring.

Next year we'll be trying out some new stuff, like cucamelons here's a picture of some of the seeds, I got these for 46p a pack in a sale - 

Looking forward to the Turks turbans.

All in all it's been a good year, next year (fingers crossed) will be even better, but for now the plot is pretty much dormant apart from the things we plan to over winter, but the work will continue.

The plot so far - 

Not too much to do.

And that's it, just need to figure out what to do with this lot - 

Happy Halloween.

Thanks for reading.