Thursday, 28 April 2011

Our allottment plot, clearing commences ... ...

We have an allotment plot ! okay half an allotment plot, but either way it's extra veg and fruit growing room, good stuff.

Here's a picture of the plot -

A little over run, lots of brambles.
We weren't sure if we were going to take the plot to begin with, for a start it needs a fair bit of work just to get it to a usable state, although as it turns out things have moved quicker and with a bit of luck we should be ready for planting some things in the next day or so.

The biggest problem was the brambles, they are every where, these I think will be the main issue we have, keeping them in check will be fun, although we have decided to allow the ones next to the fences to grow, all be it in a controlled way, might as well make use of the black berries they'll produce :-)

I have been on the plot today to do some clearing, and after four hours I've managed to clear it quite well, it still needs to be dug over, and the roots of as many of the weeds removed as possible, but the soil is pretty easy to turn, so fingers crossed it won't take too long.

Here's what it looks like now -

Things are a little clearer now :-)
There's still a little chopping to do, mainly at the top of the plot, I discovered a load of raspberry plants (handy) there are maybe as many as twenty, not sure until I clear more of the weeds. We also found that there were some vine type things growing up some of the fences, it turns out these are hop vines, so we have kept them as well, useful things hops, and not just for making beer.

We had thought it might take some time to chop back all the weeds, and we had considered hiring out a petrol strimmer, but in the end I made a tool that worked just as well, although it does require a little more effort.


Here it is -

The bramble basher :-)
Okay so it does kind of look like a sword, but it was my take on the weed slashers you can buy. It's made of a piece of 5mm thick steel, which has been lying about in my shed waiting to be used, the handle is just an off cut from some building project or other.

The way it works is kind of obvious, it has a sharp edge and you swing it, kind of like a machete, and as some of the brambles had stems an inch or more thick I figured something with a little beef was needed. The blade is heavy, but in a way that lets you swing it and the weight of the blade does the rest, so it requires minimal effort for maximum effect, which when you have 120 square metres to clear is a good thing, I did also use a set of garden shears for cutting round the plants we want to keep.

I guess the hardest part of making this tool was getting a half decent edge on the thing, the steel I used isn't really meant for this kind of thing, but it worked.

The edge -

It is quite sharp.
To get the cutting edge onto the blade I used my bench grinder to start it off, and get the angle of each side right, then I used a metal file to make it nice and sharp, then I finished it off with a sharpening stone, I did have to sharpen the blade a couple of times during use, but all in all it saved time and money, so I'm happy.

To make the handle all I did was cut the wood down the middle, then using a rasp file I made the slit a little bigger, then pushed it onto the metal blade, then using a drill and a hss (high speed steel) drill bit I drilled through the wood and then through the metal, taking care not to go too far into the other side, then I used normal wood screws to clamp the handle onto the blade, I used two screws on each side of the handle.

I used a small plane and sand paper to make the handle round and smooth, then sealed any holes, gaps with glue.

The handle -

Not the best piece of wood working ever.
And that's about it, one weed whacker :-) it cost pennies, a piece of steel like the one I used is around £5, or you could use any flat piece of steel you can find.

I admit it is perhaps over kill, but I wanted to clear the weeds, and get it done quickly. 

I fully expect the other plot holders to assign me the nick name of shogun :-)

Thanks for reading (this may not be the last allotment related post ;-)


Wednesday, 27 April 2011

The old ways are sometimes the best way ... ...

Over the last few years I've become some what obsessed with experimenting on the garden, seeing how far things can be tweaked in order to get the most out of things, and more often than not I've found that gardeners of old knew their stuff.

It seems that the simple way of doing things is most likely the best way, for example how many different types of plant food can you buy ? there are a few, they do this and that and are good for this type of plant or that type of plant, does this mean then that in order to get the best out of things you need a shed full of potions and powders for everything you intend to grow ?

I've reached the conclusion that you don't, in fact I've found that the old fashion way does pretty well, people have been growing stuff for thousands of years, and although the plants we grow are slightly different, they are on a basic level the same, forget all your f1 hybrid varieties and such like, they are plants, and plants like any living thing need things to be right in order to grow, but this doesn't mean using a myriad of chemicals to achieve that, the gardeners of old didn't have them and they did okay.

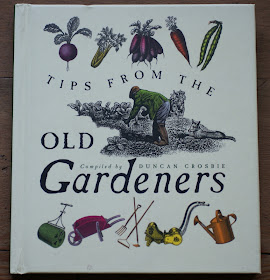
I have a book, it's a small book that my wife got me, and it's great and sometimes a little odd, but all of the things I've tried from it work, and they are pretty simple things.

Here's the book -

It's a great book.
Like I said it has some unusual things in it, but I guess it's how things used to be done, before we got all this new technology, for example the next picture is taken from a page in the book, it shows what I'm getting at, and if nothing else it adds a touch of humour into the mix, which is good.

I can't say I've tried this myself -

Frost bite anyone ?
Now I have heard this before, and to be honest I can imagine this method being used years ago, before thermometers and other temperature gauges, not sure I'll be trying it, don't think the neighbours would cope with my bare backside first thing in the morning ;-) but (no pun intended) I can see how this works, seeds generally germinate better when the soil is warm, although I tend to use my hands, if the soil feels cold a few inches down then you might want to hold off planting things out, unless you use a cloche or something to warm the soil first.

Yes there is a fair bit of folklore in the book, but again it came from somewhere, so at some point these things were tried out, and perhaps used year after year, and some of the things I have to wonder about, for example the next picture taken from the book mentions the planting of parsley, which apparently according to folklore has to be planted by the lady of the house, I grow parsley it doesn't seem to mind that I'm a bloke, so this got a raised eyebrow, I'll let you read it.

A little non pc perhaps ? -

Good stuff is parsley :-)

Okay so this probably isn't going to go down too well if you try telling your other half she has to plant the parsley, some folklore isn't always helpful.

However there are some very useful tips in this book, for example marigolds, these are great, you can plant them amongst a lot of plants and they will help to keep pests away, it's because of chemicals that come from their roots, and the scent of them is also a warning, we plant them all over the place, and it works, most pests will stay well away from them, and it's not like they are an ugly flower, a lot of people like them.

In the next picture marigolds are mentioned but it also mentions companion planting, which again is worth reading up on, see some plants when planted with other plants will do better than they would on their own because each plant brings something that the other ones can benefit from, whether it be marigolds helping to ward of pests or plants like peas and beans that hold nitrogen in their roots, which is good for growing sweetcorn, so planting your corn with your beans and peas should give you a better corn crop, there are loads of good articles online and in books about companion planting, it's a very useful way of growing things, even more so if you have a small amount of land for growing.

I like these old methods because they work, and more often than not they work better than buying something chemical based that does the same thing, take slugs and snails, they are a pain in the backside, we used to buy organic slug pellets and although they worked sometimes they weren't really good, so what to do ? again a simple solution, egg shells (everyone knows this one ?) broken egg shells are hell for slugs and snails, they can't bare to crawl over them because they are very sharp and the foot of a slug or snail is very sensitive, we use quite a few eggs each week and so far have had a good supply of chemical free slug repellent and even though you can get organic slug pellets these aren't that good for things that eat slugs, like frogs,toads and hedgehogs where as egg shells don't cause any issues, it's a win win.

So start saving your egg shells -

Crushed and ready for deployment :-)
Just give the egg shells a little rinse out, then leave them to dry in a tub, put them in the sun on a warm day, it doesn't take long, then give them a good crush ( a potato masher works well

Here's some egg shell protecting some of our corn -

This was taken a few weeks ago, corn still doing well :-)
Simple, but effective, and costs nothing extra than the price of the eggs, the shells do break down over time, they actually put calcium back into the soil, which helps some plants and worms, yes worms need calcium, although not loads, I think it helps them produce the cocoons they lay their eggs in, or something like that.

An finally here are a few tips involving nettles, again taken from the book, and one I have tweaked a little, yes nettles are great, they make good liquid manure, you can eat them, and you can make wine from them, so why not let a few grow down the bottom of the garden ?

Nettles (stinging nettles)

There are lots of things you can do with nettles, so don't bin them if you find them in your garden, use them for plant feed, and a pest controller.

To make a plant feed you need to soak the nettles in a bucket of rain water (or water from a water butt) for a month, it'll stink, but your plants will love the stuff.
Once it's soaked for a month you can use it as a liquid manure round the roots of plants, water it down about 1:10 (1 part nettle juice to 10 rain water) you can also lay the nettle mush around the base of plants as well.

For pest control again soak the nettles in rain water, but only for a few days, you can then use the liquid in a spray bottle to deter aphids, and other pests.

Remember nettles sting, so wear gloves :-)

You can just compost them as well, and apparently if you let nettles grow around your fruit bushes (currants and the like) they will share some of the nutrients with the fruit bush and also help it to be more disease resistant, can't be bad.
If you let the nettles flower they'll attract butterflies and bees as well.

Okay the tweaked bug spray, I've found this works very well, I use the nettles in some water, but I also add a few cloves of garlic, then I let it all sit in water for about a week, then I liquidize it all and then strain it to get the liquid out, which by this time will stink (and I mean stink) then all I do is put it into a spray bottle.

I've found this is very good at stopping slugs and snails eating the seedlings in the greenhouse and cold frames, it also stops other bugs, but be warned it will make your hands smell for a while if you get it on them, and if you do spray it about in your greenhouse, you may want to stand back a little when you open the door, especially in warm days, it can be quite over powering, but it works :-)

Here's a link to Amazon who sell the book I've talked about, it's good and it works.


Thanks for reading.

Sunday, 17 April 2011

I think I'm becoming a Womble ... ...

Yes I really do think I'm becoming a Womble, what's a Womble ? well for those who don't know these are Wombles (opens in new window) basically they made use of stuff people had thrown out, a blast from the past ? I used to watch the tv program when I was a kid, maybe this is responsible for my recent evolution into Wombledom ?

It's interesting, least I think it is, that back then there were tv programs about what is essentially re-cycling, and up-cycling, seems these days it's all about reduce, re-use and re-cycle, which to be honest I see nothing wrong with, maybe the Wombles knew something we didn't ?

I'm not going to get all environmental, but I think it's a good idea to reduce waste, and re-cycle what we can, for a start it's cheaper to re-use stuff than buy new, saving money is always good in my book. I also think a little less rubbish about won't be a bad thing either, and not because it'll save the planet, would you want to live next to a land fill site ? I know I wouldn't.

Anyway it seems that just lately I have been viewing things with a slightly different way of thinking, on my travels I often see things that people have thrown out and think what could I use that for ?

Seems a lot think that if you dump a load of stuff on the side of the road the council will eventually pick it up, truth is they don't (least not round our way) they'll leave it. If you have rubbish that needs moving then the council will charge for it, there are however people who go about in vans picking this stuff up to either sell on, or make use of in some way, modern day rag n bone men, and a lot will have adverts in the local paper, or come round door to do and take your unwanted stuff away for nothing, all it costs is a phone call.

On my weekly shopping run I go past a number of houses that seem to just dump stuff on the side of the road, one house in particular stands out, and a few weeks ago I noticed they had an old glass door outside, at the time I looked but thought as it was in good shape it wouldn't be there for long (I had an idea of what I could use it for)
I was wrong, the door sat in the same place for about three weeks, so the other day I thought right, I'm having it, I did knock on the door of the house to see if it was okay, they said yes, so I stuck it in my cycle trailer (which had the weekly shop in it already) and off I went.

This is what I made out of it - 

Yes another cold frame, made from old door and pallets.
I had already decided the door would make a great lid for a cold frame, and seeing as I had some wood left from my recent pallet experiments I figured it was a good idea :-)

It's easy to make something like this, and if you use the materials I have then it'll cost hardly anything, just a little time and effort. A wooden cold frame the same size as this (about a 100cm x 75cm) could be as much as twenty or thirty quid, mine cost about 2 hours in all :-)

To make something like this, is pretty easy, even for the less experienced diy types, it's basically a box with a lid, this one took a little more work as it's made from planks rather than sheets of wood, I used the same method for building this as I did for the re-cycled planter I made not so long ago.

The wood for the box - 

As you can see it's in strips, roughly 3 inches wide
The main disadvantage of doing things this way is that you have to stick each strip together to build up the box sides, it takes a little longer than just using a sheet of ply.

To connect the strips I just used another piece of pallet on each end, this also served as a fixing for the other sides.

This piece keeps the strips together.
You can use nails to fix it all together, but I tend to use screws for this type of thing, just to make sure it doesn't fall apart. For fixing the screws (I used 1inch screws for this) I have a handy little gadget, it's called a flip driver and if you use a cordless drill for wood working I'd suggest getting one, they are very handy and save time and the battery of your cordless drill.

My flip driver -

Saves time, and battery power.
The pictures aren't the best, but you can see that it has two parts, the holder that locks into the drills chuck and the bit holder and drill part, this is the part you flip round, depending on what you're doing.

The bit holder and drill -

One end for drilling and the other for driving.

What's really good about this little tool is that you can adjust how long to have the drill bit, depending on the depth you want for your pilot hole, and it also has a built in counter sink, so you can drill and counter sink at the same time, then all you do is flip it round and drive your screw in, no removing drill bits from chucks to put the driver in, you can pick them up pretty cheaply and you usually get three bit / drill bit holders, each take a different size drill bit, and each will have a slightly different sized counter sink.


Not very clear, but you can make out where it's counter sunk.
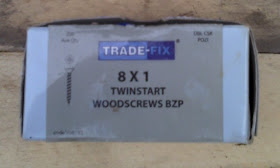
Another money saving tip, if you are going to use screws for your next wood working project, my advice is look to see where your nearest builders yard is, the reason being is that a box of 200 (1inch) screws cost me about two quid at my local builders yard, that includes VAT, the same box of screws at a diy store (you know the places I mean, B&Q, Homebase) will cost about five quid, sometimes more, so save some money, look for your local builders yard (Build center is a good place) and what's more if you need loads of screws you can usually get a discount as well (Screwfix.com is another good place for fixings)

Not much to say, it's a box of screws - 

Cheaper than diy stores, just as good.
If you do use pallets to make this sort of thing, you can use this method to make planters as well, then I'd recommend a clamp or two for the simple reason that pallet wood isn't always the straightest stuff, so using a clamp is a good way to make sure it's all nice and snugly together before fixing, as the next picture shows.

Using a clamp to hold things in place - 

Obviously the clamp size depends on the size of the project.

Once you have the two main sections built (the main section being the longest sides) you can then start to add the end, this is just a case of fixing each end to the ones you've already made.

The two longest sides completed -

Next step is to fix the shorter sides in place.
The cold frame I've made is a rectangle because I've made the sides to fit the door I found, but you can make it any size you want, especially if you intend to make your own lid. Once the sides are all fixed you should have a box shape.

Fixing the shorter sides - 

Just add each strip as you go.
After you have added all the side strips (if you used pallets) you should have something like the picture below, which is basically a box.

The finished frame - 

It's vaguely box shape :-)

And there you have it, if you use this method you should end up with a nice rustic looking planter, you can leave the wood as it is, or give it a sand and paint it with a colour of your choosing, you may also want to include a few strips across the bottom so that your plants don't fall out of the planter is moved. 

If you have kids like mine the prospect of a box may be too much for them to resist :-)  

What is it with kids and boxes ?

Now as I was making a cold frame I still had a little to do, mainly fit the door to the box. I could have just stuck the lid on and fixed it in place, but I decided to ad a little slope so that the lid sits at an angle to get a little more light into the box.
As it turns out the lid on this new cold frame is sitting at the same angle as the other one I built a while ago.

I guess there are a few ways you could add an angle to a box, but I just cut some more wood at the angle I wanted.

The angle marked out on wood - 

I made two like this.
You could also use a plane to shave the wood down to the angle you want, after I'd cut the wood all I did was fix it to the edge of the box using some longer screws, I could have added an extra piece of wood to fix to, but decided against it. Instead I drilled a pilot hole with a counter sink in the edge of the wood, I just about got away with it, had the wood been any thinner and I would have, had to use an extra piece of wood to fix to.

The wood used to create the angle, and fixing - 

Just enough room :-)
 And that's about it really, it's just a box with a lid and as I mentioned you can use the same method for building a wooden planter, or even raised planting beds.

For your viewing pleasure - 


So remember you're a Womble (and if you're not, maybe you should have a go)

Thanks for reading.


Saturday, 9 April 2011

Sometimes less is more ... ...

We live in a technology controlled world (least in my opinion we do) there are a myriad of mobile devices that keep us in touch, most people have pc's or access to one (library's allow you to use the internet) in short technology is every where, even in our fridges, it's used to get electricity and gas to our homes, along with other things, like tv, internet access.

What happens when it doesn't work ?

One of the ways we know it's summer (or nearly summer) apart from the weather is the power cuts, yes summer is power cut season in our area, better than having them in winter I guess.

Now unfortunately for us we only use gas for heating, and even then we keep the bill down as much as possible (gas is expensive) so when we get a power cut we are kind of in trouble, no way to cook food, or even make a cup of tea (arrgh !)

I always joke with my family about " The Apocalypse " which usually involves zombies ;-) and what would the world do, no electricity means no way to get online, no way to charge your smart phone, or mp3 player, scary ? well no not really.

Some people are more adept at surviving than others, a lot of it comes down to knowledge, sadly a lot of the skills that once kept us alive are being lost to technology (in my opinion)

Today was one such day, no power, and when you've been working in the garden it's nice to sit down and have a cup of tea and admire your work, sodding power cuts !

But I have a gadget, but it's a low-tech gadget, it doesn't need electric, or batteries (yes electric and batteries are kind of the same thing) and it lets you get warm,heat food and water, best of all you can make a cuppa, can't be bad ;-)

And here it is (drum roll) -

Cool isn't it :-)
It's an old Primus stove, it's designed to run on a variety of fuels, paraffin, kerosene and oil (I've been using lamp oil) you could also run it on methylated spirits and maybe petrol.

Okay so it's old, but it works and once it's going it'll heat a pan of water in under three minutes, you can cook on it as well, and it'll keep you warm, I've also found it takes a fair bit of a breeze to blow it out, which is good :-)

It works on a simple principal, you put your fuel of choice in and basically force it through a jet under pressure, this creates a mist which ignites as it hits the air, it roars like mad, sounds like a jet engine :-) which oddly makes you feel warmer.

The lamp oil takes a little lighting, so when that runs out I'll try something different, you have to fill a little reservoir with the fuel and light that first, this acts like a pilot light, then you have to close an air valve and pump a plunger. 

The plunger -

This is where the magic happens :-)
By closing the air valve and pumping the plunger you then force the fuel through the jet, the pilot light ignites it and hey presto you get a flame, which is evened out by the design of the burner, the fuel lasts a long time, a full tank will keep it going for hours, and it burns hot, although different fuels will provide more intense heat.

The stove is old, probably about thirty years or so, but it works and it's simplicity is what makes it so brilliant, when it was first made no doubt it was a high-tech piece of kit, the workmanship of the stove is very good, attention to detail that you rarely find these days.

It comes with instructions, which are fantastic -

Not the best picture, but great illustrations :-)
Thanks to this stove the four hour power cut didn't seem so bad, funny how a cuppa can make a difference ;-)

So when the zombies come (they will you know ;-) low-tech might just be the thing that saves us.

Thanks for reading.


Updating the veg beds, what we've been up to lately ... ...

Well it's all go in the garden department, the weather has perked up (thankfully) and we have been full steam ahead, planting things, getting other things started off in the green house (and in the house) and weeding, which I guess is a downside of the weather perking up, it's not just the useful stuff that wants to run rampant, although as we get more experience we've learnt to make use of anything and everything that we find in the garden, for example dandelions (which I quite like to photograph for some odd reason)

We get loads of dandelions, all over the lawn (good job we don't use it for bowls) but instead of weeding them out we now tend to eat them, in fact my wife does a nice dandelion pancake :-) and then there's stinging nettles, these as it turns out can be very handy things to have about, for one they attract bees and butterflies, which is good for pollination of other plants, and you can also eat them (yes you can eat nettles, quite tasty as it goes) not to mention the wine you can make out of them, which is rather interesting.
Nettles also make a good fertilizer, just pick some and leave them in a bucket of rain water for a week or so, it'll stink, but if you lay the mixture around plants (like a mulch) they'll thank you for it, you can also use them as a natural pesticide, again leave them in water, but only for a day or two, then spray the water on your plants, it'll help deter some pests.

This year we have ramped up production to much higher than anything we've tried before, every bit of space will be used, the idea is basically get as much from the garden as is possible, which is quite a task. I have already added extra growing room in the front garden in the form of three raised beds, and in my pursuit of extending the growing seasons I have updated one of the beds (with the view to doing all three eventually) with what I'd call a mini polytunnel, I got the idea from reading a blog that my wife follows (I know follow it as well) and I've tweaked it as an experiment.

Here's the blog I got the idea from (it's well worth reading)
Sylvan Spirit (opens in new window)

If you read through the post I linked to, you'll see some pictures of raised beds that have yellow pipe bent over them so that you can cover them in plastic of netting, a great idea (wish I'd thought of it)

As I said I've tweaked the idea a little to fit with the raised beds we have -

VoilĂ  one mini polytunnel :-)

Mine only uses two bits of plastic pipe, I didn't have enough to do it the other way round, and I've added some garden cane for extra strength. The idea is to see if it's possible to cover it in bubble wrap and some polythene sheet earlier in the year, my thinking is that the two layers should help warm the soil earlier, whilst insulating against frosts a little, which in turn should mean we can start things off earlier, least that's the theory :-)

Here's another picture, just in case you missed the first ;-)

Full of peas, we had to plant some more as some didn't germinate.
I'm looking forward to seeing if it will make a difference to production, if it doesn't it's still handy to have because you can cover them in netting which keeps birds of them, we have a lot of doves visit our garden, they love to pick the flowers off the peas.

This is one of the great things I've discovered about blogging, there are endless places to find inspiration for anything and everything, had I not read the blog I linked to I would never had tried this, and it cost nothing but a little time, but it might yield better results, which has to be good.

Make sure to drop and and have a look round the blog I linked to, it's good ;-)

Thanks for reading.