We've often wanted to make different things using Plaster of Paris, and although we have lots of different types of moulds there are times when these just won't do, and that's when a tub full of sand comes in handy.
Sand casting isn't a new idea, in fact it's been around for thousands of years, and is normally used for casting things from various metals.
The oldest known casting in existence, is a cast of a frog in Copper, found in Mesopotamia from around 3200bc
The Victorians used sand to cast iron, well I say sand it wasn't quite the same as normal beach sand, it had some other stuff in it as well, but the principle is the same, you use the sand to hold the shape of what ever it is you want to make a cast of.
Like this -
 |
| It's about a 'foot' long ... |
The tub is just a normal storage tub, but you could do this in a sand pit, or make a wooden box, the sand is the kind you use in a kids sand pit, the main reason I used this type of sand over say building sand is the grains, the play sand is quite fine, where as some building sands are coarser, and the finer the grains the less detail will be lost in the casting process.
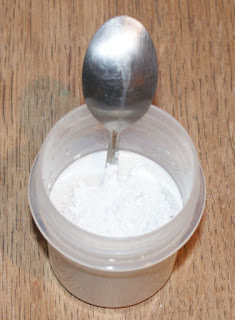
The plaster is just bog standard Plaster of Paris, which you can buy from model shops, Ebay, Amazon and numerous other places, you don't need to add anything to it (apart from water obviously) and you can also use this method to cast animal foot prints when you're out and about, just take a bag of plaster and a bottle of water, it will take about 20 - 30 minutes to set, so you may have to wait a bit, or just walk about looking at other stuff for a bit.
The plaster -
 |
| Not much left, I'll have to get some more. |
This stuff came from a mosaic tile making kit, you can also add paint to the plaster while you mix it for more interesting colours, or you can leave it white.
Mixing -
 |
| Don't tell my wife I used a spoon to mix it. |
You want to keep it to be pourable, but not too runny or too thick other wise it won't work very well, something like batter/pancake mix consistency should be okay, please bear in mind that plaster dust is very fine, so don't go breathing it in, wearing a mask is a good idea.
Ready to go -
 |
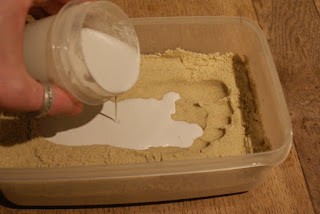
| Let pouring commence. |
Into the mould it goes -
 |
| Will it work ? |
The trick to this is having the sand damp enough so that when you press your shape into it, it holds the shape and stays there while you pour in the plaster, you do lose some definition, but not much and I've found that simple things come out quite well, like feet for example, you can also use a bowl to make a hole in the sand and then pour the plaster in the hole, and just as it starts to set you could push your shape into it then, you can also do this to make baby hand prints, and it's cheaper than buying one of those kits online.
It's set ! -
 |
| Vaguely foot shaped. |
Once your cast has set you'll need to brush the sand off it, and remember that even though it only takes 20 - 30 minutes to set it will be 24 hours before it's fully hardened, so be careful with it, you won't get all the sand of it, but having that sandy texture is quite nice, and if you wanted to make something look like stone this would help.
You can speed up the drying a bit by using a hair dryer or warm oven, be careful not to burn yourself, I would go easy with the heat though, you don't want it to crack.
Here are the sand removal tools -
 |
| Please use an old toothbrush. |
Brush the sand gently from the cast using the paint brush, the toothbrush is for later on to get any stubborn bits of sand out.
Most of the sand cleared now -
 |
| Yep it's a foot. |
I've found it's best to leave it for an hour or so before going at it with the toothbrush, but once you've got the sand off it it you should be left with a slightly textured plaster cast of what ever you chose to cast.
The foot all done -
 |
| Definitely my daughters foot, only cleaner. |
Of course there are loads of things you can mould, here are a few others we've done, hands are a good one, we also used an Ammonite as a mould, a skull (plastic one, but a real skull should work) and I have plans to make some Christmas decorations as well, which should be fun, basically anything you can push into the sand, but somethings will turn out better than others.
Some of our casts -
 |
| I think they turned out quite well. |
The Ammonite actually looks quite fossil like, as it has some sand stuck to it, makes it look more like rock, my wife is planning on using it to decorate a box she's making for our sons fossil collection.
I had to try a skull, this will come in handy for next Halloween -
 |
| Creepy. |
And if you do go out and try to make some plaster casts of animal foot prints I'd recommend making a frame to hold the plaster, this can be done with thick card, or plastic, kind of like the frames they use in criminal investigations, which is what is good about this kind of thing, not only is it fun, but it's informative you can show how footprints are taken from crime scenes, and you could also go into how this type of technique was (and still is) used in engineering, even for things like bridge building (all be it a slightly more complicated version)
Here's the moulding frame (this one is cardboard) -
 |
| Simple to make and use. |
It's just four bits of card with cuts about half way down on each end -
 |
| Four sides all done. |
Then you just slot them together and away you go, you can always make one out of plastic, or even easier would be to cut one of those 4 pint plastic milk bottle in half and then cut the bottom of it, although this will limit the size of the things you can cast.
The Ammonite again -
 |
| Probably the one that came out the best. |
Thanks for reading.


Just dropped by to say hello and congratulate you on all the wonderful things on this blog you've made! Amazing! And such detail to inspire others too. Well done. All the best.
ReplyDeleteThanks for reading.
Delete